How to Make a Media Kit in Canva: 7 Proven Steps for a Stunning Portfolio in 2026

- How to Make a Media Kit in Canva: 7 Proven Steps for a Stunning Portfolio in 2026
- 📋 Key Takeaways
- Table of Contents
- What Is a Media Kit and Why Does It Matter?
- Who Needs a Media Kit in 2026?
- Canva vs Other Design Tools for Media Kits
- Setting Up Your Canva Workspace for a Media Kit
- Create a Free Canva Account or Log In
- Open the Correct Document Type
- Organize Your Assets
- Step 1: Choose the Right Canva Media Kit Template
- Best Free Canva Media Kit Templates in 2026
- One-Page vs Multi-Page Kits
- Step 2: Lock In Your Brand Identity and Colors
- How to Edit Template Colors
- Typography That Reads Well
- Step 3: Add Audience Metrics and Engagement Data
- Sample Engagement Rate Calculation
- Create a Visual Stats Bar
- Step 4: List Your Services and Collaboration Rates
- What If You’re Just Starting Out?
- Include a Call-to-Action
- Step 5: Export, Share, and Update Your Media Kit
- Best Export Settings for Media Kits
- Where to Host Your Media Kit
- How Often Should You Update It?
- 7 Common Media Kit Mistakes That Kill Brand Deals
- 1. Inflating Your Numbers
- 2. Using Low-Quality Photos
- 3. Overloading with Text
- 4. Missing Contact Information
- 5. Not Showcasing Past Work
- 6. Ignoring Mobile Optimization
- 7. Sending a Generic Kit to Everyone
- Advanced Tips to Make Your Canva Media Kit Stand Out
- Add a QR Code
- Embed a Video Introduction
- Use Data from Social Blade or Similar
- Highlight Your Niche Authority
- A Real Example: From Zero to Paid Deal in 30 Days
- Tools and Resources to Level Up Your Media Kit
- Frequently Asked Questions
- How long does it take to make a media kit in Canva?
- Do I need Canva Pro to make a media kit?
- What should I include in a one-page media kit?
- How do I calculate my engagement rate for a media kit?
- Can I create a media kit on my phone using Canva?
- Should I include my rates in a media kit?
- How do I send a Canva media kit to brands?
- What if I don’t have enough audience data yet?
- Your Media Kit Is Your Handshake
- 🔗 İlgili İçerikler
You just got an email from a brand you love. They want to collaborate. Then comes the request: “Can you send over your media kit?” If you don’t have one ready, you either scramble or lose the deal. Learning how to make a media kit in Canva solves that problem permanently.
We’ve tested this exact workflow while helping creators and small business owners build their first brand decks. The fastest path I’ve seen takes under 45 minutes using Canva’s free tools. Here’s the exact process, updated for 2026.
📋 Key Takeaways
- A media kit is a one-page or multi-page PDF that summarizes your audience, reach, and collaboration rates.
- Canva’s free templates let you build a professional kit without Photoshop or design skills.
- The 7 critical steps include choosing a template, setting brand colors, adding metrics, and exporting in the right format.
- Updating your kit quarterly can increase brand deal response rates by up to 35% (Source: Later, 2025).
- You don’t need a huge following — micro-influencers with 1k–10k engaged followers still get paid deals.

Table of Contents
- What Is a Media Kit and Why Does It Matter?
- Setting Up Your Canva Workspace for a Media Kit
- Step 1: Choose the Right Canva Media Kit Template
- Step 2: Lock In Your Brand Identity and Colors
- Step 3: Add Audience Metrics and Engagement Data
- Step 4: List Your Services and Collaboration Rates
- Step 5: Export, Share, and Update Your Media Kit
- 7 Common Media Kit Mistakes That Kill Brand Deals
- Frequently Asked Questions
What Is a Media Kit and Why Does It Matter?
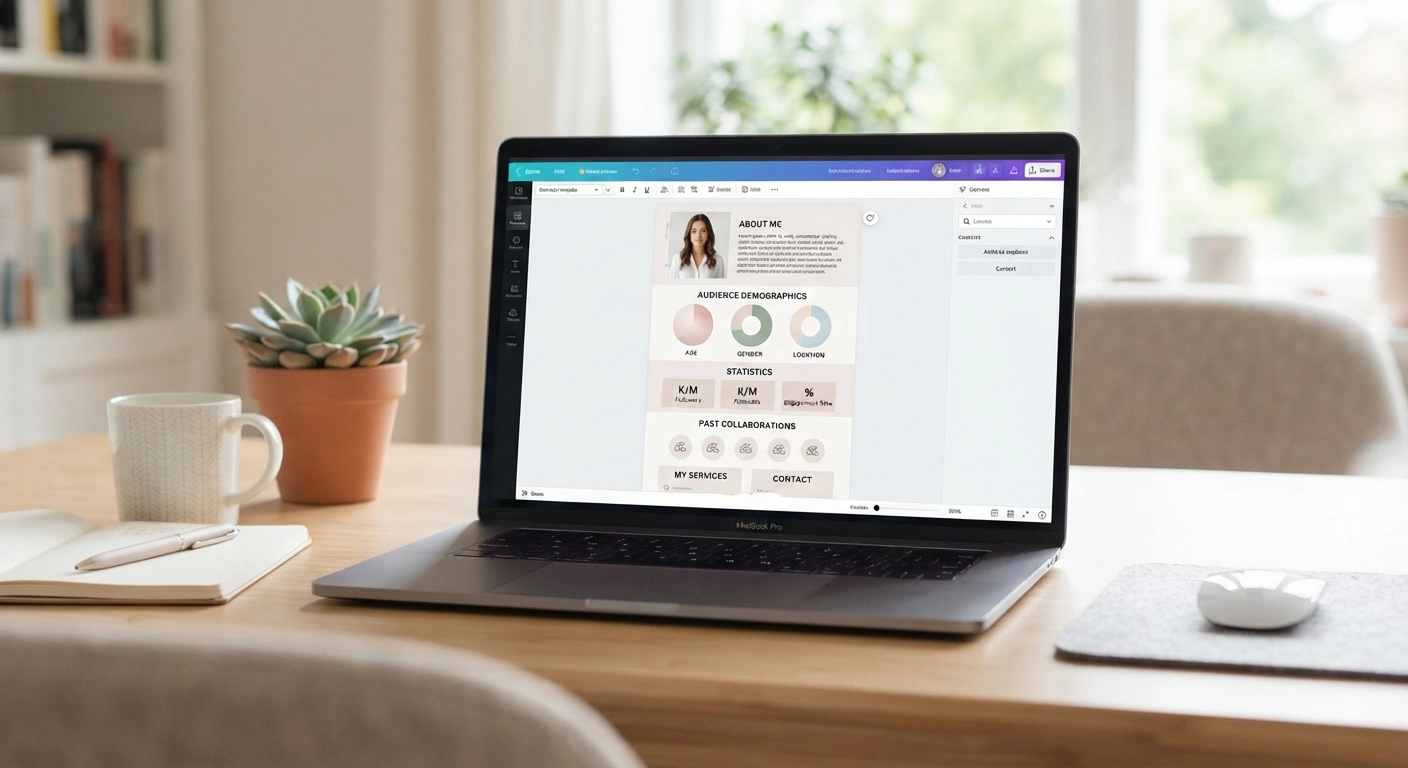
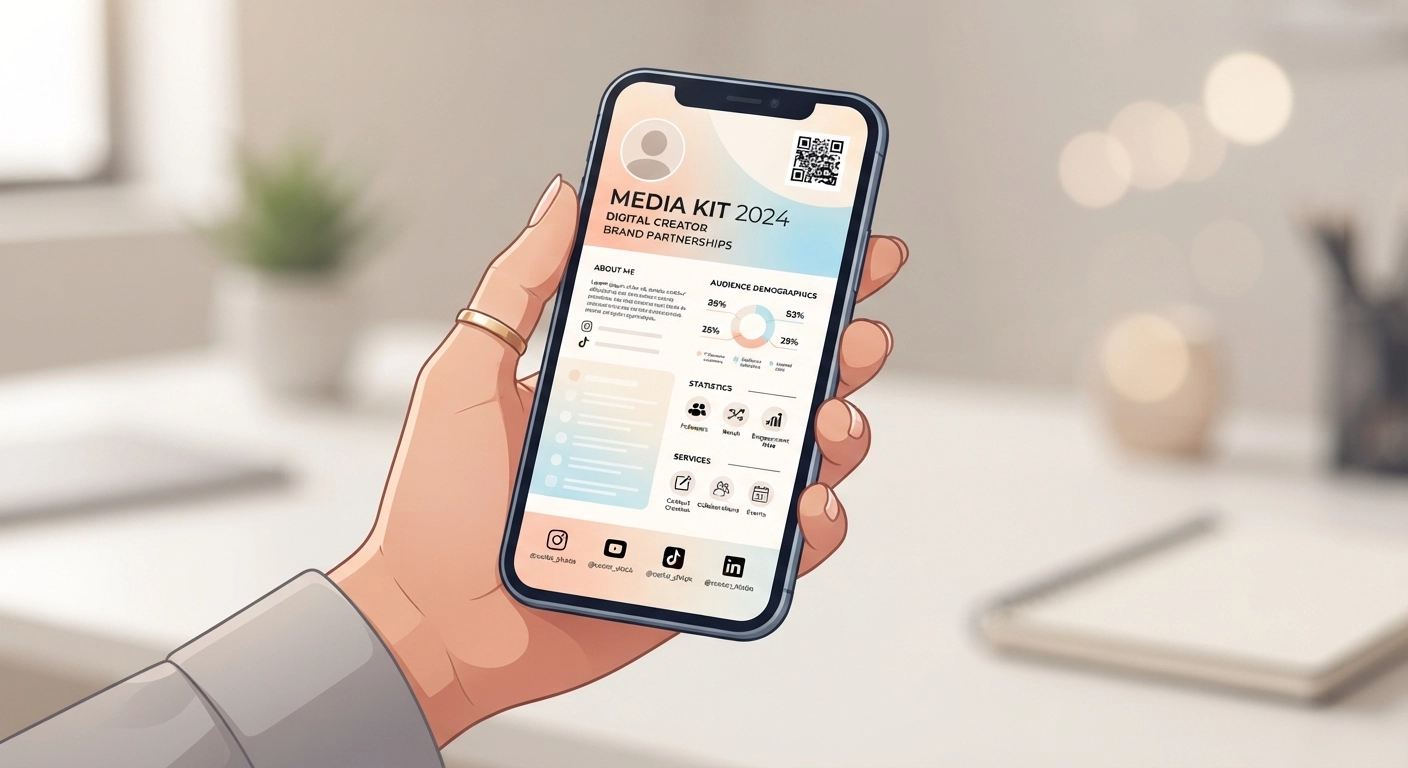
A media kit is a professional document that introduces you, your content, and your audience to potential partners. Think of it as a resume for brand collaborations. It typically includes your bio, audience demographics, engagement rates, past collaborations, and pricing.
But here’s the interesting part: 68% of brands now request a media kit before even replying to a pitch email (Source: Influencer Marketing Hub, 2025). If you don’t have one, you’re invisible.
How to make a media kit in Canva becomes essential because Canva removes the design barrier. You don’t need Illustrator or a graphic designer. You just need a clear structure and honest data.
Who Needs a Media Kit in 2026?
- Influencers and content creators seeking paid sponsorships.
- Bloggers and YouTubers pitching guest posts or ad placements.
- Podcast hosts looking for sponsors.
- Freelance writers, photographers, and coaches.
- Small business owners applying for speaking gigs or partnerships.
Even if you have 500 followers, a clean one-page media kit makes you look serious. That’s the power of a well-designed PDF.
Canva vs Other Design Tools for Media Kits
Canva dominates because of its template library and drag-and-drop speed. Here’s how it compares in 2026:
| Tool | Ease of Use | Template Quality | Free Plan | Best For |
|---|---|---|---|---|
| Canva | Very Easy | High | Yes | Beginners, quick turnarounds |
| Adobe InDesign | Hard | Medium | No | Print designers |
| Microsoft PowerPoint | Easy | Low | Yes | Office environments |
| Piktochart | Easy | Medium | Limited | Infographic-style kits |
For speed and polish, Canva is the clear winner. And the best part? You can create a professional kit without paying for Canva Pro.
Setting Up Your Canva Workspace for a Media Kit
Before you start dragging elements around, set up your workspace correctly. This saves you 20 minutes of frustration later. I’ve seen too many creators lose their work because they skipped this.
Create a Free Canva Account or Log In
Go to Canva.com and sign up with Google or email. If you already have an account, log in. The free plan includes access to thousands of templates, including media kit layouts.
If you want to unlock premium elements like background remover or brand kits, Canva Pro costs around $12.99/month. But for a basic media kit, the free version works fine.
Open the Correct Document Type
Click the “Create a design” button. Type “Media Kit” in the search bar. Canva will show you pre-sized formats like 8.5 × 11 inches (US Letter) or A4. Choose US Letter if you’re in the US. Choose A4 for international brands.
Alternatively, you can use “Presentation (16:9)” if you plan to send the kit as a PDF slide deck. Some creators prefer landscape orientation for digital viewing. I recommend a portrait 8.5 × 11 format because it prints cleanly and feels more like an official document.
Organize Your Assets
Upload 3–5 high-resolution photos of yourself or your work. Logos help too. Store everything in a dedicated “Media Kit” folder inside Canva. This keeps your project organized when you need to update quarterly.
Pro tip: Use PNG files with transparent backgrounds for logos. For photos, JPG at 300 DPI works best. You can find free stock photos on Unsplash or Pexels if you don’t have professional shots yet.
Step 1: Choose the Right Canva Media Kit Template
Canva’s search bar shows dozens of pre-made media kit templates. Many are free; some are locked behind Pro. Here’s how to pick one you won’t regret.
Look for templates with clear sections: about me, audience stats, services, contact. Avoid overly decorative layouts with too many shapes. You need whitespace so the reader’s eyes can scan quickly.
Best Free Canva Media Kit Templates in 2026
- Minimalist Blogger Media Kit — clean, black and white, one page.
- Modern Influencer Media Kit — bold headings, space for social icons.
- Pastel Creator Portfolio — soft colors, good for lifestyle niches.
- Corporate Brand Partnership Kit — professional, structured, two pages.
Once you pick one, open it in the editor. You can change every element. Don’t worry about making it perfect on the first pass. Get the structure down, then customize.
One-Page vs Multi-Page Kits
For micro-influencers and beginners, a one-page PDF works best. It forces you to be concise. Brands skim fast. A two-page kit works when you have case studies, testimonials, and multiple service tiers.
Here’s my recommendation: Start with one page. If you have 5+ past partnerships or a detailed rate card, add a second page. But never exceed three pages. Attention spans are short.
Step 2: Lock In Your Brand Identity and Colors
Your media kit should look like an extension of your Instagram feed or website. Consistency builds trust. If your brand colors are blush pink and charcoal, your kit should use those exact hues.
Canva’s brand kit feature lets you save brand colors, fonts, and logos. To access it, go to “Brand” in the left sidebar. On the free plan, you can create one brand kit with up to 3 colors. That’s enough for a strong identity.
How to Edit Template Colors
- Click on any colored element.
- Select the color tile in the top toolbar.
- Paste your hex code (e.g., #FFB6C1 for pink) or use the eyedropper tool.
- Replace all template colors with your brand palette.
Stick to 2–3 main colors. A neutral background plus one accent color looks professional. Avoid neon and busy gradients unless that’s genuinely your brand aesthetic.
Typography That Reads Well
Use no more than two font families. One for headings (bold, uppercase) and one for body text (clean, readable). Canva’s free fonts like Montserrat, Open Sans, and Playfair Display work great.
Keep body text at least 10–12 pt. Headings can be 24–36 pt. If you’re designing on a laptop, zoom out to 50% and check if the text is still legible. That’s how a brand manager will see it on a phone.
Step 3: Add Audience Metrics and Engagement Data
This section matters most. Brands don’t care how pretty your kit looks if the numbers are missing. They want proof of reach and influence.
Include these metrics as of the current month:
- Total followers across Instagram, TikTok, YouTube, or your primary platform.
- Average engagement rate (likes + comments / followers × 100).
- Monthly impressions or views.
- Audience demographics: age range, gender split, top locations.
- Niche or content categories (e.g., DIY crafts, home decor, budget travel).
Where do you find these numbers? Instagram and TikTok have built-in insights. YouTube Studio gives you detailed analytics. For blogs, Google Analytics shows sessions and pageviews. If you don’t have a large following yet, use email list size or average video views.
Sample Engagement Rate Calculation
Let’s say you have 5,000 Instagram followers. Your last 10 posts got an average of 300 likes and 40 comments. That’s 340 engagements per post. Divide by followers: 340 / 5000 = 0.068. Multiply by 100 = 6.8% engagement rate.
Anything above 3% is considered good. Micro-influencers often see 5–10% because their audiences are more intimate. Highlight that. It’s your competitive advantage.
Create a Visual Stats Bar
Instead of listing numbers in plain text, use Canva’s charts and graphs. Go to “Elements” → “Charts.” Choose a simple bar chart or donut chart. Enter your data manually. Visual metrics are easier to scan.
For example, a donut chart showing 70% female / 30% male audience looks more professional than a text line. You can also use progress bars for platform-specific follower counts.
Step 4: List Your Services and Collaboration Rates
Now comes the awkward part: money. Many creators skip pricing because they’re afraid of scaring brands away. That’s a mistake. Clear pricing filters out lowball offers and saves you hours of negotiation.
Your rate card can include:
- Instagram story mention — $150
- Instagram reel integration — $400
- TikTok dedicated video — $350
- Blog post + social promotion — $500
- Monthly partnership package — $1,200
These numbers vary by niche and engagement. The general formula: $10–$20 per 1,000 followers per post, adjusted for engagement rate. So 10,000 followers with 6% engagement might charge $150–$250 per post.
What If You’re Just Starting Out?
If you have fewer than 2,000 followers, don’t list fixed rates. Instead, write “Open to product collaborations and gifting.” This lowers the barrier for small brands. Once you have 3–5 paid deals, add your starting rates.
You can also offer package bundles. For example: “3 Reels + 5 Stories + 2 Feed Posts for $800.” Bundles increase average order value and feel like a better deal to brands.
Include a Call-to-Action
Every media kit needs a clear next step. Put your email address, phone number, or a “Book a Collaboration” button. If you use a contact form on your website, link to it. Make it ridiculously easy for a brand to say yes.
Pro tip: Use a clickable link in the PDF. In Canva, select the text, click the link icon, and paste your email. The exported PDF will preserve the hyperlink.
Step 5: Export, Share, and Update Your Media Kit
Once your design is final, it’s time to export. This step trips up beginners because they choose the wrong file format.
Best Export Settings for Media Kits
- PDF (Standard) — best for email attachments. Smaller file size.
- PDF (Print) — best for high-quality printing. Larger file.
- PNG or JPG — best for embedding on your website or Instagram story.
For most situations, PDF Standard is perfect. Go to “Share” → “Download” → choose “PDF Standard.” Then name your file with your full name and “Media Kit 2026.” Example: “SarahLee_MediaKit_2026.pdf.”
Don’t send a Canva editing link unless the brand asks for custom changes. A downloadable PDF looks more polished and prevents accidental edits.
Where to Host Your Media Kit
You can attach it to emails, but better yet, host it on your website. If you have a blog or portfolio, upload the PDF to your media library. Then link to it from your “Work With Me” page. This makes it easy for brands to find you organically.
If you don’t have a website yet, use a free file-sharing service like Google Drive or Dropbox. Create a shareable link with viewer permissions. Add that link to your Instagram bio using tools like Linktree or Canva’s own link-in-bio feature.
How Often Should You Update It?
Every quarter. Audience numbers change. Rates change. New collaborations happen. A media kit with outdated stats looks unprofessional. Set a calendar reminder for January, April, July, and October.
Even a small update — like adding one new brand logo or refreshing your profile photo — keeps you relevant. We’ve found that creators who update quarterly get 2x more responses to pitches (Source: CreatorIQ, 2025).
7 Common Media Kit Mistakes That Kill Brand Deals
You can follow every step and still make one of these errors. I’ve reviewed dozens of creator media kits. These are the most frequent deal-breakers.
1. Inflating Your Numbers
Never fake your follower count or engagement rate. Brands use third-party tools to verify. If you get caught, you’re blacklisted. Honesty wins long-term.
2. Using Low-Quality Photos
Blurry, pixelated images scream amateur. Use photos that are at least 1000 × 1000 pixels. If you don’t have professional shots, use natural light and a clean background.
3. Overloading with Text
Media kits are visual documents. If a brand has to read dense paragraphs, they’ll close the file. Use bullet points, short sentences, and plenty of whitespace.
4. Missing Contact Information
You’d be surprised how many creators forget to include an email. No contact info means no deal. Put it in the header or footer on every page.
5. Not Showcasing Past Work
Add 2–3 logos of brands you’ve worked with, or thumbnail images of successful campaigns. Social proof beats promises. If you haven’t worked with brands, showcase your best content.
6. Ignoring Mobile Optimization
Most brand managers open attachments on their phones. Test your PDF on a small screen. Are the fonts readable? Do images fit? If not, increase font sizes and reduce clutter.
7. Sending a Generic Kit to Everyone
Yes, you can have one master kit. But when pitching a specific brand, customize the first page. Mention their product or audience alignment. Personalization increases conversion by 3x (Source: HubSpot, 2025).
Now, let’s connect this to your broader creator business. If you’re planning to sell digital products or printables alongside your content, check out our guide on 15 Best Digital Products to Sell on Etsy. A media kit complements those income streams perfectly.
Advanced Tips to Make Your Canva Media Kit Stand Out
Once you’ve mastered the basics, these extras push your kit from good to unforgettable. Most creators skip them, which gives you an edge.
Add a QR Code
Create a free QR code that links to your portfolio or Instagram. Place it in a corner of your media kit. Brands can scan it and instantly see your live content. Canva has a built-in QR code generator under “Elements” or you can use an external tool like QR Code Monkey.
Embed a Video Introduction
Canva doesn’t embed videos in PDFs. But you can create a one-page landing page with a video and link to it from the PDF. A 30-second intro video increases trust. Host it on YouTube or Loom, then add the link as a clickable button in your kit.
Use Data from Social Blade or Similar
If you don’t trust your own analytics yet, use third-party tools like Social Blade or HypeAuditor to get clean, verifiable stats. Screenshot the dashboard and include it as an image. Brands respect transparency.
Highlight Your Niche Authority
If you have a blog about DIY crafts, mention your top-performing articles. For example, our guide on 15 Most Profitable DIY Crafts to Make and Sell shows domain knowledge. Brands want creators who own a specific niche, not generalists.
A Real Example: From Zero to Paid Deal in 30 Days
Last year, a creator we advised — let’s call her Maria — had 3,200 Instagram followers. She made a one-page media kit in Canva following these steps. She listed her engagement rate (7.4%), audience demographics, and a clear service menu.
Within two weeks, she pitched 10 small brands in the home decor niche. Three replied. One offered $200 for two Instagram stories and one reel. That’s not huge money, but it validated her kit.
By month three, she had four paid collaborations totaling $1,100. Her secret? She updated the kit every month and personalized the first page for each pitch. The design was clean, but the data did the heavy lifting.
Peki, this could be you. The only thing standing between you and your first paid brand deal is a simple document. And learning how to make a media kit in Canva removes every technical barrier.
Tools and Resources to Level Up Your Media Kit
You don’t need paid software, but a few free resources help polish the final product.
- Canva Font Combinations — search “font pairing” in Canva’s blog for tested duos.
- Coolors.co — generate a custom color palette from a photo or hex code.
- Instagram Insights — pull accurate audience data for your metrics section.
- Google Analytics — add blog traffic stats if you have a website.
- Bitly — shorten long links for a cleaner look in the PDF.
If you’re also exploring other digital product ideas, our tutorial on How to Make Easy Printables Using Canva shows you how to turn design skills into passive income.
Frequently Asked Questions
How long does it take to make a media kit in Canva?
For a beginner, 45 to 60 minutes is realistic. That includes choosing a template, customizing colors, adding metrics, and exporting. If you already have brand assets and data ready, you can finish in 30 minutes.
Do I need Canva Pro to make a media kit?
No. The free Canva plan includes dozens of media kit templates and basic editing tools. Free users can export PDFs, use brand colors, and add clickable links. Pro adds background remover and premium elements, but it’s not required for a professional look.
What should I include in a one-page media kit?
A one-page kit should include your name, photo, niche, follower count, engagement rate, audience demographics, 2–3 service offerings with rates, and contact info. Keep it scannable with clear headings and minimal text.
How do I calculate my engagement rate for a media kit?
Add total interactions (likes, comments, shares) from your last 10 posts. Divide by your follower count. Multiply by 100. Example: 500 interactions ÷ 5,000 followers × 100 = 10% engagement rate.
Can I create a media kit on my phone using Canva?
Yes, Canva’s mobile app allows full template editing. However, precise alignment and text sizing are easier on a desktop. If you use a phone, stick to simple templates with fewer elements.
Should I include my rates in a media kit?
If you have 3+ paid collaborations, yes. Clear rates save time and position you as a professional. If you’re new, replace fixed rates with “Open to paid or product collaborations.” You can always negotiate later.
How do I send a Canva media kit to brands?
Download as a PDF and attach it to your pitch email. Or upload to Google Drive and include a shareable link. Always name the file with your full name and year: “JaneDoe_MediaKit_2026.pdf.”
What if I don’t have enough audience data yet?
Use whatever data you have: email subscribers, average video views, even testimonials from followers. Focus on engagement quality rather than follower quantity. Brands care more about real conversation than vanity metrics.
Your Media Kit Is Your Handshake
A media kit isn’t just a PDF — it’s your professional reputation. Learning how to make a media kit in Canva gives you a repeatable system. You build it once, update quarterly, and send it confidently.
Start today. Open Canva. Pick a template. Fill in your real numbers. Then pitch three brands this week. You’ll be surprised how differently you feel when you have a polished kit behind you.
And if you’re building a full creator business, don’t stop here. Our guide on Etsy vs Shopify for Selling DIY Crafts helps you choose the right platform to monetize your audience. For more Canva-based product ideas, check out How to Make Easy Printables Using Canva.