cricut pantry labels: 7 Essential Steps to Make Easy, Custom Labels for Your Pantry in 2026
- cricut pantry labels: 7 Essential Steps to Make Easy, Custom Labels for Your Pantry in 2026
- 📋 Key Takeaways
- Table of Contents
- Why Making Your Own Cricut Pantry Labels Is a Total Game-Changer
- Exactly What You Need to Get Started (With Budget-Friendly Swaps)
- Step 1: Design Labels Like a Pro in Cricut Design Space
- Setting Up Your Canvas for Pantry Labels
- Choosing Fonts and Typography That Look Professional
- Adding Shapes, Icons, and Personal Flourishes
- Preparing for Cut: Weld, Attach, and Color Sync
- Step 2: Cut and Weed Your Vinyl Without Losing Your Mind
- Choosing the Right Cut Settings for Adhesive Vinyl
- Weeding Tiny Text and Intricate Designs
- Common Cutting Mistakes and Quick Fixes
- Step 3: Apply Labels That Stick Perfectly—Even on Curves
- Surface Prep: The Step Everyone Skips (and Regrets)
- The Hinge Method for Perfect Alignment
- Banishing Air Bubbles and Conquering Curves
- Bonus: 5 Tips for Durable, Stylish Pantry Labels That Last
- 1. Choose Removable Vinyl for Evolving Pantries
- 2. Protect Your Labels with a Clear Vinyl Overlay (Optional)
- 3. Create a Consistent System with Color Coding or Shapes
- 4. Test First on a Single Jar
- 5. Plan for Expansion
- Frequently Asked Questions
- What vinyl is best for cricut pantry labels?
- Can I use Cricut Joy for pantry labels?
- How long do Cricut pantry labels last?
- Can I put Cricut vinyl labels in the dishwasher?
- How do I remove old vinyl labels from jars?
- What font size works best for pantry labels?
- Can I make pantry labels with a Cricut that aren’t just text?
- I don't have a Cricut. Can I still get a similar look?
- Ready to Transform Your Pantry? Start Cutting Today
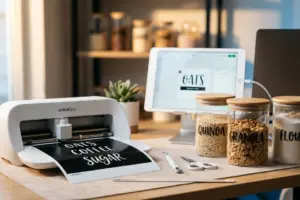
That chaotic moment when you’re standing in your kitchen, staring at a stack of matching containers, and you honestly can’t tell the flour from the powdered sugar? We’ve all been there. Last month, I decided enough was enough—my pantry had become a black hole of mismatched jars, half-open bags, and mystery grains. I pulled out my Cricut Maker, designed a simple set of custom cricut pantry labels, and in one afternoon transformed that chaos into a space that felt straight out of a home organization magazine. The best part? It wasn’t complicated at all. And honestly, if I can do it while wrangling a toddler, you absolutely can too.
What makes these labels so effective isn’t just the visual order they bring. It’s the way they make your entire cooking routine feel lighter—no more accidental salty pancakes or cornstarch-thickened smoothies. Plus, when you’re using a Cricut, you’re not stuck with generic store-bought stickers that fade after a month. You get fully personalized, durable vinyl that matches your décor, your container shapes, and even your handwriting style. In this guide, I’m going to walk you through every single step to create your own cricut pantry labels, from opening Design Space for the very first time to sticking that final label on a tricky curved jar. By the end, you’ll have a system that not only looks incredible but actually makes your kitchen a calmer place to be.
📋 Key Takeaways
- Detailed, screen-by-screen walkthrough for designing cricut pantry labels in Cricut Design Space—no experience needed.
- Side-by-side vinyl comparison table so you pick the right material for glass, plastic, and metal containers.
- Pro-tested transfer tape tricks that eliminate air bubbles, even on round jars.
- Six real mistakes I’ve made (and how you can avoid every single one).
- Bonus font pairing and sizing guide for professional-looking results.
Why Making Your Own Cricut Pantry Labels Is a Total Game-Changer
Walk into any store and you’ll find pantry labels. The problem? They’re usually white, bland, and come in fonts that look like a 1980s office memo. With cricut pantry labels, you step into complete creative control. Choose a modern calligraphy font for your flour jar, a bold sans-serif for your coffee canister, or even add tiny icons—a rolling pin for baking supplies, a chili pepper for spices. That personalization alone makes the entire process addictively fun.
But for me, the real shift came when I realized how much time I was wasting. I’d buy a new ingredient, toss it into a matching container, and then three weeks later stand there scratching my head, sniffing the lid like some sort of forensic detective. Labels, especially clear and consistent cricut pantry labels, ended that daily guessing game. Suddenly my children could help put groceries away without asking, “Mom, where does this go?” Even my husband—who famously puts eggshells back in the carton—started to respect the system.
There’s also a financial angle. High-end custom labels from a specialty shop can run you $30–$50 for a set. With a Cricut, you’re paying pennies per sheet of vinyl, and you can recut as often as you change your mind or your pantry theme. I’ve revamped my labels three times in the past year: once for a minimalist phase, once when I added a section for kids’ snacks, and once simply because I fell in love with a new wooden-grain vinyl that matched my DIY closet organizer aesthetic. That flexibility? Store-bought just can’t compete.
Exactly What You Need to Get Started (With Budget-Friendly Swaps)
Before you open Design Space, let’s make sure your worktable isn’t a disaster zone. I’ve laid out the absolute essentials, plus a few “nice-to-have” items that a lot of tutorial lists gloss over.
| Essential Item | Why You Need It | Budget-Friendly Alternative |
|---|---|---|
| Cricut cutting machine (Maker, Explore, or Joy) | Precision cuts your label designs from vinyl. | Borrow a friend’s, or check local library maker spaces—many now offer Cricut sessions. |
| Adhesive vinyl (removable or permanent) | The actual label material. Removable is perfect for pantry items you’ll refill and rearrange. | Oracal 631 (removable) or 651 (permanent) off-brand rolls from craft stores are half the price and cut beautifully. |
| Transfer tape or transfer paper | Lifts your weeded design from the backing and holds it together for application. | Regular clear contact paper (shelf liner) works surprisingly well—just test first. |
| StandardGrip cutting mat (light or medium grip) | Holds the vinyl during cutting without letting it slip or tearing upon removal. | Clean an old mat with warm water and mild soap to restore stickiness—good as new. |
| Weeding tool kit | Removes tiny vinyl pieces from letters and inside shapes. | A straight pin or dental pick works, but the hooked weeder is worth the $5. |
Beyond those basics, I always keep a small spray bottle of 70% isopropyl alcohol and a microfiber cloth handy. You’ll see why in the application step—clean container surfaces are non-negotiable for labels that don’t peel after a week. If you’re planning to label plastic bins with a slight texture, pick up some permanent vinyl and a scraper tool; it makes a world of difference.
Step 1: Design Labels Like a Pro in Cricut Design Space
This is the part where most beginners freeze. I get it—Design Space can look intimidating. But once you understand the canvas, creating cricut pantry labels becomes as easy as typing a text message.
Setting Up Your Canvas for Pantry Labels
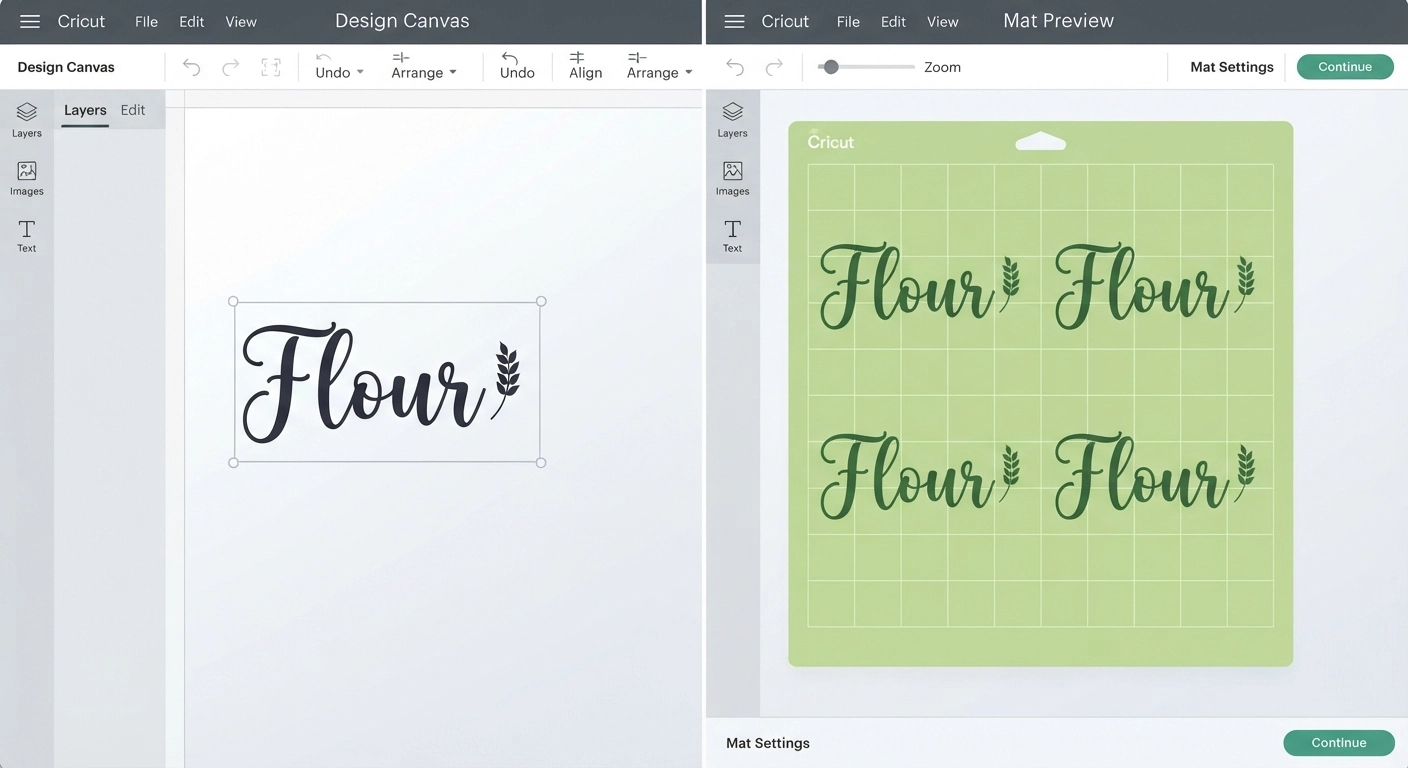
Open Design Space and click “New Project.” The blank canvas defaults to 12” x 12” if you have a Maker or Explore. For most jars and canisters, you’ll be designing individual labels that range from 2 to 5 inches wide, so you can fit multiple designs on one mat. First, switch your measurement unit to inches (menu in the top right) if you haven’t already.
Now, use the Shapes tool to create a rectangle—this will act as a placeholder for your container’s face, so you can size text to fit. Measure the flat area of your widest jar (a simple ruler works). If your largest canister is 4 inches across, draw a rectangle 3.8 inches wide and 2.5 inches tall. You don’t cut this shape; it’s just a visual guide. I actually create a separate guide layer for each container size in my pantry and label them “flour jar,” “sugar jar,” etc., then hide them before cutting.
Choosing Fonts and Typography That Look Professional
Here’s a secret: the font you pick determines whether your labels look like a high-end boutique or a third-grade art project. I’m partial to combination designs—a delicate script for the main word (“Flour”) and a clean, thin sans-serif for the secondary line (“All-Purpose”). In Design Space, filter fonts by “Writing” style for that hand-drawn feel, or upload your own favorite fonts (yes, you can install any .otf or .ttf file on your computer and it shows up in Design Space under “System Fonts”).
Avoid fonts with excessively thin connectors—they may cut beautifully on the screen but turn into tear-able nightmares on the mat. Test cut a small sample if you’re unsure. I’ve learned that bumping up the letter spacing (the “Letter Space” slider in the Text Edit bar) by 0.1–0.2 keeps cursive flourishes from merging. For block fonts, leave spacing at zero but increase the font size by 10% more than you think you need—labels always look smaller once stuck on a big jar.
Adding Shapes, Icons, and Personal Flourishes
One of my favorite cricut pantry labels sets included tiny silhouette icons: a wheat stalk next to “Flour,” a coffee cup for “Coffee Beans,” a chili pepper for “Chili Flakes.” You can find free SVG icons on sites like Freepik or The Noun Project. Upload them into Design Space (Upload → Image → select file) and clean up any unwanted background using the wand tool. Resize the icon to about 0.8–1 inch, and place it beside your text.
To keep everything aligned, select both the text and the icon, then head to “Align” in the top toolbar. Choose “Align Center Vertically” and “Distribute Horizontally.” That one click saved me from crooked labels more times than I can count. If you’re designing matching sets, duplicate your first label and simply edit the text for each new item—this keeps fonts, sizes, and icon placements identical.
Preparing for Cut: Weld, Attach, and Color Sync
Before hitting “Make It,” you need to weld any script words so they cut as a single connected piece. Select your text, right-click, and choose “Weld.” For multi-line labels where the icon is separate, I use “Attach” instead—it preserves the relative spacing on the mat without merging shapes. And here’s a color trick: assign the same color to all elements that will be cut from the same vinyl. That way Design Space groups them together on the mat preview, saving you vinyl and sanity.
Step 2: Cut and Weed Your Vinyl Without Losing Your Mind
You’ve designed the perfect cricut pantry labels. Now comes the slightly nerve-wracking part—sending that design to the machine and hoping it doesn’t eat the vinyl. Relax; I’ll walk you through the exact settings I’ve dialed in after dozens of pantry projects.
Choosing the Right Cut Settings for Adhesive Vinyl
Place your vinyl sheet (color side up) on your cutting mat, smooth it flat with a scraper or the side of your hand, and load it into the machine. In Design Space, after clicking “Make It,” select your material. For most pantry labels using 3–5 mil adhesive vinyl, the standard “Premium Vinyl” setting works beautifully. If you’re using a thicker glitter or textured vinyl, toggle down to “Premium Vinyl – Permanent” or select “Custom” and set pressure to 250–275.
I always do a test cut of a small circle from the corner of the mat when trying a new vinyl brand. It takes 30 seconds and saves me from wasting a full sheet. Check the cut lines: the blade should slice cleanly through the vinyl but not into the paper backing (carrier sheet). Adjust pressure slightly if needed. If you own a Maker, you can use the Fine-Point Blade without modifications; with Explore Air 2, older blade housings sometimes need a slight pressure increase after heavy use.
Weeding Tiny Text and Intricate Designs
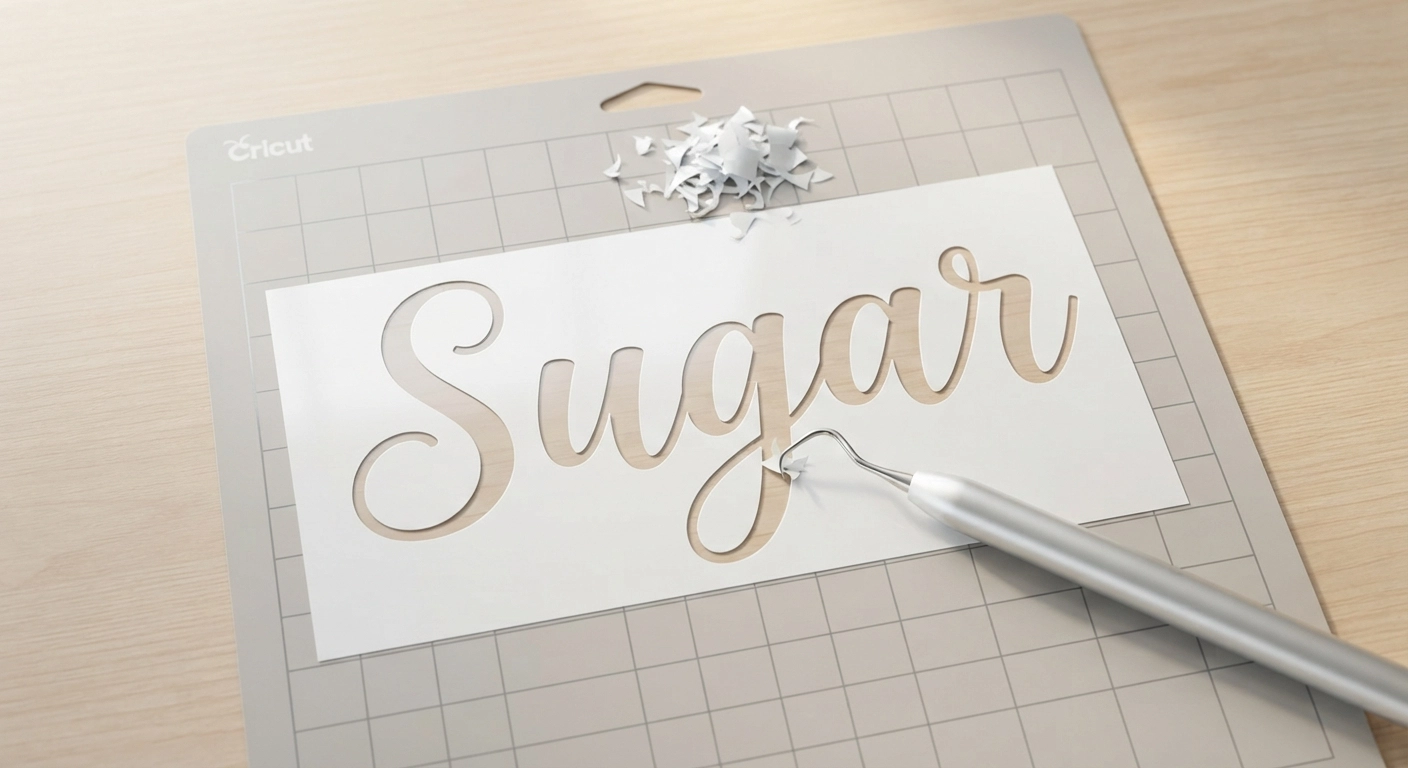
Weeding is where patience gets tested. The trick is to weed immediately after cutting, while the vinyl is still on the mat. This gives you stability. Start by peeling away the outer negative space (the vinyl you don’t want). Then, for letters like “e” or “a” with tiny centers, use a sharp weeding tool or even a pin to pop out those inside pieces. I like to work under a bright desk lamp or near a window; good light saves you from missing those sneaky little dots.
Pro tip that changed my life: use the “reverse weeding” method for delicate script fonts. First, place transfer tape over the entire uncut design (yes, before weeding). Burnish it down well. Then peel the transfer tape up—the vinyl lifts with it, leaving the paper backing behind. Now weed away the unwanted vinyl from the transfer tape. This keeps thin letters perfectly aligned and prevents them from stretching. I always reverse-weed calligraphy labels now.
Common Cutting Mistakes and Quick Fixes
One mishap I see over and over: the vinyl isn’t adhering to the cutting mat properly, and during the cut it lifts, causing jagged letters. Solution: check your mat’s stickiness. A brand-new StandardGrip mat can be too aggressive for delicate vinyl, so first “de-stick” it slightly by patting it with a clean t-shirt. Conversely, an old mat might not hold—revive it by wiping gently with a baby wipe and letting it air dry.
Another frustration: the machine cuts but doesn’t actually go through the vinyl. This usually means a dull blade. Blades last for 6–12 months with regular use. Replace yours, and if you’re in a pinch, take the blade out, push it into a ball of aluminum foil several times; this can temporarily sharpen it. Also, double-check that you’ve selected the correct material in Design Space. Choosing “Cardstock” instead of “Vinyl” will give you a very bad day.
Step 3: Apply Labels That Stick Perfectly—Even on Curves
Here’s where you get to see your hard work transform those boring containers. But don’t just slap the label on—I’ve developed a foolproof application method that works on flat canisters and curved jars alike.
Surface Prep: The Step Everyone Skips (and Regrets)
I can’t stress this enough: clean your container surface like you’re preparing for surgery. Any oil, dust, or residue will cause your vinyl to peel within days. I use 70% isopropyl alcohol on a lint-free cloth and wipe the entire labeling area thoroughly. Let it air dry completely—don’t touch the surface with your fingers afterward, as skin oils transfer immediately.
For jars that have been through the dishwasher, there may be a thin film of rinse aid left behind. I wash them with hot soapy water, dry them, then do the alcohol wipe. If you’re labeling plastic bins, a slightly tacky surface after cleaning means you’re good to go. Avoid glass cleaners that contain ammonia; they can leave a residue that repels adhesive. And please, skip the masking tape trick for cleaning—it often leaves glue bits that ruin adhesion.
The Hinge Method for Perfect Alignment
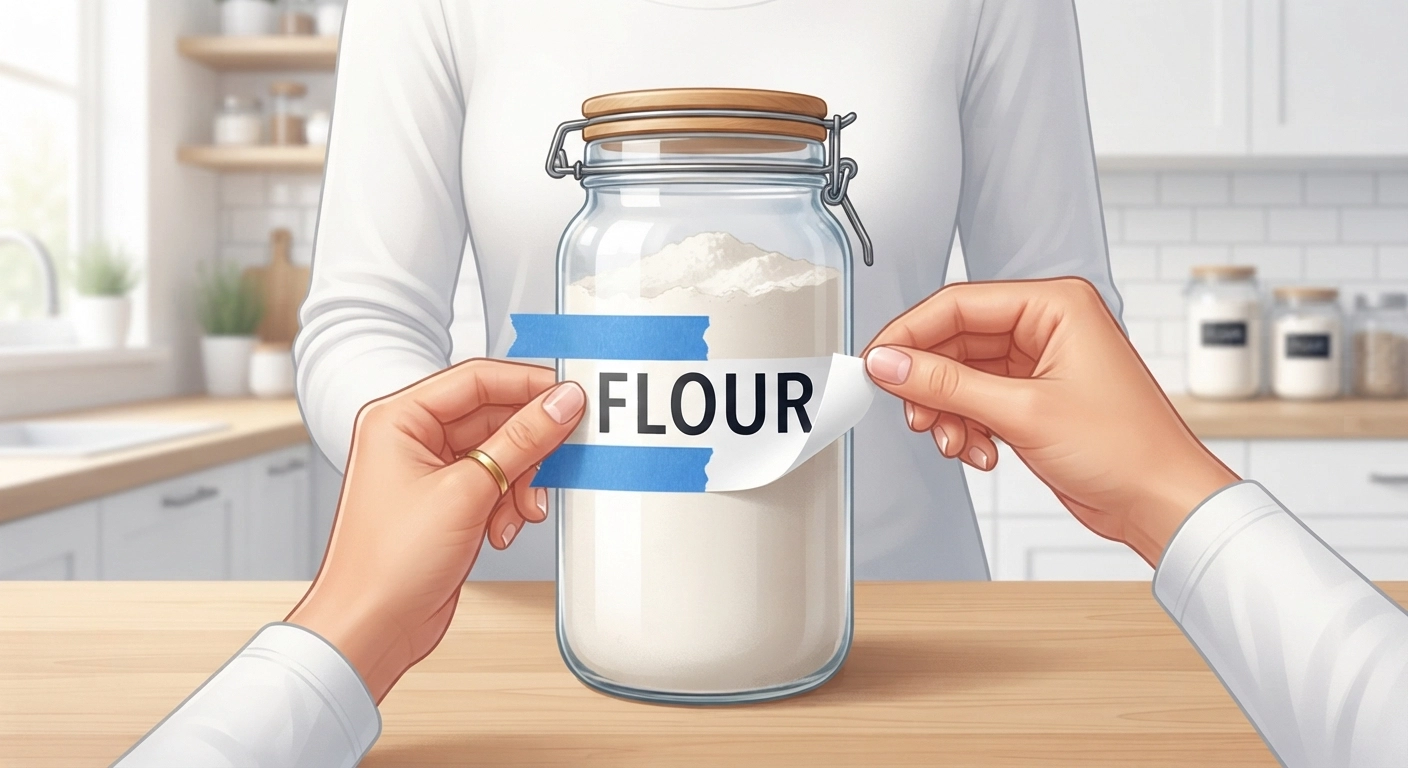
Straight labels, every single time. Cut a piece of transfer tape about an inch larger than your design on all sides. Place your weeded vinyl (still on its backing) face down on a clean table. Peel the transfer tape and slowly apply it over the design, starting from one edge and working across with a scraper or old gift card to avoid bubbles. Flip everything over and burnish the backside as well.
Now, here’s the hinge: position your label on the container where you want it, hold it in place with two fingers, and apply a horizontal strip of painter’s tape right across the middle of the transfer tape—this tape adheres to the container and acts as a hinge. Lift one side of the label, peel off the vinyl backing, and carefully cut that portion of the backing away with scissors. Then lower that side back down, pressing from the center outward. Lift the other side, remove the rest of the backing, and lower it down. The hinge ensures nothing shifts, even if you accidentally nudge it. I use this method for my most precious cricut pantry labels, the ones where “Flour” has to be perfectly centered above those decorative lines.
Banishing Air Bubbles and Conquering Curves
Air bubbles are the enemy of a professional finish. As you press the transfer tape down, work from the center outward in small, overlapping strokes with a scraper hooking toward you. If a bubble appears, stop! Don’t just press harder. Take a fine sewing needle and poke a tiny hole in the very center of the bubble. Then gently smooth outward from the hole—the air escapes, and the vinyl flattens against the surface without shrinking.
Curved jars (think round pasta containers) introduce another layer of challenge. Vinyl wants to lie flat, so you need to help it contour. After the hinge method, instead of pressing the label down in one go, I use a hair dryer on low heat. Warm the already-applied vinyl SLIGHTLY for about 10 seconds—it becomes more flexible. Then, using my fingers covered with a microfiber cloth, I gently mold the edges around the curve. Not too much heat, or you’ll stretch the design. I’ve also had great results with the “wet application” method: mix a few drops of baby shampoo in a spray bottle of water, lightly mist the container and the adhesive side of the vinyl, place the label, and slide it into position before squeegeeing out the water. This works wonders on large curved surfaces because it allows adjustments for several minutes.
Bonus: 5 Tips for Durable, Stylish Pantry Labels That Last
You’ve got the basics, but these extra insights separate a set of labels that last six months from one that looks pristine for years.
1. Choose Removable Vinyl for Evolving Pantries
I started with permanent vinyl on everything. Rookie mistake. When I wanted to change “Brown Sugar” to just “Sugar,” I spent 40 minutes scraping residue with Goo Gone. Removable vinyl (like Oracal 631) adheres beautifully to clean glass, plastic, and metal, yet peels away cleanly without leaving sticky ghosts behind. Plus, if you’re a renter and move frequently, removable labels let you take your pretty jars without scrubbing for hours—similar to our renter-friendly decor hacks principles. I reserve permanent vinyl only for items that go through rough handling, like the snack bin my kids open with sticky hands 14 times a day.
2. Protect Your Labels with a Clear Vinyl Overlay (Optional)
Want ultimate durability? Cut a clear vinyl overlay the exact same shape and size as your label and apply it directly on top after the label is applied. This acts like a clear coat and prevents scratches and water splashes. It’s a bit extra, but for frequently washed containers or those stored on open shelves near the stove, it’s a lifesaver. I’ve done this for my oil and vinegar bottles that sit right next to the range, and after six months they still look brand new.
3. Create a Consistent System with Color Coding or Shapes
One design trick that amplifies the “custom” feel: use a consistent label shape across your pantry. I use a rounded rectangle (add a small circle to the corners in Design Space and slice) for all baking supplies, and a circle for spices. Another approach: color-code by category—green labels for grains, blue for baking, red for snacks. This not only looks cohesive on video tours (hello, TikTok) but also helps kids and guests find things instantly. If you sell your own label files, this kind of thoughtful system makes your SVG file sets to sell incredibly popular.
4. Test First on a Single Jar
Before committing to labeling 20 containers, do a full cycle on one jar: design, cut, apply, and live with it for a week. Wash it by hand, see how the vinyl handles humidity, and check for edge lift. This has saved me from using a font that was gorgeous but totally illegible from three feet away, or from using white vinyl on clear glass (it disappears unless you add a backing). I learned that dark grey vinyl shows up brilliantly on most container colors and hides minor dust. Small test, big impact.
5. Plan for Expansion
Your pantry isn’t static. New flours, trendy grains, and snack obsessions will appear. When designing your labels, leave space on your mat for blank cut pieces, or save your Design Space project file in a folder called “Pantry Labels.” That way, six months from now you can open the file, type “Quinoa” in the placeholder, and cut a matching label in under 10 minutes. I also keep a small stash of pre-cut blank label shapes in my craft drawer for impromptu additions.
If you’re the kind of organizer who gets a thrill from a perfectly matched storage system, check out our DIY garage tool storage rack guide for extending that same satisfaction to your workshop.
Frequently Asked Questions
What vinyl is best for cricut pantry labels?
Removable adhesive vinyl is my top pick for 95% of pantry projects. It holds firmly to clean glass, plastic, and metal but removes without residue when you want to change labels. Permanent vinyl works if containers will be handled roughly or washed often, but be prepared for a sticky cleanup later. I use Oracal 631 for removable and Oracal 651 for permanent—both cut like a dream on all Cricut machines.
Can I use Cricut Joy for pantry labels?
Absolutely. The Cricut Joy handles smaller labels perfectly, especially for spice jars and slim containers. The main limitation is width—Joy cuts up to 4.5 inches wide, so for large canisters wider than about 4 inches you’ll need to size down your design or use a larger machine. But for a full pantry overhaul of small to medium containers, the Joy is a little powerhouse.
How long do Cricut pantry labels last?
With proper surface prep and removable vinyl, expect 2–3 years of pristine use before any edge lifting appears. Labels on containers that are hand-washed (never soaked) and kept away from direct oven or dishwasher steam last longest. I have a set from 2021 that still looks fresh, though I’ve since updated them for fun. If you add a clear overlay, durability jumps to 5+ years.
Can I put Cricut vinyl labels in the dishwasher?
I’ll be direct: don’t do it. Even permanent vinyl will eventually lift around the edges with repeated dishwasher cycles, and high heat can discolor or warp the adhesive. Hand wash your labeled containers gently on the outside, or if the inside is dirty, unscrew the lid and wash only that. For dishware you absolutely must run through the machine, consider sublimation or ceramic paints instead of vinyl.
How do I remove old vinyl labels from jars?
Peel off as much vinyl as you can by hand. Then apply a small amount of Goo Gone or rubbing alcohol to the remaining adhesive, let it sit for two minutes, and wipe away with a cloth. Wash with hot soapy water to remove oily residue, then do the alcohol wipe before applying new labels. Never use abrasive scrubbers; they scratch glass and make future labels harder to adhere smoothly.
What font size works best for pantry labels?
For the main word, aim for a finished height of 0.6–1 inch, depending on your container face. A good starting point in Design Space is a text height of 1.2 inches for script fonts, which often appear smaller after cutting due to thin strokes. Always do a test print (on paper taped to the jar) before cutting vinyl. Secondary lines like “All-Purpose” look best at 0.4–0.5 inch final height.
Can I make pantry labels with a Cricut that aren’t just text?
Yes! Many of my favorite sets incorporate simple icons—a rolling pin, a whisk, fruit silhouettes. You can upload SVG graphics into Design Space and combine them with your text. Some crafters even design full decal decorations that wrap around containers. I’ve made mason jar labels with a floral border that doubled as wedding favors. The possibilities are endless, and it’s a great skill to develop if you’re thinking of selling your handmade items later on.
I don’t have a Cricut. Can I still get a similar look?
You certainly can. While a cutting machine gives you the cleanest, most professional vinyl letters, you can buy pre-cut letter stickers from craft stores and arrange them carefully. Or print labels using waterproof sticker paper and a regular printer, then cut them out by hand. It won’t have the seamless vinyl-on-glass look, but it’s a budget way to start. For those who love the Cricut style, consider checking out our comparison glowforge vs cricut to see which machine fits your long-term crafting goals.
Ready to Transform Your Pantry? Start Cutting Today
Picture standing in your kitchen tomorrow morning, opening the cabinet, and seeing a row of perfectly labeled jars—flour, oats, quinoa, brown sugar—each one exactly where it should be, looking like a tiny aesthetic moment straight from a home magazine. That’s the feeling we’re after, and it’s closer than you think. With the steps you’ve just walked through, you now have everything needed to produce a stunning set of