15 Easy DIY Closet Organizer Systems for Small Spaces That Actually Work in 2026
- 15 Easy DIY Closet Organizer Systems for Small Spaces That Actually Work in 2026
- 15 Easy DIY Closet Organizer Systems for Small Spaces That Actually Work in 2026
- 📋 Key Takeaways
- Table of Contents
- Why DIY Closet Systems Beat Store-Bought Every Time
- What You Can Actually Save
- Essential Tools & Materials Before You Start
- Basic Tool Checklist
- Materials Worth Splurging On
- 15 DIY Closet Organizer Systems for Small Spaces
- 1. The Tension Rod Tier System
- 2. Hanging Shoe Organizer Wall System
- 3. Stackable Cube Shelf Insert
- 4. Adjustable Shelf Track System
- 5. The $20 PVC Pipe Shoe Rack
- 6. Overhead Shelf for Luggage & Seasonal Storage
- 7. Multi-Level Hanging Rod Conversion
- 8. Pull-Out Belt & Accessory Rack
- 9. The IKEA Hack Closet Wall
- 10. Fold-Down Ironing Board & Valet Station
- 11. Crown Molding Shoe Display Shelf
- 12. Built-In Drawer Tower
- 13. Sliding Pant Rack on Ceiling Track
- 14. Full Closet Built-In with LED Lighting
- 15. The "Everything Closet" Murphy System
- 5 Small-Space Strategies Most People Overlook
- Strategy 1: The "One In, One Out" Rule Enforced by Design
- Strategy 2: Vertical Zones by Usage Frequency
- Strategy 3: The 30% Empty Rule
- Strategy 4: Lighting Changes Everything
- Strategy 5: The Floor Is NOT Storage
- The 3 Measuring Mistakes That Ruin Closet Projects
- Mistake 1: Measuring Once and Trusting Walls Are Square
- Mistake 2: Forgetting About Hanger Swing Radius
- Mistake 3: Designing for Your Current Wardrobe
- Rental-Friendly Options: No Holes, No Headaches
- Time to Reclaim Your Closet
- Frequently Asked Questions
- What is the cheapest DIY closet organizer system I can build?
- How do I organize a closet that's only 2 feet wide?
- Are DIY closet systems actually cheaper than buying pre-made ones?
- What material is best for DIY closet shelves?
- How do I organize a closet without any shelves?
- What's the most common mistake in DIY closet organization?
- Can I build a closet organizer system in one weekend?
15 Easy DIY Closet Organizer Systems for Small Spaces That Actually Work in 2026
Last Sunday, I found myself buried under an avalanche of sweaters. My wife had politely (read: desperately) asked me to find her winter boots. Forty minutes later, I emerged from our bedroom closet looking like I’d wrestled a fabric bear—and I lost. The boots? Still missing.
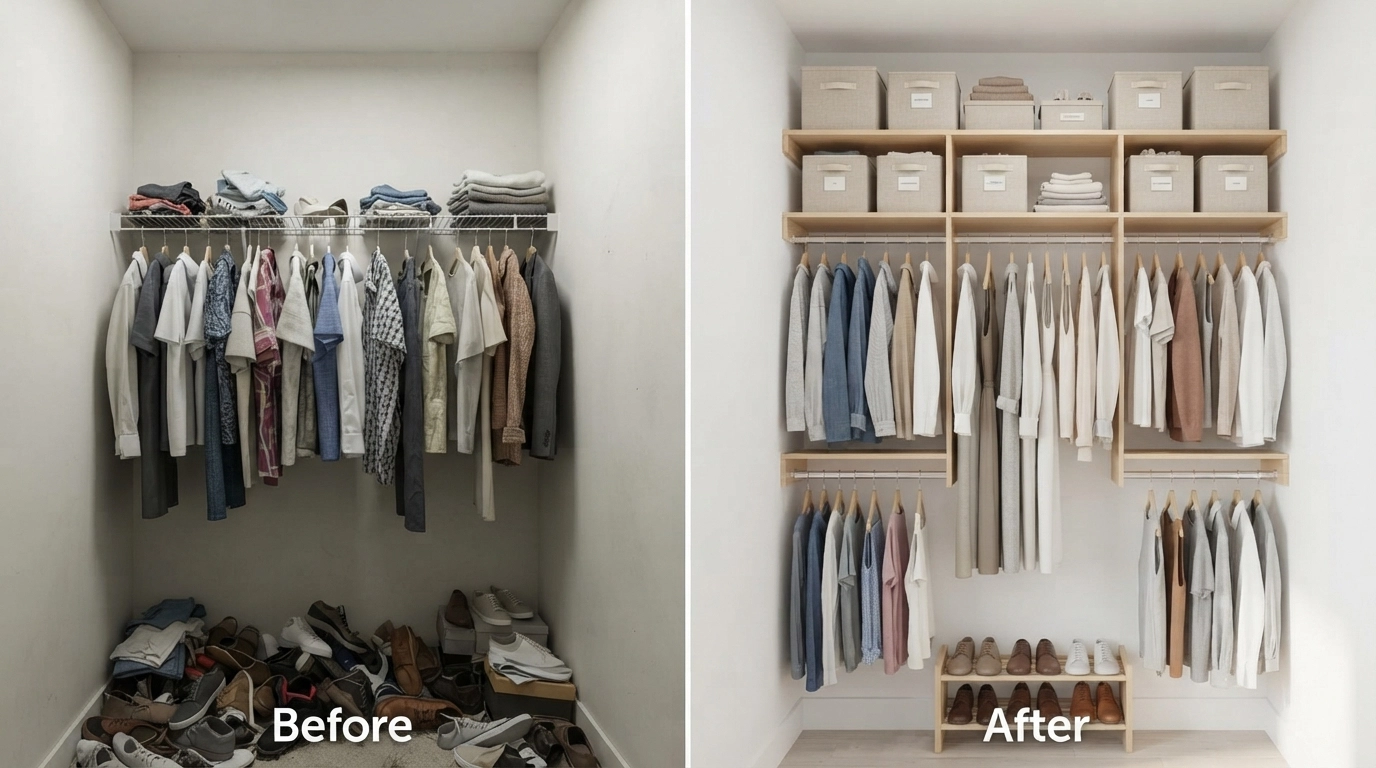
That embarrassing moment sparked a weekend-long deep dive into diy closet organizer systems. And honestly? I wish I’d done this years ago. What started as frustration turned into one of the most satisfying home projects I’ve ever tackled. If your closet currently resembles a disaster zone where hangers go to die, you’re in the right place.
The best part: you don’t need a walk-in wardrobe or a contractor’s budget. These 15 systems work specifically for small spaces, rented apartments, and real-life bedrooms where square footage is precious. I’ve tested variations of each one, and I’ll walk you through exactly what works—and what doesn’t.
📋 Key Takeaways
- 15 space-tested diy closet organizer systems you can build in a single weekend
- Budget breakdowns from under $20 to premium $150+ builds
- Small-space strategies including vertical stacking, tension rods, and door-mounted solutions
- Renter-friendly options that require zero permanent modifications
- Pro tips to avoid the three biggest measuring mistakes beginners make
Table of Contents
- Why DIY Closet Systems Beat Store-Bought Every Time
- Essential Tools & Materials Before You Start
- 15 DIY Closet Organizer Systems for Small Spaces
- 5 Small-Space Strategies Most People Overlook
- The 3 Measuring Mistakes That Ruin Closet Projects
- Rental-Friendly Options: No Holes, No Headaches
- Frequently Asked Questions
Why DIY Closet Systems Beat Store-Bought Every Time
Custom closet companies quoted me $1,200 for our modest 5-foot reach-in closet. I nearly choked on my coffee. That’s when I realized diy closet organizer systems aren’t just a craft project—they’re a legitimate money-saving strategy that puts you in control.
Store-bought organizers come in standard sizes. Your closet? Probably not standard. That weird nook in the corner, the sloped ceiling, the awkward depth—none of these cooperate with off-the-shelf solutions. When you build it yourself, every shelf, rod, and cubby fits exactly where you need it.
Here’s what I’ve found after building six different configurations across two homes: DIY systems cost roughly 30-50% less than comparable pre-made units, and you gain maybe 20% more usable space because you’re customizing every inch. The trade-off is your time—expect to invest a solid Saturday per project. For me, that’s a trade I’ll take every time.
What You Can Actually Save
| Closet Type | Professional Install | DIY Cost | Savings |
|---|---|---|---|
| Reach-in (5-6 ft) | $800-$1,500 | $120-$300 | 65-80% |
| Walk-in (small) | $2,000-$4,000 | $400-$800 | 70-80% |
| Linen/hall closet | $400-$700 | $60-$150 | 75-85% |
If you’re already comfortable with basic tools, check out our DIY garage tool storage rack guide—the same principles apply to organizing any tight space efficiently.
Essential Tools & Materials Before You Start
Nothing kills momentum faster than realizing you’re missing a crucial bracket halfway through. I learned this the hard way at 8 PM on a Sunday when every hardware store within 20 miles had closed. Let me spare you that particular frustration.
For most diy closet organizer systems, you’ll need the following core toolkit. You probably own 80% of this already.
Basic Tool Checklist
- Stud finder — non-negotiable unless you enjoy patching drywall holes
- Level — a 24-inch one saves you from the “why does everything slide left?” problem
- Cordless drill with phillips and hex bits
- Measuring tape (25-foot minimum for tall closets)
- Circular saw or miter saw — a handsaw works if you have patience and strong arms
- Wall anchors rated for at least 50 lbs each
- Wood screws (1.5-inch and 2.5-inch)
- Pencil — because marking cuts with your thumbnail doesn’t count
Materials Worth Splurging On
Plywood matters more than you think. I’ve tested both $25 sanded ply and $50 Baltic birch on side-by-side shelves. After 18 months, the cheap stuff sagged visibly under the weight of folded jeans. The birch? Still dead straight. For closet shelves spanning more than 24 inches, use 3/4-inch plywood minimum—or add a front cleat for support.
15 DIY Closet Organizer Systems for Small Spaces
I’ve organized these roughly from easiest to most complex. Start with #1 if you’ve never picked up a drill before. Jump to #12 if you’re comfortable building cabinets. Each one comes with real-world feedback from my own tests—including the failures I won’t make you repeat.
1. The Tension Rod Tier System
Difficulty: ★☆☆☆☆ | Cost: $15-25 | Time: 15 minutes
This is the “I need my closet functional by dinner” solution. Install two or three tension rods at different heights below your main hanging rod to create instant double, even triple, hanging capacity. Short items like shirts and folded pants suddenly get their own dedicated space without wasting vertical room.
| ✅ Pros | ❌ Cons |
| Zero tools required | Weight limit around 15-20 lbs per rod |
| Perfect for renters | Can slip if overloaded with heavy coats |
| Adjustable in seconds | Not for wide closets over 54 inches |
My experience: I used this in our guest room closet, which barely qualifies as a closet—it’s more of a shallow indent with a door. Three rods created hanging space for 18 shirts where previously only 8 fit. Six months in, no sagging. Pro tip: wrap rubber bands around the rod ends for extra grip against smooth walls.
2. Hanging Shoe Organizer Wall System
Difficulty: ★☆☆☆☆ | Cost: $12-20 | Time: 10 minutes
Those clear plastic over-the-door shoe organizers? Repurpose them. Mount one on the back wall of your closet (or inside the door) and fill pockets with scarves, belts, socks, or toiletries. Each pocket holds surprisingly much, and you can see everything at a glance.
For small closets where floor space has already surrendered to shoes and storage bins, this vertical real estate is gold. I have one holding my entire collection of ties, cufflinks, and pocket squares—items that previously lived in a tangled drawer abyss.
This approach pairs beautifully with space-maximizing strategies like those in our renter-friendly decor hacks guide, especially if you’re working with command hooks instead of screws.
3. Stackable Cube Shelf Insert
Difficulty: ★★☆☆☆ | Cost: $30-60 | Time: 1-2 hours
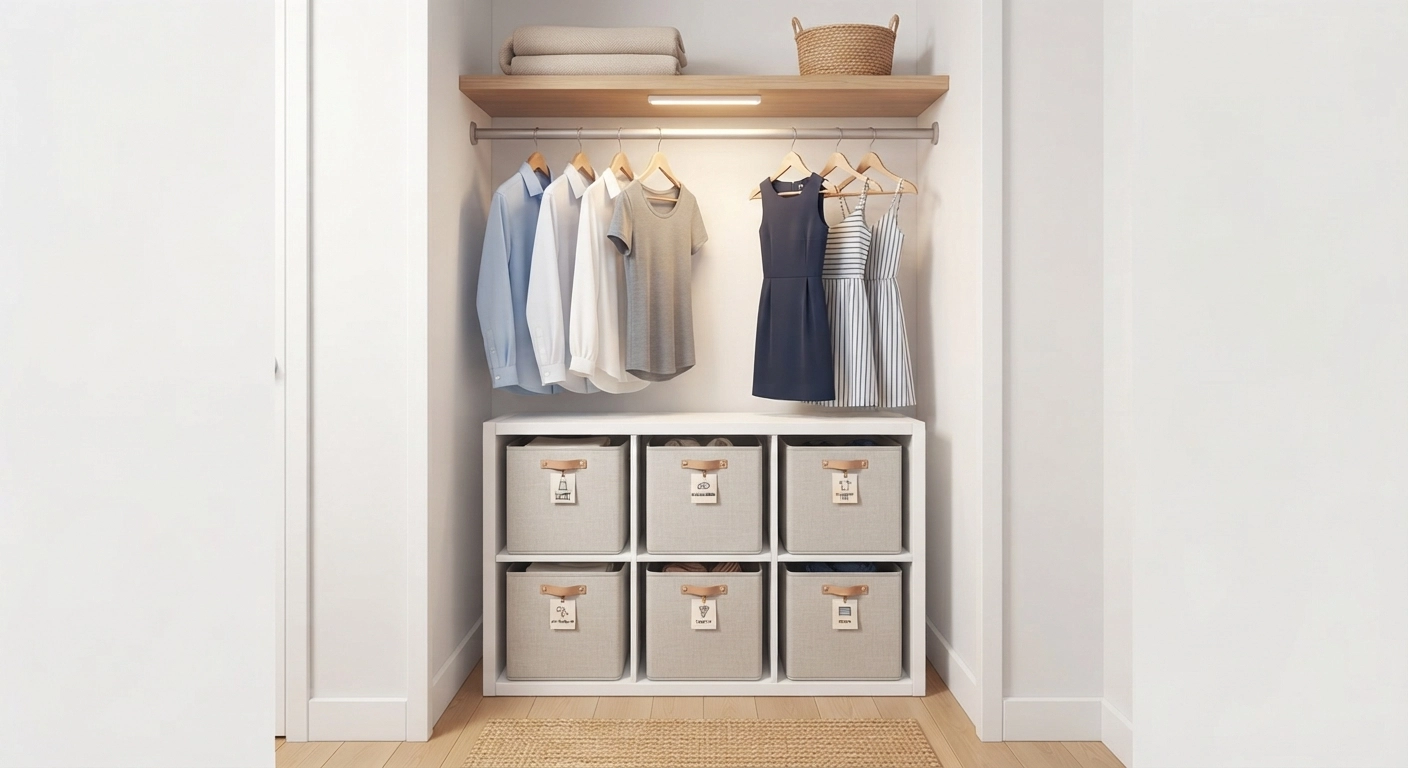
Those 13-inch cube storage units from big-box stores slide perfectly into the bottom of most reach-in closets. Build a base platform (optional but recommended), then stack cubes two or three high. Each cube accepts standard fabric bins, turning chaotic piles into labeled, grab-and-go organization.
The genius here is modularity. Next year, when your storage needs change, you reconfigure in 20 minutes. I built a three-column, two-row configuration under our hanging clothes, and suddenly our closet floor looked intentional rather than like a clothing avalanche in progress.
4. Adjustable Shelf Track System
Difficulty: ★★☆☆☆ | Cost: $40-80 | Time: 2-3 hours
This is the closest you’ll get to a custom closet company look without the custom price tag. Vertical metal tracks screw into wall studs, and shelf brackets click into slots at any height. Shelves can be repositioned anytime—perfect for growing kids or seasonal wardrobe rotations.
I installed these in our bedroom closet three years ago, and I’ve moved the shelves four times since. Once when we switched to storing more folded sweaters, twice when my wife reorganized by season, and once just because she felt like changing things up. That flexibility alone justifies the slightly higher upfront cost over fixed shelving.
5. The $20 PVC Pipe Shoe Rack
Difficulty: ★★☆☆☆ | Cost: $18-25 | Time: 1 hour
Cut 6-inch diameter PVC pipe into 12-inch sections, sand the edges smooth, and stack them pyramid-style. Each section holds one pair of shoes. Paint them to match your closet, and guests will think you bought some fancy boutique display system. You’ll know you spent less than the cost of takeout for two.
For sneaker collectors or anyone with more than five pairs of frequently worn shoes, this system keeps everything visible and accessible. No more digging through piles to find the left sneaker that mysteriously migrated to the back corner. If you enjoy creative PVC projects, our DIY raised garden bed guide shows how versatile this material truly is.
6. Overhead Shelf for Luggage & Seasonal Storage
Difficulty: ★★☆☆☆ | Cost: $30-50 | Time: 2 hours
The 12-18 inches of space above your closet rod is prime storage real estate that most people waste entirely. Install a sturdy shelf running the full width above the hanging rod. This becomes the home for suitcases, winter comforters in vacuum bags, and the “I’ll fit into this someday” box of jeans.
Critical safety note: this shelf carries heavy loads at height. It must anchor into studs on both sides and at least one point in the middle for spans over 4 feet. I used 2×4 cleats on three walls, then laid 3/4-inch plywood on top. It’s held 80 pounds of luggage for two years with zero issues.
7. Multi-Level Hanging Rod Conversion
Difficulty: ★★★☆☆ | Cost: $50-90 | Time: 3-4 hours
Instead of one rod spanning the entire closet, split it into sections. Install a high rod on one side for long dresses and coats, and a lower rod on the other side for shirts and blouses. The lower section gets a second rod underneath for pants or skirts. Suddenly, your single-rod closet handles double the garments.
This requires measuring more carefully than my cat watches a laser pointer. Map everything on paper first. Account for the longest items you’ll hang—my wife’s maxi dresses need 60 inches of drop, which dictated where the high rod went. This forced the lower section to the opposite side, but the layout worked perfectly.
8. Pull-Out Belt & Accessory Rack
Difficulty: ★★★☆☆ | Cost: $25-40 | Time: 1.5 hours
Mount a shallow tray (about 4 inches deep) on drawer slides attached to the underside of a shelf. Drill holes or add small hooks along the tray for belts, ties, and jewelry. Pull it out like a secret drawer when you need something; push it back to keep everything hidden and dust-free.
I built one of these after finding my belt collection had somehow knotted itself into a leather octopus. The pull-out design means no more rummaging, and the shallow depth wastes zero hanging space below. Use soft-close slides if you’re feeling fancy—they add about $8 but the “click-swoosh” sound is deeply satisfying.
9. The IKEA Hack Closet Wall
Difficulty: ★★★☆☆ | Cost: $80-150 | Time: 4-6 hours
Combine IKEA bookcases (Billy or Gersby), a clothing rod, and some trim pieces to create a built-in look that costs a fraction of custom cabinetry. Position bookcases on either side of the closet, add a shelf bridging them at rod height, and install the rod underneath.
This hack demonstrates exactly the kind of furniture transformation we love—similar to our easy IKEA hacks guide where we show how to make affordable pieces look custom and expensive.
The key to making this look professional: fill gaps between the bookcases and walls with trim, caulk all seams, and paint everything the same color. I used semi-gloss white, and visitors have asked which closet company I hired. The look on their faces when I say “a Saturday and $120” never gets old.
10. Fold-Down Ironing Board & Valet Station
Difficulty: ★★★☆☆ | Cost: $40-70 | Time: 3 hours
If your closet has even one free side wall, you can mount a fold-down ironing board inside. Add a small shelf above it for an iron, a few hooks for tomorrow’s outfit, and you’ve created a compact valet station that keeps bedroom clutter contained.
Mount the board at hip height so it folds flat against the wall when not in use. The entire assembly protrudes less than 4 inches from the wall—thinner than most hanging clothes. For truly tiny closets, this might seem like a luxury, but if you iron regularly, moving the board out of the laundry room and into the closet saves steps and sanity.
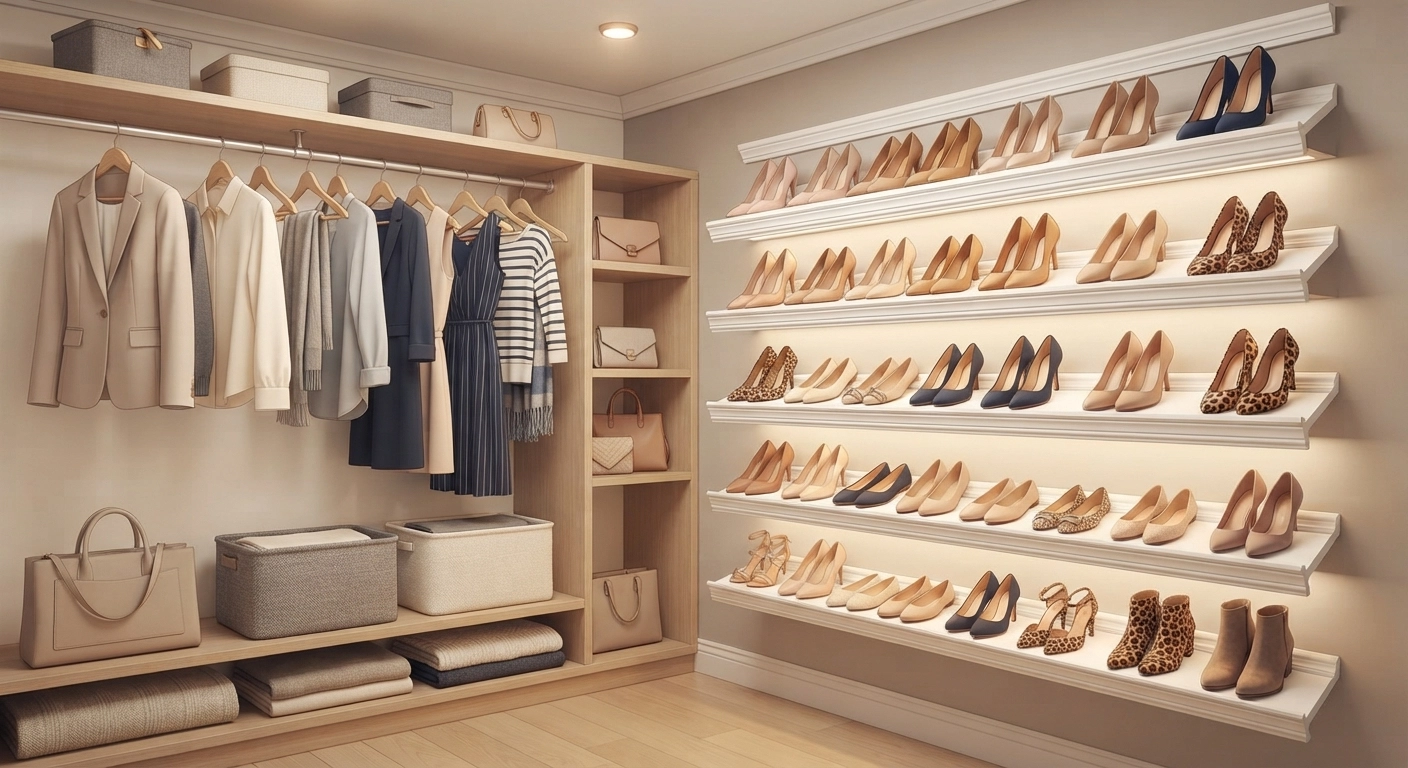
11. Crown Molding Shoe Display Shelf
Difficulty: ★★★☆☆ | Cost: $35-55 | Time: 3 hours
Here’s a trick I spotted in a high-end boutique and immediately stole for my own closet. Mount strips of crown molding horizontally along a wall, facing upward. The curved profile creates a perfect heel rest that displays shoes at an angle—like a store display, but in your closet.
Each 8-foot strip of molding costs about $15 and holds 8-10 pairs of heels or flats. Mount three strips spaced 12 inches apart vertically, and you’ve got shoe storage for 25+ pairs that takes up zero shelf space. The molding curve naturally cradles the shoe sole, preventing slippage.
12. Built-In Drawer Tower
Difficulty: ★★★★☆ | Cost: $100-180 | Time: 6-8 hours
For the ambitious DIYer with intermediate woodworking skills: build a tower of shallow drawers that fits into one side of your closet. These drawers hold undergarments, socks, workout gear, or anything that doesn’t hang well. The top becomes an additional folding surface.
I built a four-drawer tower using 1/2-inch Baltic birch plywood and full-extension drawer slides rated for 75 pounds. Each drawer is 4 inches deep—perfect for rolled t-shirts and folded jeans. The project took a full weekend, but it eliminated the need for a separate dresser in our bedroom, which freed up nearly 12 square feet of floor space.
For those interested in building wooden projects that add real value, our woodworking projects that sell guide covers similar drawer construction techniques that could turn this skill into side income.
13. Sliding Pant Rack on Ceiling Track
Difficulty: ★★★★☆ | Cost: $60-100 | Time: 4-5 hours
Install a short section of barn door track on the ceiling of your closet, perpendicular to the back wall. Hang a custom-built rack with multiple rods for pants. The entire rack slides left and right, giving you access to 30+ pairs of pants while occupying the dead space directly behind your hanging clothes.
This is a game-changer for couples sharing one closet. My side holds shirts on the fixed rod, while the sliding pant rack behind it houses my entire work trouser collection. I slide it left to access the shirts, right to grab pants. My wife claimed it was “excessive” until she saw how much hanging space it freed up. Now she wants one.
14. Full Closet Built-In with LED Lighting
Difficulty: ★★★★★ | Cost: $200-400 | Time: 12-16 hours
This is the capstone project—a floor-to-ceiling built-in system with dedicated zones for hanging, folding, shoes, and accessories. You’ll build a plywood framework, add shelves and rods, install trim for a seamless look, and wire in LED strip lighting for that luxury boutique feel.
Break this into two weekends. Weekend one: demolition, wall prep, painting, and framework. Weekend two: shelves, trim, hardware, and lighting. The LED strips are easier than they sound—peel-and-stick tape lights with a motion sensor switch cost about $25 and transform the closet experience entirely. No more squinting at dark corners trying to distinguish navy from black.
15. The “Everything Closet” Murphy System
Difficulty: ★★★★★ | Cost: $150-250 | Time: 2 weekends
For closets smaller than 4 feet wide: everything must earn its place. This system combines a wall-mounted folding table, pegboard side panels, overhead cubbies, dual hanging rods at split heights, and pull-out baskets below. It’s the Swiss Army knife of closet organization.
I built a version of this for a 38-inch wide hallway closet that needed to store coats, cleaning supplies, a vacuum, and gift-wrapping materials. The pegboard walls let me reconfigure hooks and baskets as seasons change. The fold-down table provides wrapping space that disappears when not needed. Every element serves at least two functions, which is the only way small-closet organization actually works long-term.
5 Small-Space Strategies Most People Overlook
Building the organizer is only half the battle. How you use the space determines whether your diy closet organizer systems actually solve the problem or just create prettier clutter. These five strategies made a bigger difference in our closets than any single shelf or rod.
Strategy 1: The “One In, One Out” Rule Enforced by Design
Design your system to hold a fixed quantity. I built our shoe rack to fit exactly 12 pairs—not 13. When new shoes arrive, old ones must depart. The physical constraint forces decisions that “maybe I’ll wear these again” thinking avoids. It sounds harsh, but after six months, we realized we hadn’t missed a single pair we’d donated.
Strategy 2: Vertical Zones by Usage Frequency
Prime real estate—between shoulder and knee height—belongs to daily-wear items. Seasonal gear goes high. Occasional-use items (formal wear, specialty equipment) go low or to the sides. This sounds obvious, but most closets I see put everyday clothes exactly where they’re hardest to reach, while last year’s Halloween costume enjoys prime eye-level placement.
Strategy 3: The 30% Empty Rule
Leave 30% of your closet’s capacity unused. I know, I know—it feels wasteful. But a closet at 100% capacity is a closet you can’t actually use. You need air gaps to slide hangers, space to pull out bins, and room to see what you own. Our closet became dramatically more functional when we stopped treating every cubic inch as storage potential.
Strategy 4: Lighting Changes Everything
I added a $15 motion-sensor LED strip under the top shelf, and suddenly we could see clothes that had been hiding in shadow for years. Dark corners create “dead zones” where items go to be forgotten. Light the entire closet—not just where the existing bulb reaches—and you’ll discover clothes you forgot you owned.
Strategy 5: The Floor Is NOT Storage
If items live on your closet floor permanently, your organizer system has failed. The floor should be clear—maybe a laundry basket at most. When I finally built shoe racks and elevated storage high enough to reclaim our closet floor, the entire room felt bigger and more luxurious. Vacuuming became possible. Finding shoes became instantaneous. Small change, massive quality-of-life improvement.
The 3 Measuring Mistakes That Ruin Closet Projects
I’ve made every one of these mistakes. My hope is you won’t have to. If you’re building any of the more complex diy closet organizer systems above, read this section twice.
Mistake 1: Measuring Once and Trusting Walls Are Square
Walls are never perfectly square. Measure width at the top, middle, and bottom of your closet opening. Use the narrowest measurement for any shelf that spans the full width. I learned this after cutting a beautiful shelf to 48 inches—only to discover the closet was 47-7/8 inches at the back. That 1/8-inch gap haunted me until I finally rebuilt it.
Mistake 2: Forgetting About Hanger Swing Radius
Clothes on hangers need about 22-24 inches of depth from the back wall. If you install shelves deeper than about 14 inches below hanging clothes, hangers will hit the shelf when you try to push clothes aside. Test with your actual hangers before finalizing shelf placement. Slim velvet hangers save about 2 inches of depth compared to thick wooden ones.
Mistake 3: Designing for Your Current Wardrobe
Unless you plan to own exactly the same clothes forever, build flexibility into your system. Adjustable shelves, removable rods, and modular components let your closet evolve. I initially built our closet entirely around folded sweaters—then moved to a warmer climate where I own exactly three sweaters. The fixed shelves that once made sense became wasted space. Adjustable tracks would have made reconfiguration a one-hour task instead of a complete rebuild.
Rental-Friendly Options: No Holes, No Headaches
Not everyone can drill into walls. I spent five years in apartments where security deposit anxiety prevented even a single nail hole. These approaches work within landlord restrictions and leave zero trace when you move out.
Freestanding wardrobe systems (like the IKEA hack in #9) sit inside the closet without attaching to walls. Tension rods and over-door organizers require no hardware. Command hooks rated for 7.5 pounds each can support lightweight shelving and hanging organizers. And modular cube storage units simply stack into place.
The trade-off: freestanding systems waste about 2-3 inches of width on each side compared to wall-mounted alternatives. In a 60-inch closet, you’re losing roughly 10% of your width. For most renters, that’s an acceptable compromise for the security deposit protection. If you’re navigating renter limitations, our renter-friendly decor hacks article covers many more strategies that apply beyond just closets.
Time to Reclaim Your Closet
That Sunday avalanche of sweaters that started this whole journey? It doesn’t happen anymore. Not because we own fewer things, but because everything now has a designated home. The boots are on their shelf. The sweaters are in their cubby. The belts are on their pull-out rack, behaving themselves.
diy closet organizer systems aren’t about creating a Pinterest-perfect space that looks staged. They’re about building a system that actually works for how you live—whether that means color-coded perfection or just knowing where your other shoe is hiding. Start with one project from this list. Give yourself a Saturday. See what happens when your closet stops fighting you and starts working for you.
Ready to tackle more organization projects? Browse our garage and workshop organization guides for the same practical, tested approach to getting your entire home under control.
Frequently Asked Questions
What is the cheapest DIY closet organizer system I can build?
The tension rod tier system costs under $25 and requires zero tools. Buy two or three tension rods, install them at different heights below your main hanging rod, and you’ve instantly doubled or tripled hanging capacity. It’s perfect for renters and takes about 15 minutes to set up.
How do I organize a closet that’s only 2 feet wide?
For ultra-narrow closets, focus entirely on vertical organization. Use the highest possible shelf for off-season storage, install a single hanging rod at the optimal height for your longest garment, add a slim shoe rack on the floor, and mount hooks or small organizers on any available side wall. The “Everything Closet” Murphy System (#15) was specifically designed for closets under 4 feet wide.
Are DIY closet systems actually cheaper than buying pre-made ones?
Yes, substantially. A basic reach-in closet system from a home improvement store runs $200-500 for standard sizes. A comparable DIY version using plywood and shelf tracks costs $80-200 and fits your exact dimensions. The savings increase with closet size, and the custom fit means you use space more efficiently.
What material is best for DIY closet shelves?
For shelves spanning more than 24 inches, use 3/4-inch plywood (Baltic birch if budget allows) or MDF with a solid wood front edge. Avoid particleboard for shelves that will hold significant weight—it sags over time. For short shelves under 24 inches, 1/2-inch plywood works fine if supported on three sides.
How do I organize a closet without any shelves?
Command hooks, hanging organizers, over-the-door racks, tension rods, and freestanding garment racks all work without any permanent shelving. A combination of double hanging rods (using tension rods below the main rod) and hanging fabric shelf units that suspend from the closet rod can create substantial organization without a single screw.
What’s the most common mistake in DIY closet organization?
Building for your current wardrobe instead of building flexible systems. Your clothing needs change seasonally and over time. Adjustable shelf tracks, removable rods, and modular cubbies let you reconfigure as needed. Fixed shelving becomes a liability when your storage requirements shift.
Can I build a closet organizer system in one weekend?
Most projects rated 1-3 stars in difficulty can be completed in a single Saturday, assuming you have basic tools and buy materials ahead of time. The more complex built-in systems (#14 and #15) typically require two weekends—one for demolition and prep, another for construction and finishing.
{“@context”:”https://schema.org”,”@type”:”FAQPage”,”mainEntity”:[{“@type”:”Question”,”name”:”What is the cheapest DIY closet organizer system I can build?”,”acceptedAnswer”:{“@type”:”Answer”,”text”:”The tension rod tier system costs under $25 and requires zero tools. Buy two or three tension rods, install them at different heights below your main hanging rod, and you’ve instantly doubled or tripled hanging capacity. It’s perfect for renters and takes about 15 minutes to set up.”}},{“@type”:”Question”,”name”:”How do I organize a closet that’s only 2 feet wide?”,”acceptedAnswer”:{“@type”:”Answer”,”text”:”For ultra-narrow closets, focus entirely on vertical organization. Use the highest possible shelf for off-season storage, install a single hanging rod at the optimal height for your longest garment, add a slim shoe rack on the floor, and mount hooks or small organizers on any available side wall. The Everything Closet Murphy System was specifically designed for closets under 4 feet wide.”}},{“@type”:”Question”,”name”:”Are DIY closet systems actually cheaper than buying pre-made ones?”,”acceptedAnswer”:{“@type”:”Answer”,”text”:”Yes, substantially. A basic reach-in closet system from a home improvement store runs $200-500 for standard sizes. A comparable DIY version using plywood and shelf tracks costs $80-200 and fits your exact dimensions. The savings increase with closet size, and the custom fit means you use space more efficiently.”}},{“