crochet amigurumi for beginners: 7 Essential Steps to Make Your First Plushie in 2026
- crochet amigurumi for beginners: 7 Essential Steps to Make Your First Plushie in 2026
- 📋 Key Takeaways
- Table of Contents
- 1. What Exactly is Amigurumi? (And Why You'll Love It)
- The Psychology Behind the Plushie
- It's a Gateway to a Creative Business
- 2. Essential Supplies for crochet amigurumi for beginners
- Choosing the Right Yarn (Don't Buy the Fluffy Stuff Yet!)
- The Magic of the Right Crochet Hook
- The "Must-Have" Accessories
- 3. The 4 Core Stitches You Must Know
- The Magic Ring (The Ultimate Boss Fight)
- The Single Crochet (sc)
- Increasing (inc)
- The Invisible Decrease (invdec)
- 4. How to Read an Amigurumi Pattern Without Getting Confused
- Decoding the Abbreviations
- Translating a Pattern Line
- 5. Step-by-Step crochet amigurumi for beginners Project
- Phase 1: The Setup (Growing the Circle)
- Phase 2: The Body (Building Height)
- Phase 3: Closing it Up (Decreasing)
- 6. Assembly and Finishing Touches (The Tricky Part)
- Pin Before You Sew
- The Whip Stitch Technique
- Adding Facial Features
- 7. Common Mistakes Beginners Make (And How to Fix Them)
- Why Are There Holes in My Amigurumi?
- Help! My Plushie is Inside-Out!
- My Stitch Count is Always Wrong
- 8. Your Next Steps in the Amigurumi Journey
- 9. Frequently Asked Questions
- Is amigurumi hard for beginners?
- What is the best yarn for amigurumi beginners?
- Do I need to know how to crochet before trying amigurumi?
- Why does my amigurumi look lopsided?
- How do I wash my amigurumi toys?
Have you ever scrolled through Instagram or Pinterest, seen an adorable, squishy crocheted octopus or a tiny stuffed bee, and thought, “I really wish I could make that”? You definitely aren’t alone. Diving into crochet amigurumi for beginners might seem incredibly intimidating at first glance. All those tight stitches, strange abbreviations, and tiny limbs look like a complex mathematical puzzle designed to frustrate you.
But here is the honest truth: if you can tie a simple knot and count to ten, you can absolutely master crochet amigurumi for beginners. Seriously. You don’t need a background in textile arts, and you don’t need to spend hundreds of dollars on fancy equipment. All you need is a hook, some yarn, and a little bit of patience. By the time you finish reading this comprehensive guide, you will know exactly how to read a pattern, choose the right materials, and stitch together your very first plushie without wanting to pull your hair out.
📋 Key Takeaways
- Start Small: Your first project should be a simple sphere shape, like a whale or a bee, to help you master basic tension.
- Hook Size Matters: Always use a crochet hook that is 1-2 sizes smaller than what the yarn label recommends to prevent stuffing from showing through your stitches.
- The Magic Ring is Essential: Mastering this single technique is the foundation of almost all amigurumi projects.
- Invisible Decreases are Game Changers: Using the front loops only for your decreases will make your plushie look smooth and professional.
- Count Your Stitches: Using a stitch marker is non-negotiable if you want to avoid lopsided toys.
1. What Exactly is Amigurumi? (And Why You’ll Love It)
Before we start tangling ourselves in yarn, let’s talk about what we are actually doing here. The word “amigurumi” (pronounced ah-mee-goo-roo-mee) comes from Japan. It is a blend of two Japanese words: ami, meaning crocheted or knitted, and nuigurumi, which translates to a small stuffed doll. While the art form has been around for decades in Japan, it exploded in global popularity over the last few years thanks to social media.
The Psychology Behind the Plushie
Why is everyone suddenly obsessed with making these little yarn creatures? For one, the barrier to entry is incredibly low. Unlike woodworking or pottery, you can pack your entire project into a small tote bag and take it on the train, to a coffee shop, or just curl up on your couch.
There is also a profound mental health benefit. The repetitive motion of crocheting has been shown to reduce cortisol levels and induce a state of mindfulness. You are literally stitching your stress away while creating something undeniably cute. According to Wikipedia’s history of Amigurumi, the kawaii (cute) aesthetic is a core component of the craft, which naturally brings a sense of joy and comfort to both the maker and the receiver.
It’s a Gateway to a Creative Business
Here is the really exciting part: once you get good at this, people will absolutely want to buy your creations. Handmade plushies are incredibly popular at craft fairs and online marketplaces. If you are looking to turn this relaxing hobby into a side hustle, you can easily transition from making gifts for friends to running a small business. If that sounds appealing, you should definitely check out our guide on DIY Crafts to Make and Sell: 10 Profitable Ideas for 2026 to see how amigurumi fits into the broader handmade market.
2. Essential Supplies for crochet amigurumi for beginners
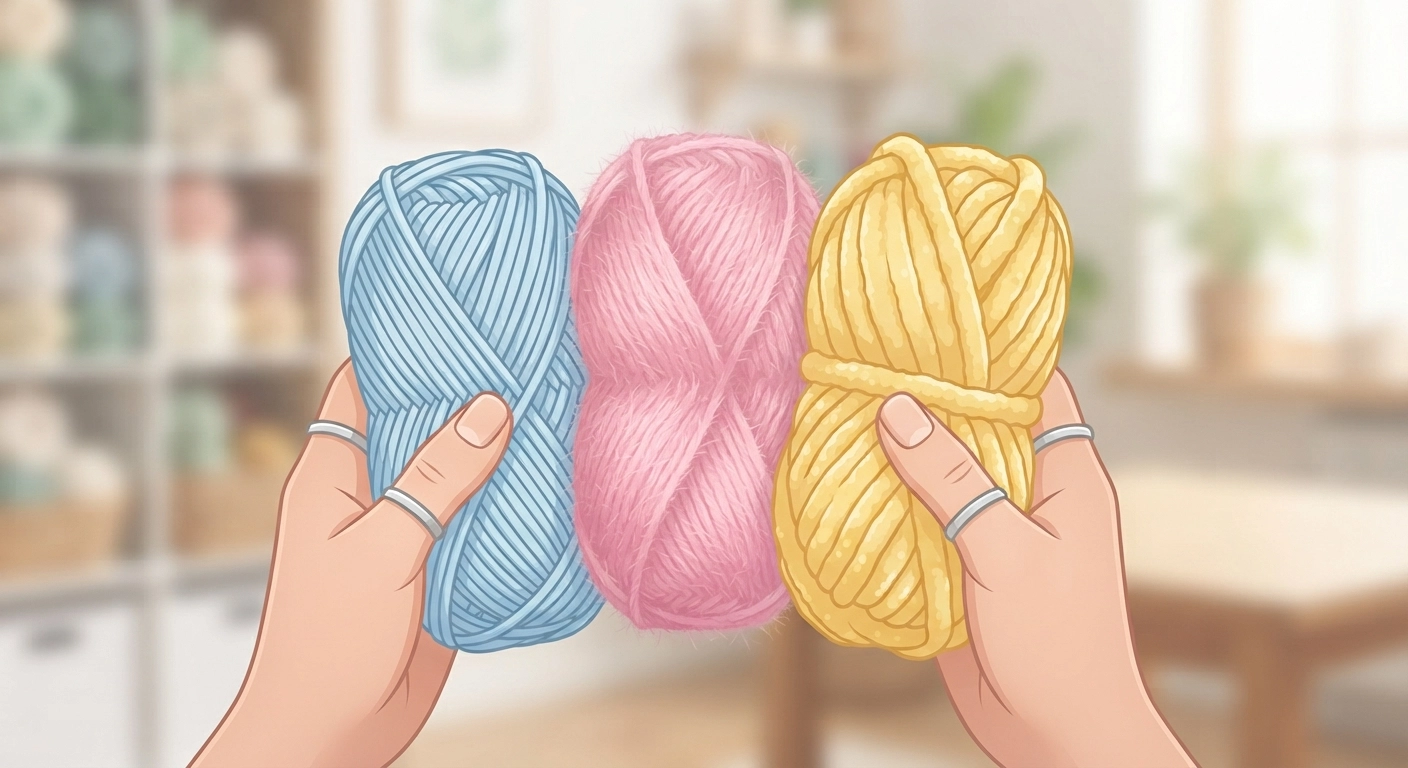
Walking into a craft store for the first time is overwhelming. There are walls of yarn, hundreds of hooks, and gadgets you didn’t even know existed. Let’s cut through the noise. You only need a few specific items to start your crochet amigurumi for beginners journey successfully.
Choosing the Right Yarn (Don’t Buy the Fluffy Stuff Yet!)
The biggest mistake new crocheters make is buying novelty yarn. Yes, that fuzzy, fluffy, velvet yarn looks incredibly soft, but it is an absolute nightmare for beginners because you cannot see your stitches. When you are learning, stitch visibility is your best friend.
For your first few projects, stick to 100% cotton or a cotton-acrylic blend in a worsted weight (Weight 4). According to the Craft Yarn Council standard yarn weight system, worsted weight is the perfect middle ground—not too thin, not too bulky. Cotton yarn doesn’t split easily, and it holds its shape beautifully, giving your amigurumi that crisp, professional look.
The Magic of the Right Crochet Hook
Amigurumi is different from making a scarf or a blanket. When making a blanket, you want soft, drapey fabric. When making a stuffed animal, you want a stiff, dense fabric so the white stuffing doesn’t peek out through the holes.
The secret? Always use a hook that is 1 to 2 sizes smaller than what the yarn label recommends. If your worsted weight yarn calls for a 5.0mm hook, grab a 3.5mm or 4.0mm hook instead. I highly recommend investing in an ergonomic hook with a thick rubber handle. Amigurumi requires tight tension, and a standard thin metal hook will make your hand cramp up in 20 minutes.
The “Must-Have” Accessories
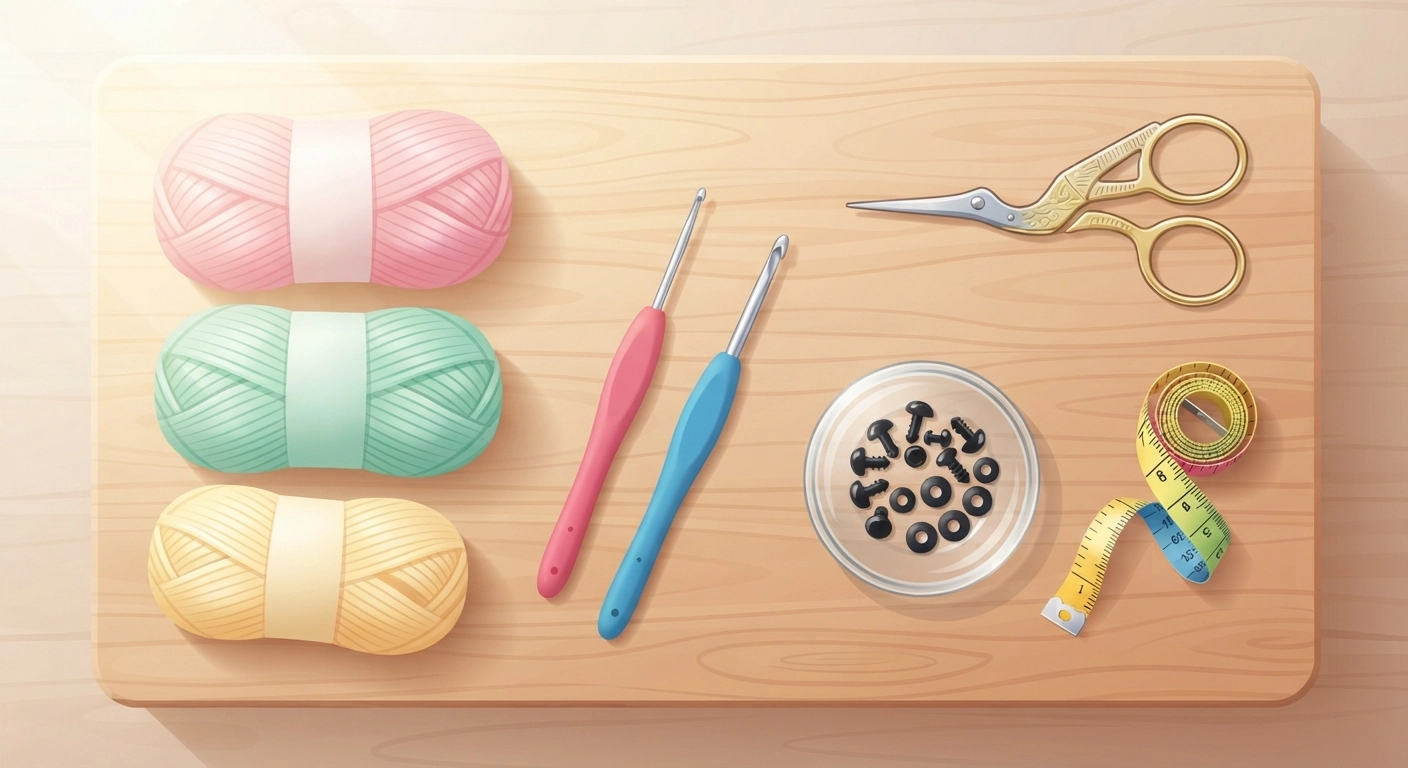
Beyond yarn and a hook, you will need:
- Stitch Markers: Amigurumi is worked in continuous spirals. Without a stitch marker, you will lose your place in about three seconds. (Pro tip: A bobby pin or a scrap piece of contrasting yarn works perfectly if you don’t want to buy plastic markers).
- Safety Eyes: These are plastic eyes that snap together with a washer on the back. They instantly give your plushie a professional look. Note: Safety eyes are not safe for children under 3 years old. If making a baby toy, embroider the eyes with black yarn instead.
- Polyester Fiberfill: This is the stuffing. A little goes a long way.
- A Tapestry Needle: A blunt needle with a large eye, used for sewing the body parts together.
3. The 4 Core Stitches You Must Know
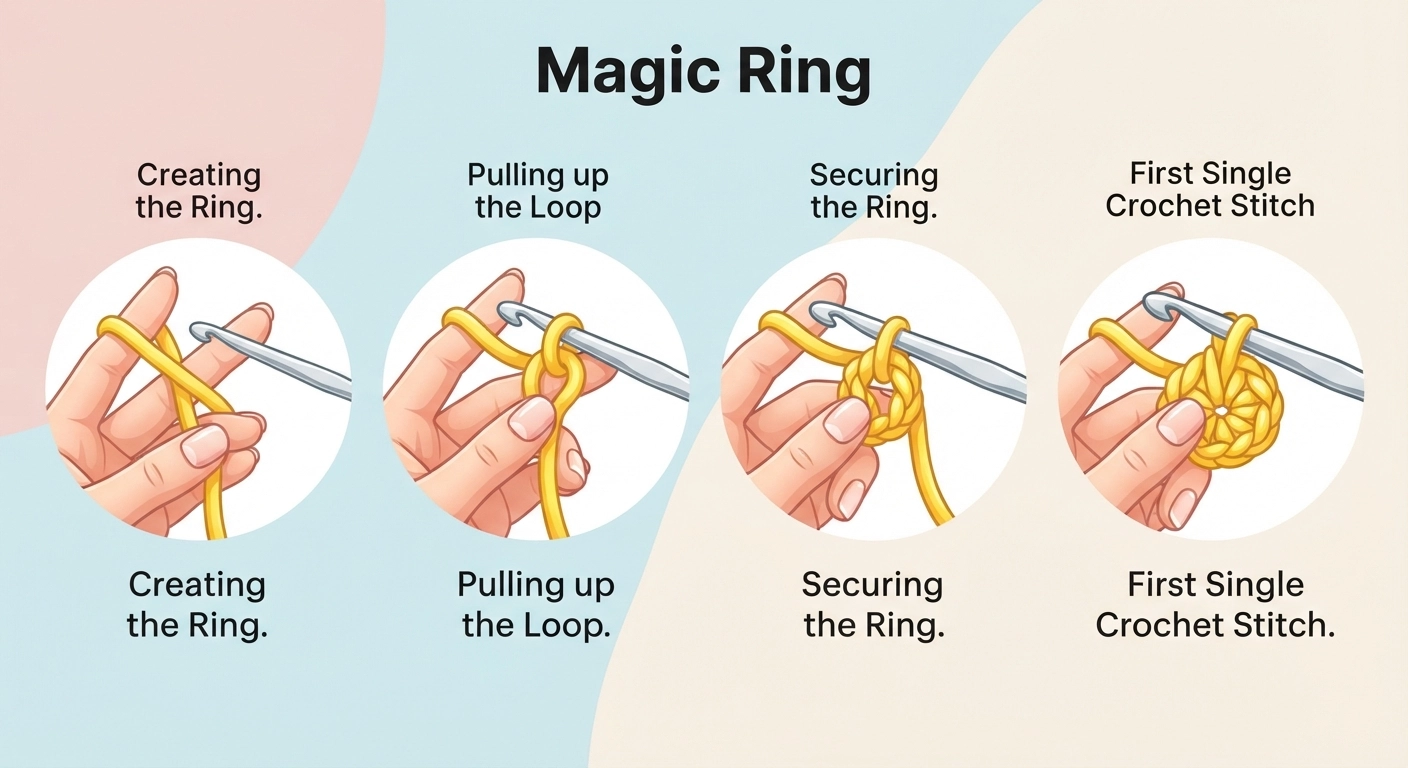
You might look at a complex crocheted dragon and think it requires advanced, secret techniques. It doesn’t. Almost every amigurumi pattern in the world is built on just four basic concepts. Once you master these, the world is your oyster.
The Magic Ring (The Ultimate Boss Fight)
Let’s be real for a second. The Magic Ring (sometimes called a Magic Circle) is the nemesis of every new crocheter. I remember throwing my hook across the room the first time I tried it. But you cannot avoid it. It is the technique used to start crocheting in a circle without leaving a visible hole in the center.
Instead of chaining stitches and joining them (which leaves a gap), you create an adjustable loop, crochet your first round of stitches into that loop, and then pull the tail tight to close the hole completely. It takes practice. Watch a few slow-motion video tutorials, take a deep breath, and keep trying. Once your hands memorize the motion, you’ll do it without thinking.
The Single Crochet (sc)
This is the bread and butter of crochet amigurumi for beginners. About 95% of your plushie will be made of single crochet stitches. To do it:
- Insert your hook into the next stitch.
- Yarn over (wrap the yarn around the hook) and pull up a loop. You now have two loops on your hook.
- Yarn over again and pull through both loops on the hook.
That’s it. You just made a single crochet.
Increasing (inc)
To make your circle wider (like when shaping a head), you need to add stitches. An increase is incredibly simple: you just place two single crochet stitches into the exact same hole. That’s all an increase is!
The Invisible Decrease (invdec)
To make your shape smaller (like tapering down to the neck), you need to decrease. A standard decrease can look bulky and leave ugly gaps in your work. The “Invisible Decrease” is a technique you must learn from day one.
Instead of inserting your hook through both loops of the stitch, you insert it only into the Front Loops of the next two stitches, yarn over, and complete a single crochet. It pulls the stitches together seamlessly, and true to its name, it is virtually invisible on the finished toy.
If you’re already thinking about how these cute creations could brighten up a space, you’re on the right track. Many people use small amigurumi pieces as desk buddies or nursery decorations. You can find more inspiration for minimalist, cozy spaces in our Easy DIY Room Decor Aesthetic guide.
4. How to Read an Amigurumi Pattern Without Getting Confused
Opening your first crochet pattern can feel like looking at an alien language. What on earth does Rnd 4: [2 sc, inc] x 6 (24) mean? Don’t panic. Pattern designers use a standardized shorthand to save space. Let’s decode it.
Decoding the Abbreviations
Here is a quick cheat sheet for the most common terms you will encounter in crochet amigurumi for beginners:
- MR: Magic Ring
- sc: Single Crochet
- inc: Increase (2 sc in one stitch)
- dec / invdec: Decrease / Invisible Decrease
- st / sts: Stitch / Stitches
- BLO / FLO: Back Loop Only / Front Loop Only
- FO: Fasten Off (cut the yarn and pull it through to secure)
Translating a Pattern Line
Let’s look at that confusing line again: Rnd 4: [2 sc, inc] x 6 (24)
Here is exactly how you read it out loud in plain English:
“In Round 4, I will make one single crochet in the next two stitches, and then do an increase in the third stitch. I will repeat this exact sequence inside the brackets 6 times total. By the time I finish this round, I should have exactly 24 stitches.”
The number in the parentheses at the very end of the line—in this case, (24)—is your stitch count. This is your built-in safety net. If you reach the end of the round and count 23 or 25 stitches, you made a mistake and need to go back. This is why stitch markers are your best friend!
5. Step-by-Step crochet amigurumi for beginners Project
Theory is great, but practice is better. Let’s walk through the exact anatomy of a basic amigurumi sphere. If you can make a sphere, you can make a head, a body, an apple, or a little whale. Almost everything starts right here.
Phase 1: The Setup (Growing the Circle)
You always start at the top of the head and work your way down.
Round 1: You start with a Magic Ring and place 6 single crochets inside it. Pull it tight. (6 stitches)
Round 2: You place an increase (2 sc) into every single stitch. (12 stitches)
Round 3: You do 1 sc, then 1 inc. Repeat this all the way around. (18 stitches)
Round 4: You do 2 sc, then 1 inc. Repeat around. (24 stitches)
Notice the mathematical pattern? Each round, you are adding 6 stitches. The circle stays flat and grows wider.
Phase 2: The Body (Building Height)
Once your circle is as wide as you want the head to be, you stop increasing. For the next several rounds, you will simply put one single crochet into every stitch. (e.g., Rounds 5-9: sc in all 24 sts).
This is where the magic happens. Because you are no longer adding stitches, the flat circle will naturally start to curl inward, forming a bowl shape. This is the walls of your plushie’s head!
Phase 3: Closing it Up (Decreasing)
Before the hole gets too small, you need to add your safety eyes (usually between Rounds 6 and 7) and stuff the toy firmly. Once stuffed, you reverse the math you did in Phase 1.
Round 10: 2 sc, 1 invdec. Repeat around. (18 stitches)
Round 11: 1 sc, 1 invdec. Repeat around. (12 stitches)
Round 12: invdec in every stitch. (6 stitches)
Finally, you cut the yarn, thread it through a needle, and weave it through those final 6 stitches, pulling tight to close the hole completely. Congratulations, you just crocheted an amigurumi ball!
6. Assembly and Finishing Touches (The Tricky Part)
I will let you in on a little secret in the crochet community: everyone loves crocheting the parts, but almost everyone hates sewing them together. Assembly can be tedious, and if done poorly, your cute teddy bear can end up looking like a Picasso painting. But with a few simple tricks, you can make this process painless.
Pin Before You Sew
Never just hold an arm in place and start sewing. It will slip, and you will end up with a lopsided toy. Use long sewing pins to attach the arms, legs, and ears exactly where you want them. Take a step back and look at the toy from the front, side, and top. Does it look balanced? If not, unpin and adjust. Only thread your needle when you are 100% happy with the placement.
The Whip Stitch Technique
When attaching an open piece (like an arm) to a closed piece (like the body), the whip stitch is your go-to method. Thread your yarn tail onto your tapestry needle. Go into a stitch on the main body, come up, and then go through both loops of the stitch on the arm. Pull tight. Move to the next stitch and repeat. The key to seamless joints is pulling the yarn firmly after every single stitch so the seam sinks into the fabric and becomes invisible.
Adding Facial Features
Sometimes, safety eyes aren’t enough. You might want to embroider a little smile, some sleepy eyelashes, or rosy cheeks. Use a thinner yarn or embroidery floss for this. A simple “V” shape makes a perfect little animal mouth. Take your time here—the facial expression is what gives your crochet amigurumi for beginners project its true personality.
If you find that your finishing skills are top-notch, you might be sitting on a goldmine. Beautifully finished handmade items command premium prices online. If you are curious about how to evaluate the worth of your time and materials, take a look at our comprehensive guide on How to Price Your DIY Crafts for Etsy.
7. Common Mistakes Beginners Make (And How to Fix Them)
You are going to make mistakes. It is a guaranteed part of the learning process. The good news is that yarn is very forgiving—you can always pull it out (called “frogging”) and try again. Here are the most common pitfalls and how to avoid them.
Why Are There Holes in My Amigurumi?
If you can clearly see the white stuffing showing through your stitches, you have a tension problem. This is usually caused by one of three things:
- Your hook is too big. Remember, drop down 1-2 hook sizes from the yarn label recommendation.
- Your tension is too loose. Try holding the yarn a bit tighter as it flows through your non-dominant hand.
- You are overstuffing. Yes, you want the toy to be firm, but if you cram too much fiberfill inside, it will stretch the stitches apart.
Help! My Plushie is Inside-Out!
This is incredibly common for beginners. When you start crocheting your sphere and it begins to curl into a bowl, the natural tendency is to let it curl inward, meaning you are working on the inside of the bowl. This results in the “wrong side” of the stitches facing outward (they look like little horizontal dashes instead of clean “V” or “X” shapes).
The Fix: Simply pop the bowl the other way! The right side of the stitches should always be facing you on the outside, and your crochet hook should be working on the edge closest to your body, working clockwise around the rim.
My Stitch Count is Always Wrong
You get to the end of the round, the pattern says you should have 36 stitches, but you only have 34. What happened? You likely missed a stitch or forgot an increase.
Do not just wing it and add random stitches to make up the numbers. This will warp the shape of your toy. Unravel your work back to your stitch marker and count carefully as you redo the round. Using a stitch marker at the first stitch of every single round is the only way to prevent this.
8. Your Next Steps in the Amigurumi Journey
Learning crochet amigurumi for beginners is a journey of patience, but the reward of holding a physical, squishy character that you created from a single strand of string is unmatched. You now know the science behind the yarn, the magic of the invisible decrease, and how to decode those intimidating patterns.
Your next step is simple: pick a beginner-friendly pattern—like a small whale, a bumblebee, or a simple mushroom—grab your hook, and start practicing that Magic Ring. Don’t worry if your first few attempts look a little wonky. Every expert crocheter has a slightly deformed first project hiding in their closet!
Once you get the hang of it, you might find yourself exploring other creative avenues. From paper crafts to digital designs, the DIY world is vast. If you want to expand your crafting repertoire, check out our tutorial on How to Make Paper Flowers for another fun, low-cost creative outlet.
9. Frequently Asked Questions
Is amigurumi hard for beginners?
Not at all! While it requires learning a few specific techniques (like the magic ring and invisible decrease), amigurumi uses very basic stitches. Because projects are small, they work up quickly, making it a highly rewarding craft for beginners who want fast results.
What is the best yarn for amigurumi beginners?
The best yarn to start with is a worsted weight (Weight 4) cotton or cotton-acrylic blend. Cotton provides excellent stitch definition, meaning you can easily see where to insert your hook. Avoid fuzzy, fluffy, or chenille yarns until you are comfortable reading your stitches.
Do I need to know how to crochet before trying amigurumi?
It helps, but it is not strictly necessary. Many people learn to crochet specifically by jumping straight into an amigurumi project. As long as you take the time to practice holding the yarn and mastering the single crochet stitch first, you can absolutely start your crochet journey here.
Why does my amigurumi look lopsided?
Lopsided toys are usually the result of inconsistent tension or incorrect stitch counts. If you crochet tightly one day and loosely the next, the shape will warp. Always use a stitch marker to ensure you have the exact number of stitches required for each round.
How do I wash my amigurumi toys?
If you used cotton or acrylic yarn, you can usually spot-clean the toy with a damp cloth and mild soap. For a deeper clean, place the plushie in a mesh laundry bag and wash it on a gentle, cold cycle. Always air dry them; putting them in the dryer can melt acrylic yarn or warp the stuffing.