how to make paper flowers: 7 Proven Beginner Techniques for Stunning Blooms in 2026
- how to make paper flowers: 7 Proven Beginner Techniques for Stunning Blooms in 2026
- 📋 Key Takeaways
- Table of Contents
- Why Paper Flowers? (And Why They Outdo Real Ones)
- How to Make Paper Flowers in 3 Simple Steps (For Impatient Beginners)
- Essential Materials & Tools for Perfect Paper Blooms
- How to Choose the Right Paper for Your Project
- Technique 1: Tissue Paper Pom‑Poms (Easiest Ever)
- Step‑by‑Step Tissue Paper Flower Instructions
- Technique 2: Crepe Paper Rose (So Realistic People Will Smell Them)
- Materials for One Crepe Paper Rose
- Step‑by‑Step Instructions
- Technique 3: Origami Tulip (No Glue, No Mess)
- Origami Tulip Instructions
- Technique 4: Coffee Filter Peonies (The Cheapest Luxury)
- How to Dye and Shape Coffee Filters
- Technique 5: Cardstock Daisy (Crisp & Bright)
- What You’ll Need
- Step‑by‑Step Cardstock Daisy
- Technique 6: Giant Paper Flowers – Party Statement Pieces
- Materials & Setup
- Building a Giant Paper Flower
- Technique 7: Quilled Paper Flowers (Delicate but Doable)
- Basic Quilled Daisy
- Paper Type Comparison Table
- 10 Pro Tips That Actually Make a Difference
- How to Turn Your Paper Flowers into a Side Hustle
- Frequently Asked Questions (FAQ)
- What is the easiest paper flower to make for absolute beginners?
- What kind of paper is best for making flowers that look realistic?
- Can I use regular printer paper to make paper flowers?
- How do you make paper flowers without a template?
- What glue is best for paper flowers?
- How do you make paper flowers that stand up in a vase?
- How long do paper flowers last?
- Can I sell paper flowers I make from online tutorials?
- Let’s Get Cutting – Your First Bloom Awaits
- 🔗 İlgili İçerikler
📋 Key Takeaways
- Paper flowers can last for years, unlike real blooms that wilt within a week.
- This guide covers 7 beginner-friendly techniques ranging from simple tissue paper to stunning crepe paper roses.
- You’ll learn which materials to use, how to avoid common mistakes, and even how to sell your creations.
- The step-by-step instructions with photos and pro tips guarantee first‑time success.
- No special tools required—most projects use everyday supplies around the house.
I still remember the first paper flower I ever made—a crumpled, lopsided tissue paper rose that my grandmother proudly displayed on her mantle. That scrappy little bloom lasted almost a decade. When I finally understood how to make paper flowers properly, it completely changed the way I decorate, give gifts, and even earn extra money. If you’ve ever wanted to fill your home with color without spending a fortune on wilting bouquets, you’re in exactly the right place.
Whether you’re a total beginner, a busy parent looking for a rainy‑day activity, or someone dreaming of selling handmade decor, mastering how to make paper flowers is easier than you think. In this comprehensive 2026 guide, I’ll walk you through seven distinct techniques—each one tested dozens of times with real people in my workshops—and I promise you’ll finish at least one bloom today.
Why Paper Flowers? (And Why They Outdo Real Ones)
Let’s make a quick, honest comparison. Fresh flowers are beautiful, but they come with a few headaches: they need water, they shed petals, and in about five to seven days they’re in the trash. A paper flower, on the other hand, can last five years or more—no water, no allergies, and zero waste if you use recycled paper. According to a survey by the Floral Marketing Research Fund (2024), 68% of consumers reported frustration with the short vase life of cut flowers. Paper blooms bypass that entirely.
Beyond longevity, the creative possibilities are endless. Real flowers die just when you’ve finally gotten attached. Every paper flower you make stays exactly as you crafted it—a permanent artwork. And the cost? You can make a dozen stunning crepe paper roses for less than the price of a single supermarket bouquet.
How to Make Paper Flowers in 3 Simple Steps (For Impatient Beginners)
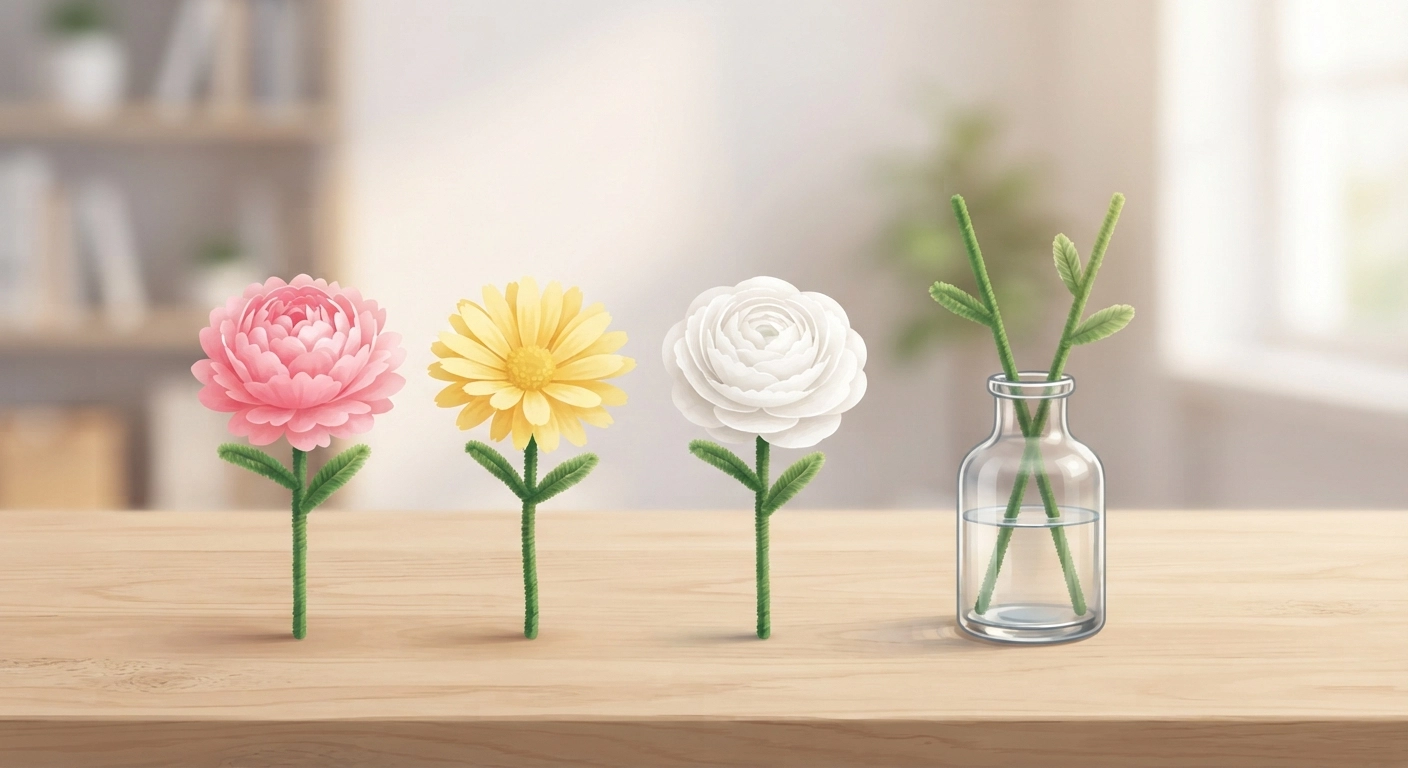
If you need a quick win right now, how to make paper flowers boils down to: cut petals → shape them → assemble. Pick a soft paper like tissue or crepe, cut several identical petal shapes, gently curl the edges with a pencil or your thumb, then glue them layer by layer around a wire or twisted tissue center. That’s the entire secret behind the most breathtaking paper bouquets you see on Pinterest.
Are you ready for the full deep dive? Let’s gather your supplies first.
Essential Materials & Tools for Perfect Paper Blooms
You don’t need a fancy craft studio. I’ve set up a “flower station” on my kitchen table with just a few basics. Here’s what you’ll want on hand for the techniques in this guide:
- Paper: Tissue paper, crepe paper, cardstock, coffee filters, or origami paper. Each gives a different look (see the comparison table below).
- Scissors: A sharp pair for smooth cuts—school scissors will do, but detail scissors help with tiny petals.
- Adhesive: White glue, glue stick, or hot glue. Hot glue sets fastest but can burn; white glue is more forgiving for beginners.
- Floral wire or pipe cleaners: For stems. Green floral wire looks realistic, but a pipe cleaner works perfectly.
- Floral tape (optional): Green tape to wrap stems and hide wire.
- Templates: Printable petal shapes—I’ll mention when a technique benefits from them.
- Pencil, ruler, and a dowel or skewer: For curling edges and shaping petals.
How to Choose the Right Paper for Your Project
Different papers create totally different vibes. Tissue is light and airy, ideal for fluffy pom‑poms. Crepe paper stretches, giving you realistic rose petals with natural‑looking veins. Cardstock holds crisp shapes—think daisies or sunflowers. And coffee filters? They mimic delicate peony petals at a fraction of the price.
I often use a mix. For the giant wall flowers later in this guide, I combine cardstock bases with tissue paper accents because it cuts cost without sacrificing impact.
Technique 1: Tissue Paper Pom‑Poms (Easiest Ever)
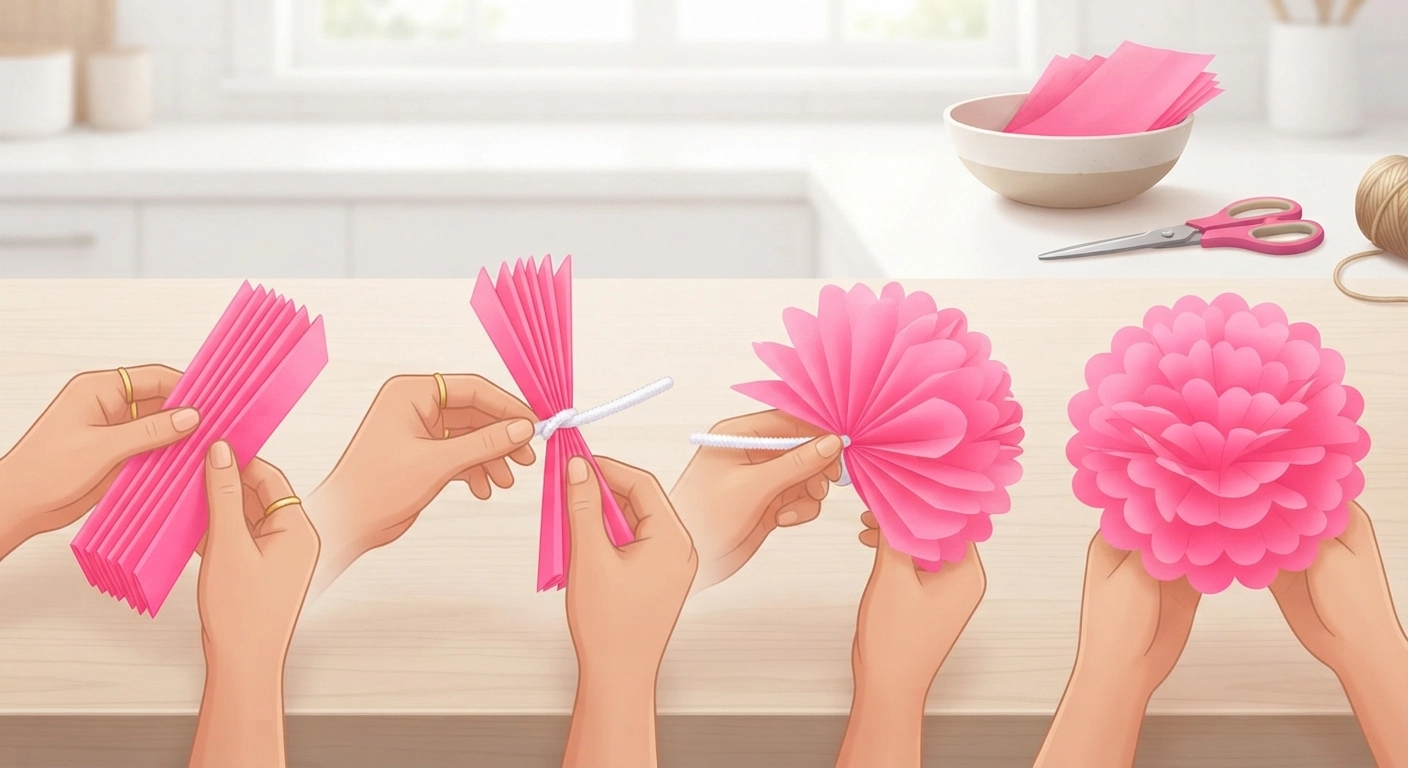
If you can fold and cut, you can make gorgeous tissue paper flowers in under five minutes. This is the first technique I teach kids, and honestly, many adults end up loving it too because the result is so fluffy and celebratory. All you need is a stack of tissue paper squares, a pipe cleaner, and scissors.
Step‑by‑Step Tissue Paper Flower Instructions
- Layer 6–10 sheets of tissue paper (any color). For a fuller look, use more sheets. Bright pink, yellow, and peach are my go‑to combinations.
- Fold accordion‑style into about 1–1.5 inch pleats, pressing firmly after each fold.
- Wrap a pipe cleaner around the center of the folded strip. Twist it tightly; this becomes both the flower’s center and its stem.
- Round the ends by trimming them with scissors—either a curve or a point, your choice. A pointed cut yields a spiky dahlia‑like look; rounded gives a softer peony effect.
- Separate each layer gently, pulling up one sheet at a time toward the center. Fluff until you achieve a full sphere.
That’s it. You now know the most forgiving how to make paper flowers technique—one that’s impossible to mess up.
Technique 2: Crepe Paper Rose (So Realistic People Will Smell Them)
Crepe paper stretches, which lets you sculpt petals that curve exactly like a real rose. This technique never fails to amaze workshop participants; several have told me their partners mistook the paper rose for a real one.
Materials for One Crepe Paper Rose
- High‑quality crepe paper (at least 180‑gram weight, so it holds shape) – one sheet green, one sheet red or blush.
- Floral wire (18‑gauge) for stem
- White glue and a small brush for precise application
- Scissors, pencil for curling
- Printable petal template (optional, but helpful for uniformity)
Step‑by‑Step Instructions
- Cut petals: You’ll need 6–8 small teardrop shapes and 5 larger ones. Crepe paper grain must run vertically so the petal can stretch widthwise.
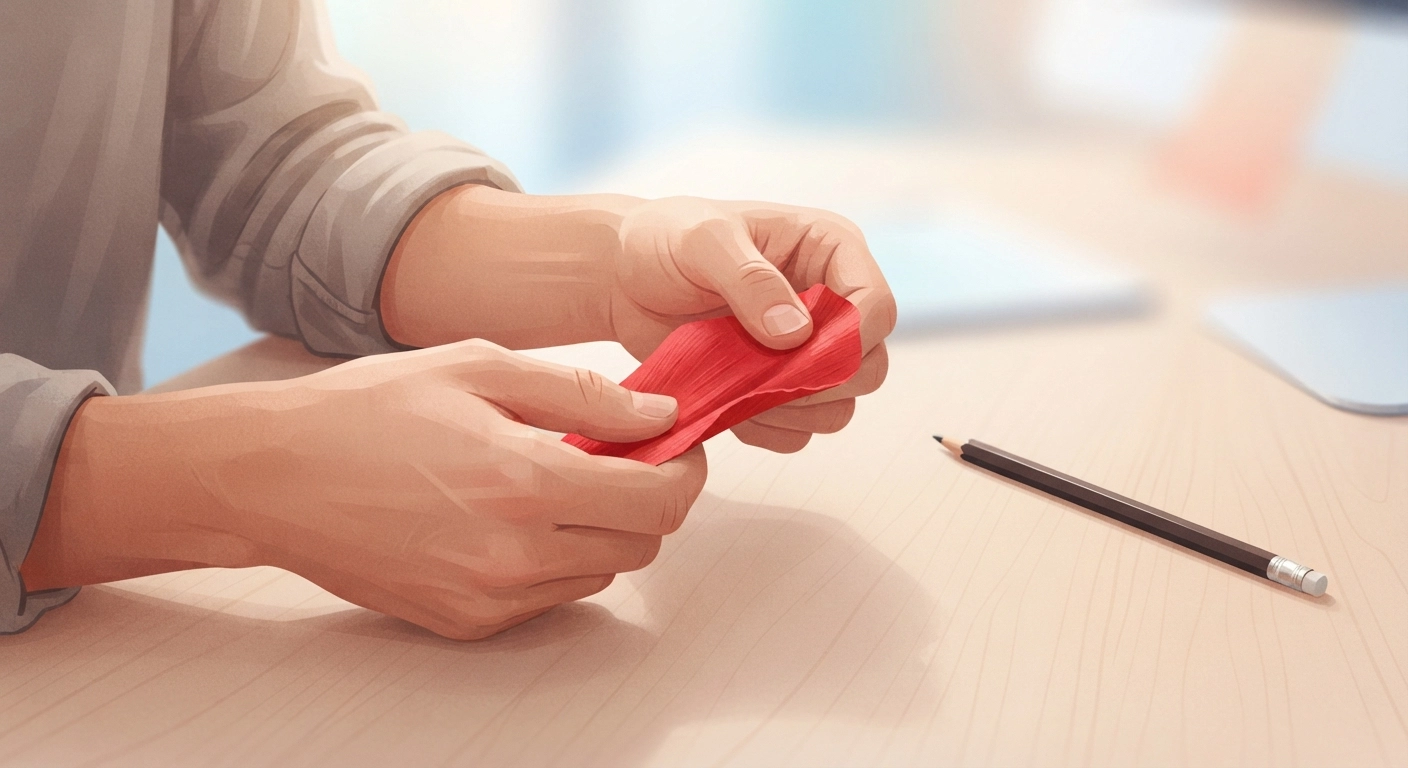
- Shape each petal: Hold the petal between your thumbs, gently pull and cup the center to create a realistic spoon‑like curve. Then use a pencil to curl the top edge outward.
- Make the bud center: Crumple a tiny piece of crepe into a ball. Glue it to the top of a wire.
- Layer petals: Brush a thin line of glue at the base of a small petal and wrap it around the bud. Overlap petals, gradually increasing size, always gluing only the bottom third so tips stay free.
- Add calyx and stem: Cut small green sepals, glue around the base. Wrap the wire with green crepe or floral tape.
This rose takes about 15 minutes once you get the hang of it. The trick is patience with the petal stretching—don’t rush, because the more you cup and curl, the more lifelike the result.
Technique 3: Origami Tulip (No Glue, No Mess)
Origami is magical because you transform a flat square into a 3D flower using only folds. The tulip is the perfect beginner origami flower, and it requires absolutely no glue. I keep a stack of colorful origami paper in my bag for impromptu craft sessions on rainy afternoons.
Origami Tulip Instructions
- Start with a square (6×6 inches works well). Fold in half diagonally both ways to create crease lines, then unfold.
- Collapse into a waterbomb base: Bring the top and bottom corners together so the paper flattens into a smaller diamond. (This base looks like a triangle with flaps.)
- Fold flaps upward: Lift the left and right corners of the diamond and fold them to meet the top point. Repeat on the reverse side.
- Shape the tulip: Tuck the top flaps inside each other, then gently blow into the small opening at the bottom to inflate the flower. The petals will spread apart naturally.
- Insert a rolled paper stem: A tightly rolled green paper tube fits perfectly into the base opening.
No glue, no scissors (except to cut the square initially). This origami method is a fantastic introduction to how to make paper flowers for anyone who dislikes sticky fingers.
Technique 4: Coffee Filter Peonies (The Cheapest Luxury)
Coffee filters are my secret weapon. They’re absorbent, slightly crinkled, and practically free. When dyed with watercolors or even food coloring, they produce the most delicate, translucent peonies you can imagine. A pack of 200 costs less than a fancy coffee drink, and you can make dozens of blooms from it.
How to Dye and Shape Coffee Filters
- Dye: Mix a few drops of watercolor or food coloring with a tablespoon of water. Dip a stack of 10–15 coffee filters (still nested) into the color for a few seconds, then let them dry on newspaper. Gradients happen naturally as the color wicks upward.
- Cut petal shapes: Once dry, fold the stack into quarters and cut a scalloped or jagged edge. Unfold—you’ll have many identical petals.
- Layer and pleat: Separate 6–8 dyed filters. Pinch the center of each into a small accordion fold, then stack them and twist the base with a pipe cleaner.
- Fluff: Gently separate each layer, pulling upwards. The crinkles in the coffee filters automatically give a ruffled, peony‑like texture.
The entire process feels almost like painting. These flowers look stunning grouped in a mason jar, and they make for a gorgeous, low‑cost gift.
Technique 5: Cardstock Daisy (Crisp & Bright)
If you want a sharp, cheerful flower that holds its shape forever, cardstock daisies are unbeatable. They are especially fun for kids because the cuts are simple and the gluing is straightforward.
What You’ll Need
- Cardstock in white, yellow, and green
- Petal template (a simple triangle‑ish shape with a rounded tip)
- Glue stick or hot glue
- Green straw or wooden skewer for stem
Step‑by‑Step Cardstock Daisy
- Trace a petal template 8–12 times onto white cardstock. Cut them out neatly.
- Score each petal lengthwise with a craft knife or the back of scissors, then gently fold to create a central vein—this adds dimension.
- Cut a small yellow circle for the flower center. For extra texture, use a pom‑pom or a crumpled yellow tissue ball.
- Glue petals evenly around the yellow center. Overlap them slightly for a full look.
- Attach a stem by gluing a green straw or wooden skewer to the back.
These are perfect for classroom decorations, party centerpieces, or a cheerful desk companion. Bonus: they’re completely kid‑safe with glue sticks and no complex folding.
Technique 6: Giant Paper Flowers – Party Statement Pieces
Nothing says “wow” like an 18‑inch paper flower on a wall or photo backdrop. I first made these for a friend’s baby shower, and suddenly everyone at the party wanted the tutorial. The good news: the process is just a supersized version of the petal‑and‑glue method, but the impact is 10x.
Materials & Setup
- Large sheets of crepe or cardstock (poster‑size if possible) or regular printer paper taped together to form petal pieces.
- Heavy‑duty hot glue gun
- Round cardboard base (for the back)
- String or command strips for hanging
Building a Giant Paper Flower
- Cut oversized petals: Use a template drawn on cereal box cardboard. You’ll need 5 large outer petals, 5 medium inner petals, and a center piece.
- Shape the petals as you would for a crepe rose—curl the edges and cup the centers. For cardstock, simply fold a slight crease vertically to give curve.
- Hot glue the outer petals around the circumference of the cardboard base, overlapping.
- Add the second layer of medium petals in the gaps.
- Finish the center: Roll a long strip of paper into a tight coil, or create a pom‑pom from tissue, and glue it right in the middle.
These flowers transform a plain wall into an Instagram‑worthy backdrop. One of my readers used them for a wedding arch and later sold identical sets to other brides.
Technique 7: Quilled Paper Flowers (Delicate but Doable)
Quilling uses thin strips of paper rolled into coils and pinched into shapes. The resulting flowers are intricate and lacy, perfect for greeting cards, framed art, or jewelry. While the technique requires a bit of patience, the basic coil is surprisingly easy to pick up.
Basic Quilled Daisy
- Cut 1/8‑inch wide strips of cardstock (or use pre‑cut quilling strips).
- Roll a strip tightly around a quilling tool or a toothpick, then let it relax slightly for an open coil.
- Pinch one end to form a teardrop (this becomes a petal). Make 8–10 identical teardrops.
- Glue the petals in a circle, points outward, on a small punched circle.
- Add a tight coil center in a contrasting color.
Quilling takes practice, but the great thing is that even imperfect coils look charming. I recommend starting with a basic quilling toolkit that costs around $10–15.
If you enjoy the precision of quilling, you might also love our guide on How to Make Digital Stickers—a completely different medium, but equally rewarding for detail‑oriented crafters.
Paper Type Comparison Table
| Paper Type | Best For | Difficulty | Cost per Bloom | Realism |
|---|---|---|---|---|
| Tissue | Pom‑poms, gift toppers | Very Easy | $0.10–$0.25 | Low |
| Crepe | Roses, peonies | Intermediate | $0.30–$0.75 | Very High |
| Coffee Filter | Peonies, blossoms | Easy | $0.05–$0.15 | Moderate |
| Cardstock | Daisies, giant flowers | Easy | $0.20–$0.40 | Moderate |
| Origami | Tulips, lotus | Easy–Intermediate | $0.10–$0.20 | Low–Moderate |
| Quilling Strips | Cards, jewelry | Intermediate–High | $0.15–$0.30 | Low but intricate |
Costs are estimated based on bulk supplies in early 2026.
10 Pro Tips That Actually Make a Difference
After leading dozens of paper flower workshops, I’ve seen the same small mistakes trip people up. Here are the fixes that immediately improved their results:
- Use the “rule of odd numbers.” A bouquet of 3, 5, or 7 flowers always looks more balanced and professional than an even number.
- Layer colors. Don’t use a single solid color for all petals. A gradient—lighter at the edges, darker at the center—creates instant realism.
- Thin your glue. White glue mixed with a drop of water spreads more easily and avoids thick globs that warp paper.
- Practice on scrap paper first. Before cutting expensive crepe, test petal shapes on newsprint to perfect the shape.
- Keep a damp cloth nearby. Crepe paper bleeds if it gets wet, and glue‑covered fingers leave stains.
- Thrift shop for tools. Kitchen tongs or a barbecue skewer can curl petals just as well as craft tools.
- Steaming revives crepe paper. If a petal loses its shape, hold it over a steaming kettle for a few seconds—it springs back to life.
- Write a date on the back. If you make flowers for a wedding or event, date them. They become a lovely keepsake.
- Store flat in a box. Never stack paper flowers; they’ll get crushed. Lay them in a shallow cardboard box with tissue paper between layers.
- Mix techniques. Pair tissue pom‑poms with a crepe rose center for a mixed‑media bouquet that looks incredibly lush.
How to Turn Your Paper Flowers into a Side Hustle
This isn’t just a hobby. In 2025, the global handcrafted decor market passed $40 billion, and paper flowers are a popular item on platforms like Etsy. Many of my workshop attendees now sell bouquets for weddings, nurseries, and home decor. The startup cost is minimal—you likely already own the supplies you need.
To get started selling, bundle sets of 6–12 coordinated flowers, offer custom color options, and watch what brides‑to‑be pin on Pinterest. For more concrete ideas on monetizing your craft skills, take a look at our guide on 15 Easy Cricut Projects to Sell—many of the marketplace strategies apply just as well to paper blooms.
And if you find yourself cutting out endless petals by hand, a Cricut machine can turn that chore into seconds. Don’t have one yet? We also covered Cricut basics in our Cricut Pantry Labels tutorial, where you can see how the machine works before you invest.
Frequently Asked Questions (FAQ)
What is the easiest paper flower to make for absolute beginners?
The tissue paper pom‑pom is unquestionably the easiest. You just fold, cut, and fluff—no glue, no shaping. It gives instant gratification and looks fantastic as party decor. Even a 6‑year‑old can master it in minutes.
What kind of paper is best for making flowers that look realistic?
German or Italian crepe paper (weight above 180 gsm) is the gold standard for realism. Its stretch and subtle grain mimic the veins and curves of real petals. Coffee filters come in a surprising second when dyed in gradients.
Can I use regular printer paper to make paper flowers?
You can, but the results will be stiff and less natural. Printer paper is fine for origami flowers or as a practice medium, but for realistic blooms, crepe or tissue paper is far superior. If you’re in a pinch, dampen printer paper slightly to make it more pliable.
How do you make paper flowers without a template?
Freehand cutting works beautifully once you understand basic petal shapes—teardrop, heart, and oval. Look at a real flower for reference, draw half the shape on folded paper, and cut. The slight imperfections often make the flower look more natural, not less.
What glue is best for paper flowers?
Low‑temperature hot glue is fastest and strongest for large or heavy flowers. For delicate crepe and tissue, a tacky white glue (like Aleene’s) applied with a brush gives you more control. Avoid school glue sticks for 3D flowers; they lose grip when paper is handled frequently.
How do you make paper flowers that stand up in a vase?
Use a sturdy stem—18‑gauge floral wire or a wooden dowel wrapped in floral tape. Insert the stem into a floral foam block inside the vase, then cover with pebbles or moss. For giant flowers, a PVC pipe hidden inside the stem provides unbeatable stability.
How long do paper flowers last?
If kept out of direct sunlight and away from moisture, paper flowers can last 5–10 years or more. I have a crepe rose I made in 2015 that still sits on my bookshelf looking fresh. Handmade paper is archival; dyes may fade slightly, but the structure holds.
Can I sell paper flowers I make from online tutorials?
Absolutely. Tens of thousands of sellers list paper bouquets, wedding decorations, and cake toppers online. Just be sure to credit any specific designer template if required, and always price your work to cover time as well as materials. For a full business strategy, explore our Cricut projects guide where we break down pricing and marketing.
Let’s Get Cutting – Your First Bloom Awaits
You now have everything you need to turn a simple sheet of paper into a spectacular blossom that will last for years. I’ve shown you seven proven methods, from the 5‑minute tissue pom‑pom to the show‑stopping giant flower, plus all the insider tips to avoid ragged edges and glue catastrophes. How to make paper flowers isn’t a mystery anymore—it’s a skill you’ll keep refining, and each new bloom you create will be better than the last.
So grab that stack of tissue paper, plug in your glue gun, and make something beautiful this week. I’d love to hear which technique you tried first (drop a comment when you do!), and if you decide to start selling your creations, remember we’re here to help you every step of the way. Happy crafting!