how to create notion templates: 9 Essential Steps to Organize Your Life in 2026

- how to create notion templates: 9 Essential Steps to Organize Your Life in 2026
- 📋 Key Takeaways
- Table of Contents
- Why You Should Learn How to Create Notion Templates Today
- The Shift Towards Personalized Productivity
- The Massive Side Hustle Potential
- Step 1: Define the Core Purpose of Your Workspace
- Identify the Core Problem
- Map Out the Workflow Before Building
- Step 2: Set Up the Foundation (Pages vs. Databases)
- Creating Your Main Dashboard
- Choosing Between Tables, Boards, and Calendars
- Step 3: Link Databases for Maximum Efficiency
- The Magic of Relation Properties
- Using Rollups to Gather Data
- Step 4: Add Automations, Buttons, and Formulas
- Using Native Buttons
- Adding Smart Formulas
- Step 5: Master the Aesthetics (Make It Look Good)
- Custom Covers and Minimalist Icons
- Structuring with Columns and Callouts
- Step 6: Test Your Template Like a Pro
- The "Dummy Data" Stress Test
- Mobile Optimization Check
- Step 7: How to Publish and Share Your Setup
- Generating the Public Link
- The Crucial "Allow Duplicate" Setting
- Step 8: Monetize: Selling Your Digital Products
- Platforms to Sell On
- Packaging Your Setup
- Wrapping It Up: Your Next Steps
- Frequently Asked Questions (FAQ)
- Is it hard to learn how to create notion templates?
- Can I really make money selling these setups?
- Do I need a paid Notion account to create templates?
- How do I protect my template from being stolen?
- What is the difference between a page and a database?
- Can I use templates created by other people?
Imagine waking up, opening your laptop, and seeing every single task, goal, and project perfectly organized in a digital space designed exactly the way your brain works. That is the true magic of learning how to create notion templates. If you have ever felt completely overwhelmed by generic productivity apps that force you into their rigid, unchangeable structures, you are in the right place.
Figuring out how to create notion templates doesn’t just help you organize your own chaotic schedule; it actually opens the door to a highly profitable digital side hustle in 2026. We tested dozens of workspace setups, and the truth is simple: once you understand the basic building blocks of this platform, you can build custom systems that people are actively searching for. Whether you want to build a simple daily planner for yourself or a comprehensive business tracker to sell online, this guide will walk you through every single click.
📋 Key Takeaways
- Start with a specific problem: The most successful templates solve a targeted issue, like meal planning, freelance client management, or ADHD task tracking.
- Master the databases: Understanding the fundamental difference between simple text pages and relational databases is your golden ticket to advanced builds.
- Aesthetics matter immensely: A functional workspace is great, but a visually appealing one (with custom covers and icons) is what people actually want to use daily.
- Always stress-test your build: Never publish or share a workspace without populating it with “dummy data” to ensure your formulas and relations work perfectly.
Why You Should Learn How to Create Notion Templates Today

Right now, people are craving custom systems. The days of downloading a one-size-fits-all app and hoping it works for your unique lifestyle are over. Notion has surpassed 30 million users globally, and a massive chunk of those users are actively looking for pre-built workspaces because they simply don’t have the time to build one from scratch.
The Shift Towards Personalized Productivity
Think about how you work. Do you prefer seeing your tasks as a simple checklist, or do you need a visual board where you can drag and drop items? Maybe you need a timeline view to see how your projects overlap. When you learn how to create notion templates, you gain the power to mold the software to your brain, rather than molding your brain to the software. This level of personalization reduces burnout and actually makes getting things done feel rewarding.
The Massive Side Hustle Potential
Here is the really exciting part: there is a booming creator economy built entirely around this software. Creators like Thomas Frank have publicly shared that they make hundreds of thousands of dollars selling their advanced setups. You don’t need to be a coding genius to get a piece of this pie. By mastering the basics of how to create notion templates, you can package your organizational skills into a digital product.
If you love the idea of creating digital goods but aren’t sure if a database is your style, you might also want to explore how to make digital planners to sell: 7 Critical Steps to Build a Profitable Etsy Shop in 2026. Both paths offer incredible passive income potential, but Notion provides a unique, interactive experience that static PDF planners just can’t match.
Step 1: Define the Core Purpose of Your Workspace
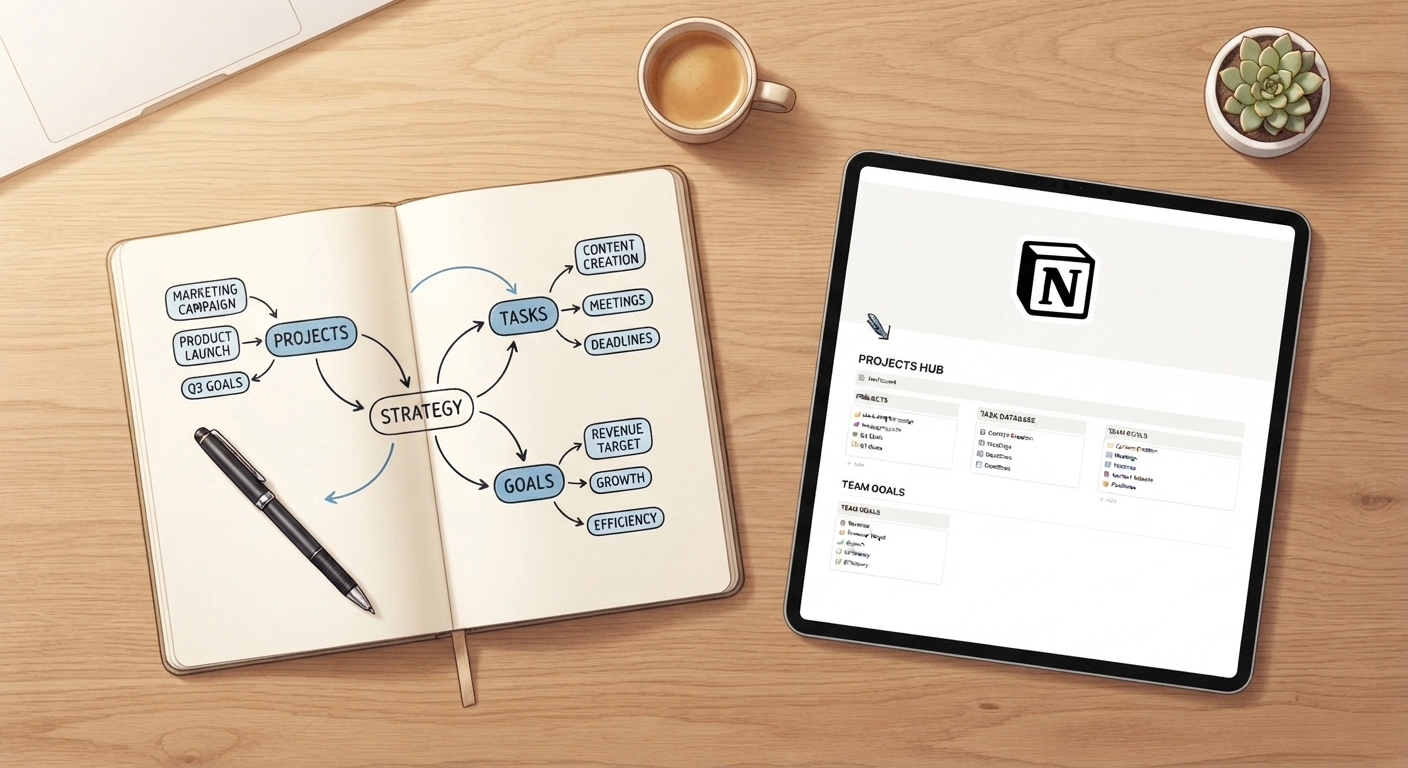
Before you even open the app and click “New Page,” you need a plan. Staring at a blank digital canvas is the number one reason beginners get frustrated and quit. You need to know exactly what problem you are trying to solve.
Identify the Core Problem
Ask yourself: Who is this for, and what pain point does it eliminate? If you are building a “Student Survival Dashboard,” the pain points are missed deadlines, lost lecture notes, and tracking grades. Therefore, your build needs a master assignment tracker, a class schedule, and a digital notebook. If you try to make a template that does everything for everyone, it will end up being cluttered and useless.
Map Out the Workflow Before Building
Grab a physical piece of paper and a pen. Yes, really! Sketch out how the information should flow. Let’s say you are building a freelance client manager. You will likely need:
- A database for Clients (Names, emails, company info).
- A database for Projects (Website redesign, logo creation).
- A database for Tasks (Draft wireframes, send invoice).
Seeing this on paper makes the actual digital building process ten times faster. You won’t get lost in the menus because you already have your architectural blueprint.
Step 2: Set Up the Foundation (Pages vs. Databases)
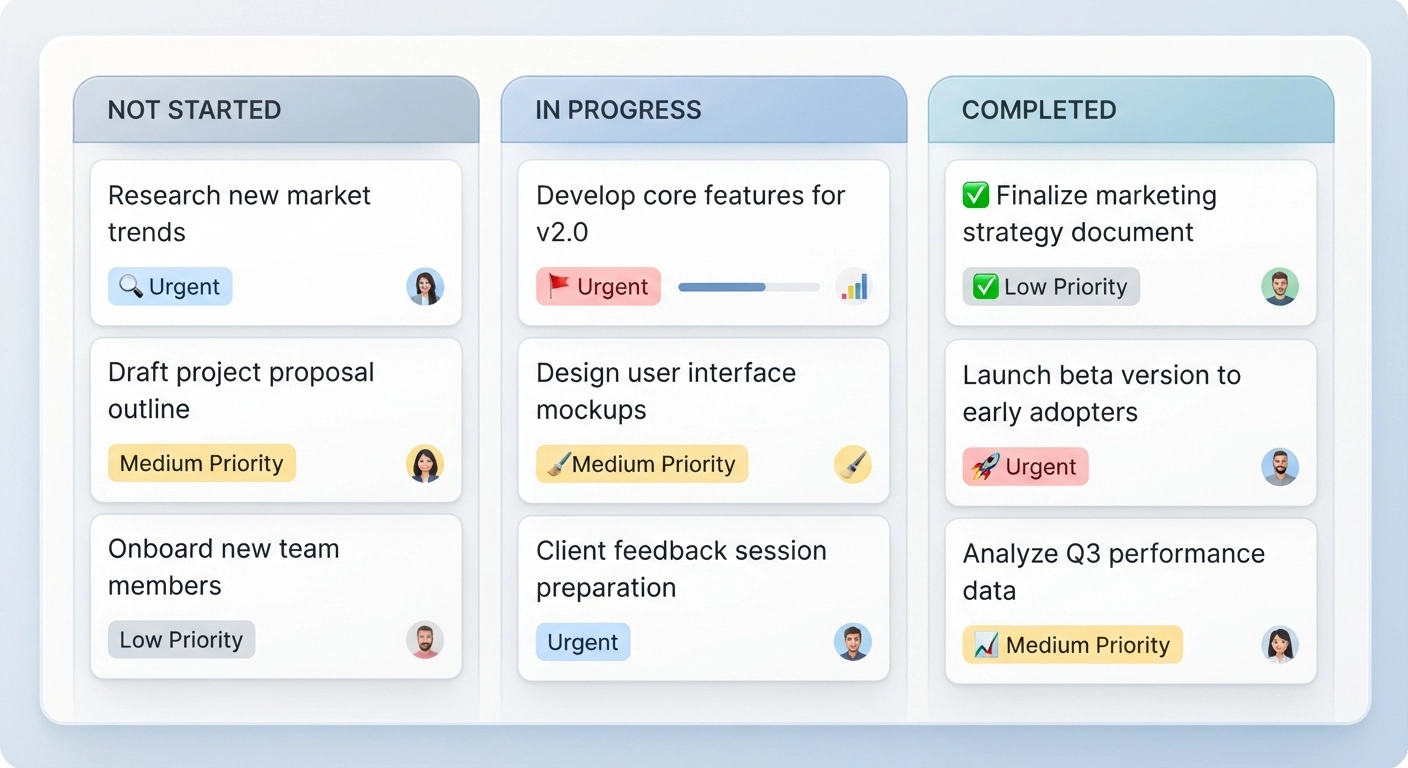
Now it’s time to get your hands dirty. Open your workspace and create a new blank page. This will serve as the “Home” or “Dashboard” for your entire system.
Creating Your Main Dashboard
Your dashboard is the steering wheel of your template. It should give the user a bird’s-eye view of everything important without overwhelming them. To start, type /page to create sub-pages. Think of your dashboard as a folder on your computer, and the sub-pages as the files inside it. Keep the dashboard clean by only displaying what needs to be seen daily.
Choosing Between Tables, Boards, and Calendars
This is where the real power of learning how to create notion templates shines. A database in this platform isn’t just a boring spreadsheet; it’s a flexible container for your data. When you type /database, you’ll see a few options:
- Table View: Best for raw data entry, like a list of expenses or a directory of contacts.
- Board View (Kanban): Perfect for tracking progress. You can drag tasks from “To Do” to “In Progress” to “Done.”
- Calendar View: Essential for anything date-bound, like social media content planning or assignment due dates.
- Gallery View: Highly visual. Great for recipe books, mood boards, or reading lists where you want to display image covers.
The beauty is that you don’t have to choose just one. You can create a database as a Table to input all your data, and then create a “View” of that exact same database as a Calendar on your main dashboard. It’s the same data, just wearing a different outfit.
If you enjoy organizing data but prefer traditional spreadsheet software for heavy numerical calculations, you might find it helpful to read our guide on how to make google sheets budget tracker to sell: 7 Critical Steps to Build a Profitable Product in 2026. However, for text, tasks, and project management, Notion remains unmatched.
Step 3: Link Databases for Maximum Efficiency
If you only take one thing away from this guide, let it be this section. Connecting different databases is what separates amateur setups from premium, high-quality systems.
The Magic of Relation Properties
Let’s go back to our freelance example. You have a “Projects” database and a “Tasks” database. Without a relation, you’d have to manually type the project name into every single task. That’s a waste of time.
Instead, you add a new property to your Tasks database and select Relation. Then, point it to your Projects database. Now, when you create a task called “Design Homepage,” you can simply click the relation property and select the “Acme Corp Website” project. The two are now permanently linked. This is a core fundamental when mastering how to create notion templates.
Using Rollups to Gather Data
Once databases are related, you can use Rollups. A rollup pulls data from a related database. For example, if you linked your Tasks to your Projects, you can create a Rollup in the Projects database that counts how many tasks are checked as “Done.” This allows you to instantly see that a project is 75% completed without ever leaving the dashboard.
Step 4: Add Automations, Buttons, and Formulas
To make your system truly user-friendly (especially if you plan to sell it), you need to remove friction. Users shouldn’t have to click five times to add a simple daily journal entry.
Using Native Buttons
The Button block (type /button) is a game-changer. You can configure a button to perform multiple actions with a single click. For example, you can create a button called “Start My Day.” When clicked, it can automatically:
- Add a new page to your Daily Journal database.
- Tag that page with today’s date.
- Open the page in full screen so you can start typing immediately.
This kind of seamless experience is exactly what buyers look for in premium templates.
Adding Smart Formulas
Don’t let the word “formula” scare you. You don’t need a computer science degree to use them. Formulas can calculate data, manipulate text, or create visual progress bars. Here is a very simple formula you can use to create a visual percentage of completed tasks:
round(prop("Completed Tasks") / prop("Total Tasks") * 100) / 100When you combine this formula with Notion’s native progress bar display option (found in the property settings), you get a beautiful, automatically updating visual indicator of your progress. Understanding these small technical details is a huge part of learning how to create notion templates that stand out from the crowd.
Step 5: Master the Aesthetics (Make It Look Good)
Let’s be brutally honest: humans are visual creatures. You could build the most mathematically perfect, highly efficient database system in the world, but if it looks like a boring gray spreadsheet, nobody will want to use it. Aesthetics drive adoption.
Custom Covers and Minimalist Icons
Every page in your workspace can have a cover image and an icon. Do not skip these! They provide visual hierarchy and make navigation intuitive. Instead of using the default emojis, try using clean, minimalist icons (there are built-in Notion icons, or you can upload your own SVG files).
For cover images, consistency is key. If your template has a “Dark Academia” theme, ensure all database covers match that color palette. If you want to design your own custom headers that perfectly fit the screen dimensions, we highly recommend checking out our tutorial on How to Make Easy Printables Using Canva. The same design principles apply to creating stunning digital covers.
Structuring with Columns and Callouts
Never leave your dashboard as one long, scrolling list of text. Use columns to maximize screen real estate. You can drag the six-dot handle next to any block and drop it to the far right of another block to create a column.
Use Callout blocks (type /callout) to highlight important instructions or to create visually distinct “widgets” on your dashboard. For example, a callout block with a light blue background is perfect for a “Quick Links” menu.
Step 6: Test Your Template Like a Pro
One of the biggest mistakes beginners make when figuring out how to create notion templates is publishing their workspace immediately after building it. You must test it first to ensure it actually works in real-world scenarios.
The “Dummy Data” Stress Test
An empty database looks clean, but it doesn’t tell you if your system works. You need to fill your template with fake, “dummy” data. Add five fake clients, ten fake tasks, and three fake projects.
- Do the relations connect properly?
- Do the formulas calculate the right numbers?
- Does the calendar view look too cluttered when there are multiple events on the same day?
By stress-testing your build, you catch embarrassing errors before a customer or a friend points them out to you.
Mobile Optimization Check
A huge percentage of users will access your workspace from their smartphones. Notion handles mobile responsiveness automatically, but complex multi-column layouts on desktop will stack vertically on a phone. Open the Notion app on your phone and navigate through your new setup. If a user has to scroll for 30 seconds just to find their daily to-do list, you need to rearrange your dashboard to put the most critical information at the top.
Step 7: How to Publish and Share Your Setup
You have built it, tested it, and made it look gorgeous. Now, how do you actually get it into someone else’s hands? The process is surprisingly simple, but you have to check the right boxes.
Generating the Public Link
Go to the very top right corner of your main dashboard page and click the Share button. Toggle on the switch that says “Share to web”. This generates a unique URL that anyone on the internet can visit, even if they don’t have an account yet.
The Crucial “Allow Duplicate” Setting
Under the “Share to web” menu, there is a specific toggle called “Allow duplicate as template”. If you do not turn this on, people will only be able to look at your page like a standard website; they won’t be able to copy it into their own workspace. Once this is toggled on, anyone with the link will see a small “Duplicate” button in the top right corner of their screen. This is the ultimate goal when you learn how to create notion templates for others.
Pro Tip: Make sure you delete all your personal data and leave only the helpful “dummy data” before you generate this share link!
Step 8: Monetize: Selling Your Digital Products
If you’ve followed these steps, you now possess a valuable digital asset. Why not make some money from it? Selling digital products is one of the best low-overhead business models in 2026.
Platforms to Sell On
You don’t need to build a complicated e-commerce website. Most creators use platforms specifically designed for digital downloads:
- Gumroad: The most popular choice in the Notion community. It’s incredibly easy to set up, and you can offer “Pay what you want” pricing.
- Etsy: A massive marketplace with built-in traffic. People actively search Etsy for “ADHD planners” or “Business dashboards.”
- Lemon Squeezy: A great modern alternative to Gumroad that handles global taxes for you automatically.
Packaging Your Setup
When someone buys your product, they shouldn’t just get a raw URL. Create a simple PDF that welcomes them, explains the core philosophy of your system, and provides the actual link to duplicate the workspace. This adds a layer of professionalism.
Pricing can be tricky for beginners. Should you charge $5 or $50? A good rule of thumb is to look at the complexity. A simple habit tracker might be $5, while a complete freelance business operating system could easily sell for $49 to $99. To understand the psychology behind pricing your creations, take a look at our detailed breakdown on How to Price Your DIY Crafts for Etsy: A Beginner’s Guide. The core pricing principles discussed there apply perfectly to digital products as well.
Wrapping It Up: Your Next Steps
Learning how to create notion templates is like learning how to play with digital Lego bricks. At first, you are just snapping simple pieces together. But with a little bit of practice, you’ll be building massive, intricate systems that can genuinely change the way you (and your customers) manage daily life.
Don’t let the advanced features intimidate you. Start small. Build a simple grocery list or a weekly meal planner. Play with the relation properties, add a few custom icons, and see how it feels. The best way to master this platform is simply by doing. So, open up a blank page today, define your core problem, and start building your very first custom workspace!
Frequently Asked Questions (FAQ)
Is it hard to learn how to create notion templates?
Not at all! The basic features—like creating pages, typing text, and making simple lists—are as easy as using a standard word processor. The learning curve only kicks in when you start dealing with relational databases and formulas, but even those can be mastered in a few weeks of consistent practice.
Can I really make money selling these setups?
Absolutely. The market for digital organization tools is massive in 2026. Many creators make a comfortable side income (and some even a full-time living) by designing specialized workspaces for specific niches, like real estate agents, college students, or freelance writers.
Do I need a paid Notion account to create templates?
No, you do not. The free version of the software is incredibly robust and gives you access to almost all the core features, including unlimited blocks for individual users, databases, and relations. You only need a paid plan if you plan to upload very large files (over 5MB) or need advanced team collaboration features.
How do I protect my template from being stolen?
This is a common concern when figuring out how to create notion templates to sell. Unfortunately, once someone duplicates your workspace into their own account, they have full control over it. The best protection is building a strong personal brand and offering excellent customer support, so people prefer to buy the “official” version directly from you.
What is the difference between a page and a database?
A page is a static document where you can type text, add images, and create simple checklists. A database is a structured collection of pages that have specific properties (like dates, tags, and numbers) which can be filtered, sorted, and viewed in multiple ways (like a calendar or a board).
Can I use templates created by other people?
Yes! In fact, reverse-engineering other people’s setups is one of the best ways to learn. You can duplicate a free template from the community gallery, break it down to see how they set up their relations and formulas, and then use that knowledge to build your own unique systems.