How to Make an Easy DIY Backyard Fire Pit in One Weekend
- How to Make an Easy DIY Backyard Fire Pit in One Weekend
- 📋 Key Takeaways
- Table of Contents
- Why Build a DIY Backyard Fire Pit?
- The Weekend‑Friendly Promise
- Budget Reality Check
- Planning Your Fire Pit: Location, Codes, and Design Choices
- Picking the Perfect Spot
- Choosing a Fire Pit Style That Fits Your Home
- Materials and Tools You’ll Need
- Materials for a 36‑inch Inside‑Diameter Fire Pit
- Tools Checklist
- Step‑by‑Step: How to Build Your Fire Pit in 7 Critical Stages
- Stage 1: Mark and Excavate the Area
- Stage 2: Lay Landscape Fabric and Gravel Base
- Stage 3: Set and Level the First Course of Blocks
- Stage 4: Stack Remaining Courses and Insert the Fire Ring
- Stage 5: Fill the Inner Ring with Gravel
- Stage 6: Glue the Top Course (Optional but Recommended)
- Stage 7: Final Inspection and Curing
- Safety Tips and Fire Pit Etiquette You Must Follow
- Styling and Landscaping Around Your Fire Pit
- Lighting That Sets the Mood
- Plantings and Windbreaks
- Maintenance and Common Mistakes to Avoid
- Seasonal Maintenance Checklist
- Three Rookie Errors That Can Ruin the Build
- Frequently Asked Questions (FAQ)
- What is the cheapest way to build a DIY backyard fire pit?
- Do I need a permit for a backyard fire pit?
- How far should a fire pit be from the house?
- Can I build a fire pit directly on my grass?
- What type of stone is safe for a fire pit?
- Can I cook over my DIY fire pit?
diy backyard fire pit: 7 Proven Steps to Build a Safe, Stunning Pit in One Weekend (2026 Guide)
Last summer I stood in my backyard staring at a patch of grass that felt like a waste of space. Three days later that same spot had become the heart of our outdoor evenings—a diy backyard fire pit built with my own hands. No fancy skills, no hired contractor, just a weekend of honest work and the right plan. The best part? We’ve roasted marshmallows, hosted friends, and never once worried the thing would crack or tilt because I built it correctly from the start.
If you’ve been scrolling Pinterest wondering whether you can pull off a fire pit yourself, the answer is a solid yes. In this guide you’ll see exactly how to do it in one weekend, even if you’ve never laid a single paver. I’ll walk you through the planning, the materials, the step‑by‑step build, and the safety details that many rushed tutorials skip. By the end you’ll have a complete blueprint—and the confidence to get your hands dirty.
📋 Key Takeaways
- You can build a diy backyard fire pit in a single weekend using basic tools and locally available materials.
- Proper planning—checking local codes, calling 811, and choosing the right spot—prevents costly mistakes.
- Concrete blocks paired with a steel fire ring are the safest and most budget‑friendly option for beginners.
- Adding a gravel base, fire bricks, and a secure seating area turns a simple ring into a long‑term outdoor feature.
- Regular maintenance and sensible fire safety habits will keep your pit looking great and functioning for years.
Why Build a DIY Backyard Fire Pit?
A ready‑made fire pit from the big box store can cost anywhere from $350 to over $1,200, and you still have to haul it home, level the ground, and often live with a design that doesn’t suit your space. Building your own diy backyard fire pit flips the script: you control the size, the materials, the look, and you usually spend half the money—or less. According to the latest data from the Hearth, Patio & Barbecue Association (HPBA), 68% of homeowners planning a new outdoor fire feature are now choosing a DIY approach to save on labor and personalize their yard (HPBA 2025 trend report).
But the real payoff is how a fire pit transforms your backyard. It becomes a natural gathering spot where kids roast s’mores, neighbors stop by for a chat, and chilly spring evenings turn cozy. I’ve watched our fire pit turn a rarely used corner into the most popular square footage on the property. There’s also a genuine sense of pride that comes from saying, “I built that.” And because you know exactly how it’s constructed, you’ll be quicker to notice—and fix—any wear and tear before it becomes a problem.
The Weekend‑Friendly Promise
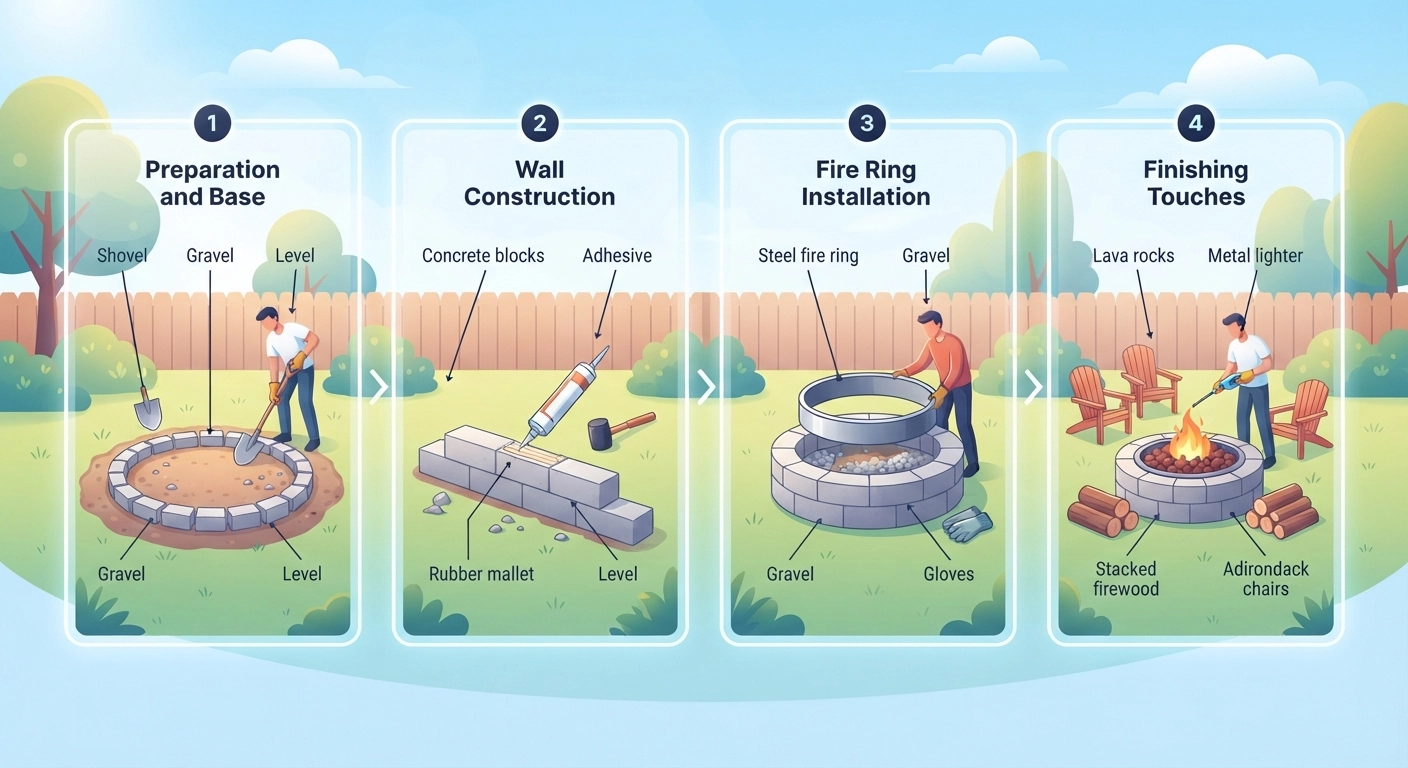
You don’t need a week off work. With basic tools and a helper for the heavy lifting, you can realistically complete the entire project between Saturday morning and Sunday afternoon. The key is working in four focused phases: ground prep, base layer, block stacking, and finishing touches. I’ll break each phase into bite‑sized steps later, but for now just know that a diy backyard fire pit is genuinely a weekend project—not a myth.
Budget Reality Check
Many online guides pretend you can build a fire pit for $50. That’s only true if you already have stones lying around and don’t care about safety. A proper, safe fire pit built with a steel ring insert, fire bricks, and quality concrete blocks typically runs between $120 and $250 depending on your area. I’ll give you a realistic cost table later so you can plan without sticker shock. But even at the higher end, you’re still well below the price of many pre‑cast models.
🛠️ If you enjoy this kind of hands‑on backyard project, you might also love our guide on building a DIY outdoor dining table on a budget—the perfect companion piece for your new fire pit seating area.
Planning Your Fire Pit: Location, Codes, and Design Choices
A successful diy backyard fire pit starts not with a shovel, but with a notepad. Spend an hour on planning and you’ll dodge the three most common pitfalls: placing the pit too close to the house, building over utility lines, and choosing a style that clashes with your home.
Most municipalities require a fire pit to be at least 10 to 25 feet away from any structure, fence, or overhanging branches. Before you mark a single circle, call 811 (the national “Call Before You Dig” hotline) to have underground utilities flagged—for free. I’ve seen too many people punch a shovel through a cable line and lose internet for a weekend. Also check your local fire code. In some drought‑prone areas open burning is banned, but spark‑arresting portable fire pits might be allowed. Your local fire marshal’s website will have the final say.
Picking the Perfect Spot
Look for a relatively level area where you already enjoy spending time. The ideal location is sheltered from prevailing winds so smoke doesn’t blow directly toward your seating. If your yard has a slight slope, you can still build a fire pit, but you’ll need to dig deeper on the high side to create a level base. Also think about sight lines: placing the pit where you can see it from the kitchen window adds a cozy visual glow, and it’s easier to keep an eye on kids.
Choosing a Fire Pit Style That Fits Your Home
The most popular DIY styles break down into four categories, and each gives a completely different backyard vibe.
| Style | Best For | Approx. Cost (Materials Only) | Difficulty |
|---|---|---|---|
| Concrete Block + Steel Ring | Beginners, modern look | $140 – $220 | Easy |
| Retaining Wall Block (no ring) | Rustic, budget build | $90 – $160 | Moderate (needs fire brick lining) |
| Natural Stone Dry‑Stack | Matching natural landscape | $180 – $350 | Moderate |
| Fire Pit Kit (metal bowl + block surround) | Fastest build, apartment‑friendly | $200 – $400 | Very Easy |
For this guide I’ll focus on the concrete block and steel ring method—it’s the safest beginner build, offers a polished look, and the ring protects the blocks from thermal shock. If you decide to go with stone, many of the same steps apply; just swap the blocks for stone and add fire bricks inside.
Materials and Tools You’ll Need
Assemble everything before you start. There’s nothing more momentum‑killing than running to the hardware store mid‑project. I learned that the hard way when I miscalculated the number of blocks and had to leave a half‑built pit for two hours—the dog thought it was a new digging spot.
Materials for a 36‑inch Inside‑Diameter Fire Pit
- Steel fire pit ring – 36” diameter, minimum 1.5 mm thick. This protects your blocks and creates a clean burn chamber.
- Concrete retaining wall blocks – about 60–80 units, depending on height. Choose trapezoidal blocks if you want a perfect circle or standard rectangular for a square pit.
- Fire bricks – 20–25 bricks to line the inside of the ring (optional but highly recommended for longevity).
- Paver base gravel (crushed stone #411 or #21A) – about 12 cubic feet for the foundation and inner ring floor.
- Landscape fabric – enough to cover the excavated area plus 2 inches of overlap.
- Construction adhesive – one tube of heavy‑duty landscape block adhesive (if you’ll glue the top course).
- Leveling sand – a small bag for final adjustments.
Tools Checklist
- Shovel and spade
- Hand tamper or plate compactor (rental optional)
- 4‑foot level
- Rubber mallet
- Measuring tape and marking paint
- Work gloves and safety glasses
- Garden hose or string for marking the circle
🔨 Woodworking more your speed? Check out our post on woodworking projects that sell—many of those ideas pair beautifully with a finished fire pit area.
Step‑by‑Step: How to Build Your Fire Pit in 7 Critical Stages
Now the part you’re really here for. I’m breaking the build into seven clear stages that align with a natural weekend rhythm. Follow these in order and you’ll avoid backtracking.
Stage 1: Mark and Excavate the Area
Use a piece of string tied to a stake to trace a perfect circle. For a 36‑inch ring, mark a circle about 6 inches larger all around—roughly 48 inches in diameter. Strip the grass and dig down 4–6 inches across the entire circle. Keep the base as level as humanly possible; any slope here will show up later as a lopsided top course.
Stage 2: Lay Landscape Fabric and Gravel Base
Spread landscape fabric across the excavated area to prevent weed growth and keep the gravel from sinking into the soil. Pour in 3–4 inches of paver base gravel and compact it with a hand tamper. Take your time on this step—a solid compacted gravel base eliminates settling cracks and keeps your pit stable for years.
Stage 3: Set and Level the First Course of Blocks
Place your first ring of blocks directly on the tamped gravel. Use a rubber mallet to tap each block down and check level continuously. If a block wobbles, add or remove a little gravel under it. The entire structure depends on this base course, so don’t rush. For a circular pit, trapezoidal blocks naturally form a ring; for square pits, rectangular blocks work fine.
Stage 4: Stack Remaining Courses and Insert the Fire Ring
Stack the second and third courses, staggering the joints like a brick wall. After the second course, drop the steel fire ring into the center. This is where a helper really shines—the ring can be heavy. Line the inside of the ring with fire bricks if you’re using them, standing them vertically against the ring wall. They absorb and reflect heat, which protects the concrete blocks and makes your fire more efficient.
Stage 5: Fill the Inner Ring with Gravel
Pour the remaining gravel into the fire ring until the surface is 3–4 inches below the top of the ring. This creates a clean, drainable floor for your fire. Some folks prefer removing the gravel and sand, but a gravel bed allows water to drain away and prevents ash from turning into sludge.
Stage 6: Glue the Top Course (Optional but Recommended)
Run a bead of landscape block adhesive along the top course before setting the final row. This locks everything together and keeps curious kids (or pets) from knocking blocks loose. The adhesive is paintable if you later decide to change your block color.
Stage 7: Final Inspection and Curing
Step back and check level one last time. If anything shifted during assembly, now is the moment to tweak. Let the adhesive cure for at least 24 hours before lighting your first fire. During that time you can move on to the fun part—styling and seating.
By following these stages you essentially have a bulletproof diy backyard fire pit that meets safety standards and looks like a pro install. For an even larger outdoor transformation, our DIY raised garden bed guide can help you frame the fire pit area with edible plants or seasonal flowers.
Safety Tips and Fire Pit Etiquette You Must Follow
A beautiful fire pit becomes a literal hazard if you skip the safety basics. According to the National Fire Protection Association (NFPA), outdoor fire pits and recreational fires account for an average of 5,300 burn injuries annually (NFPA, 2024). Most are preventable with simple precautions.
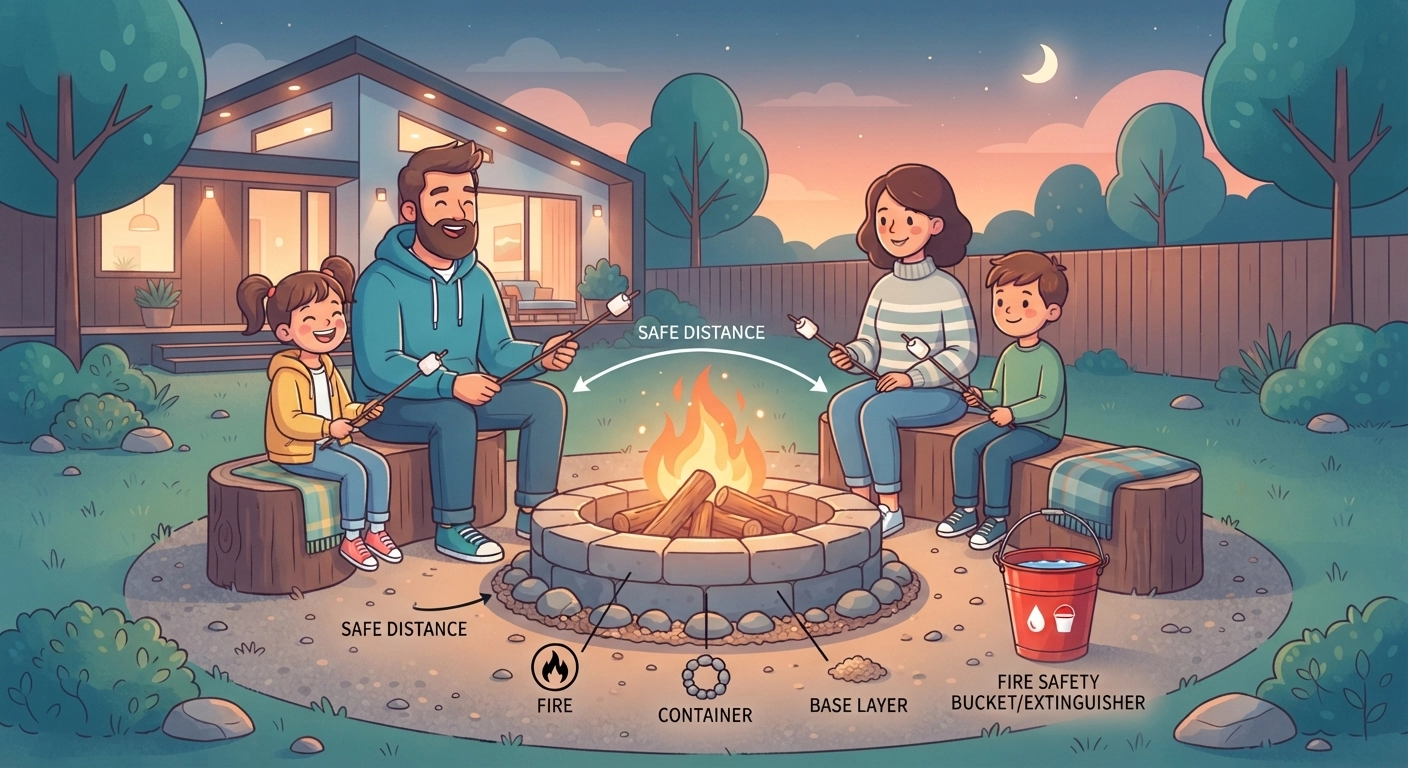
- Keep a 10‑foot clearing zone. Remove dry grass, leaves, and any flammable materials within 10 feet of the pit.
- Have a fire extinguisher or garden hose ready. Better yet, keep a bucket of sand nearby—it smothers flames without damaging your blocks.
- Never use lighter fluid or gasoline. They cause dangerous flare‑ups and can soak into the gravel. Use fire starters or dryer lint with wax instead.
- Check wind conditions. If the wind is gusty, skip the fire. Flying embers can ignite dry leaves or wooden fences dozens of feet away.
- Never leave a fire unattended. This one is non‑negotiable, even for a quick bathroom break.
After every fire, let the wood burn completely to ash if possible, then douse the embers with water and stir with a shovel until the hissing stops. Cold ash is the only safe ash.
Styling and Landscaping Around Your Fire Pit
The fire pit itself is the anchor, but the surroundings make the space feel complete. You don’t need landscaping expertise—just a few intentional moves.
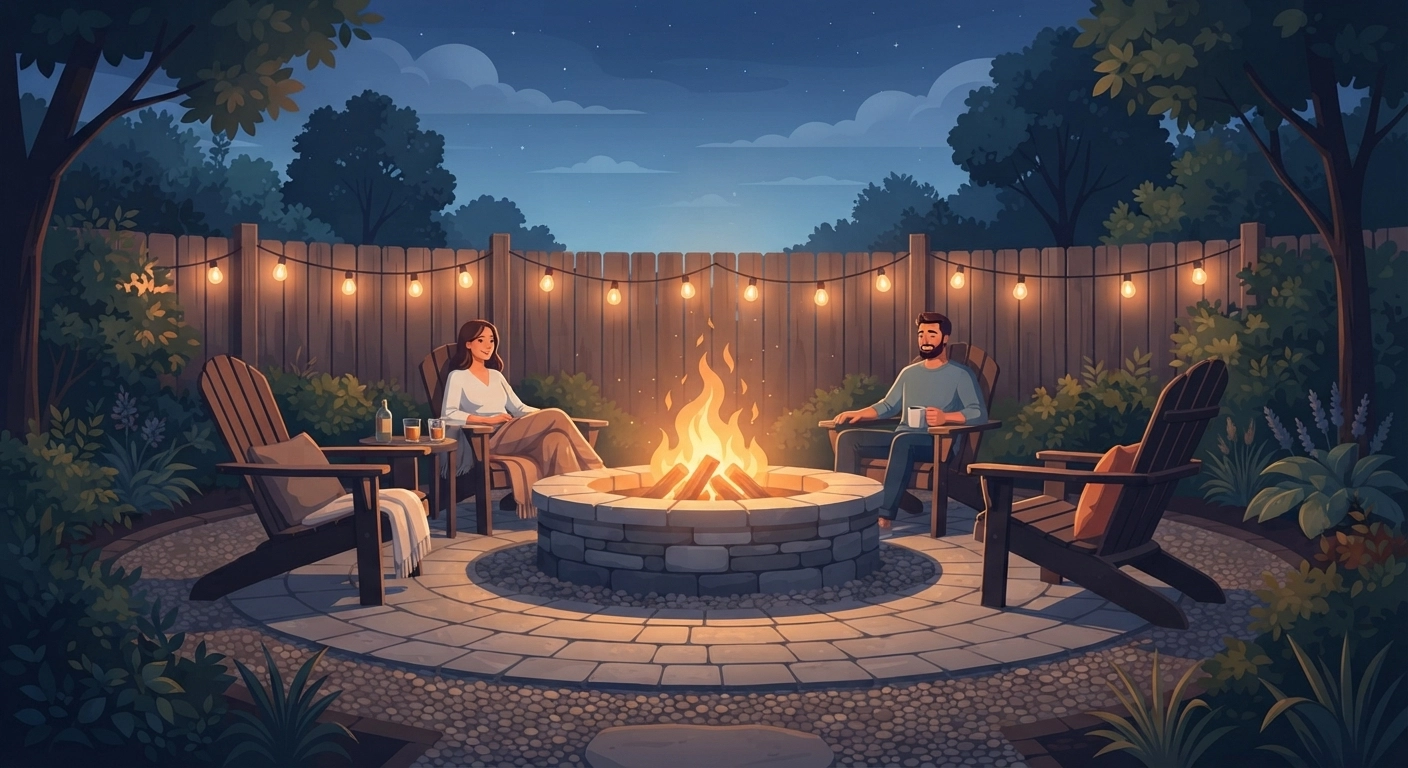
A 3‑foot ring of pea gravel or decomposed granite around the pit creates a clean, mud‑free surface for chairs. Adirondack chairs or sturdy teak benches withstand weather and frame the pit beautifully. If you’re up for another quick weekend project, consider building a matching outdoor dining table to create a seamless flow from cooking to lounging.
Lighting That Sets the Mood
String lights hung from a pergola or posts add a soft glow without competing with the fire. Solar‑powered stake lights along a gravel path leading to the pit improve safety and charm. I’ve found that warm‑white LEDs create a magical atmosphere, especially when the fire dies down to embers.
Plantings and Windbreaks
Low shrubs or ornamental grasses planted a safe distance away soften the hard edges of the blocks. If wind is an issue, a semi‑circle of lattice fencing with climbing vines acts as a natural windbreak. Just keep all greenery at least 10 feet back to comply with fire safety.
Maintenance and Common Mistakes to Avoid
The biggest enemy of a diy backyard fire pit is trapped moisture. In freezing climates, water can seep into small cracks, freeze, and pop blocks out of alignment. Here’s how to stay ahead of that.
Seasonal Maintenance Checklist
- Spring: Inspect blocks for cracks; re‑level any that have shifted. Sweep out debris and check the gravel base for erosion.
- Summer: After heavy rain, let the gravel dry before using the pit to avoid steam bursts. Reapply adhesive if any top blocks have loosened.
- Fall: Give the pit a deep clean—remove ash completely. If you live in a wet climate, consider covering the pit with a breathable canvas cover.
- Winter: In snow zones, place a wooden board over the ring to prevent ice accumulation inside the pit, then drape with a tarp. This keeps the ring from rusting.
Three Rookie Errors That Can Ruin the Build
- Skipping the gravel base. Without proper drainage, water pools under the blocks and causes frost heave.
- Using regular bricks instead of fire bricks. Common clay bricks explode under high heat. Always use refractory fire bricks inside the ring.
- Over‑tightening the circle. If you force trapezoidal blocks too tightly together, thermal expansion can crack them. A tiny gap (1/16 inch) allows for movement.
Now that you know the full process, you’re ready to build a fire pit that will be the centerpiece of countless evenings. The satisfaction of lighting that first fire—knowing every stone is placed by you—is absolutely worth the effort. Grab your shovel, mark the weekend on the calendar, and let’s get started. And if you’re itching for another outdoor project afterwards, don’t miss our easy raised garden bed tutorial to frame your new favorite spot with fresh herbs and flowers.
Frequently Asked Questions (FAQ)
What is the cheapest way to build a DIY backyard fire pit?
The cheapest safe method is to use standard concrete retaining wall blocks and a galvanized steel fire ring insert. Skipping the ring and using only blocks is possible, but you must line the interior with fire bricks—otherwise the blocks will eventually crack. Total cost can stay under $150 if you source blocks on sale.
Do I need a permit for a backyard fire pit?
In many jurisdictions, a recreational fire pit under 3 feet in diameter does not require a permit, but you must follow setback distances. Always check with your local fire department and HOA. Some towns require a spark screen and others ban open fires during certain seasons.
How far should a fire pit be from the house?
The generally accepted minimum is 10 feet from any combustible structure, including wooden fences, decks, and overhanging trees. The NFPA recommends 25 feet for absolute safety, especially if you live in a dry climate. Play it safe and meet the stricter guideline.
Can I build a fire pit directly on my grass?
You can, but it’s not recommended. Over time, the heat will kill the grass beneath the pit, creating an ugly ring. A better approach is to excavate the sod, lay gravel, and build from there. The gravel base also improves drainage and fire safety.
What type of stone is safe for a fire pit?
Only fire‑rated materials like fire brick, lava rock, or concrete blocks rated for heat exposure should be used inside or immediately surrounding the fire. Avoid regular river rock, limestone, or ordinary bricks—they can explode when they get hot. For the outer wall, natural granite or basalt work well but are more expensive.
Can I cook over my DIY fire pit?
Absolutely. Once the fire has burned down to a nice bed of coals, you can grill on a portable grate placed over the ring. I’ve done hot dogs, burgers, and even foil‑wrapped potatoes. Just avoid direct flame‑grilling if you’ve used landscaping adhesive near the cooking area, and always clean the grate after use.