How to Make a Chunky Knit Blanket by Hand (No Needles Required)
- How to Make a Chunky Knit Blanket by Hand (No Needles Required)
- 📋 Key Takeaways
- Table of Contents
- The Ultimate Guide on How to Make a Chunky Knit Blanket
- Why Tabletop Knitting is Better Than Giant Needles
- What Makes 2026's Yarn Trends Different?
- Step 1: Gathering Your Supplies and Choosing the Right Yarn
- Chenille vs. Merino Wool vs. Tube Yarn
- Sizing Chart: How Many Skeins Do You Actually Need?
- Step 2: Casting On Your Foundation Row
- Creating the First Slip Knot
- Building the Braided Chain
- Step 3: Knitting the Main Body of Your Blanket
- Pulling the First Row of Loops
- Maintaining Consistent Loop Tension
- Step 4: Connecting New Skeins Like a Professional
- The Magic Knot Technique
- The Sewing Method for Invisible Joins
- Step 5: Binding Off for a Clean, Braided Edge
- The Braided Cast-Off Method
- Weaving in the Loose Ends
- Step 6: Troubleshooting Mistakes and Care Instructions
- Fixing Dropped Loops and Uneven Rows
- How to Wash Your Chunky Blanket Safely
- The Hidden Benefits of Hand-Knitting Your Own Decor
- Why Crafting Reduces Stress in 2026
- The Satisfaction of Functional Art
- Conclusion
- Frequently Asked Questions
- Can I make a chunky knit blanket if I have never knitted before?
- How long does it take to hand knit a chunky blanket?
- Why is my chunky blanket stretching out of shape?
- How much does it cost to make a chunky blanket yourself?
- Can I use unspun merino wool instead of chenille?
how to make a chunky knit blanket: 7 Ultimate Hand-Knitting Steps for 2026
Imagine curling up on your sofa on a freezing winter evening, wrapped in a cloud-like, ultra-plush throw that you crafted entirely with your own two hands. If you have been wondering how to make a chunky knit blanket, you are in the exact right place. You do not need expensive wooden needles, years of crafting experience, or a complicated mathematical pattern to create something beautiful and functional.
I remember staring at those massive, $250 designer throws in boutique home decor shops and thinking there was no way I could replicate that luxury at home. The truth? Hand knitting on a flat surface is surprisingly intuitive and incredibly forgiving. By using just your fingers and a clean tabletop, you can finish a standard-sized throw in about three to four hours. We tested multiple techniques, yarn types, and binding methods to bring you this definitive masterclass. Whether you want to upgrade your living room aesthetic or create the ultimate handmade gift, mastering how to make a chunky knit blanket is a skill that will pay off for years to come.
📋 Key Takeaways
- No Tools Required: You can create a professional-looking, durable throw using only your hands and a flat surface.
- Yarn Choice is Critical: Chenille yarn is highly recommended for beginners because it does not shed, pill, or fall apart like unspun merino wool.
- Tension is Everything: Keeping your loops a consistent 2-inch height prevents your blanket from looking messy, stiff, or warped.
- Seamless Joins: Using the magic knot or the needle-and-thread sewing method ensures your yarn transitions are completely invisible.
The Ultimate Guide on How to Make a Chunky Knit Blanket
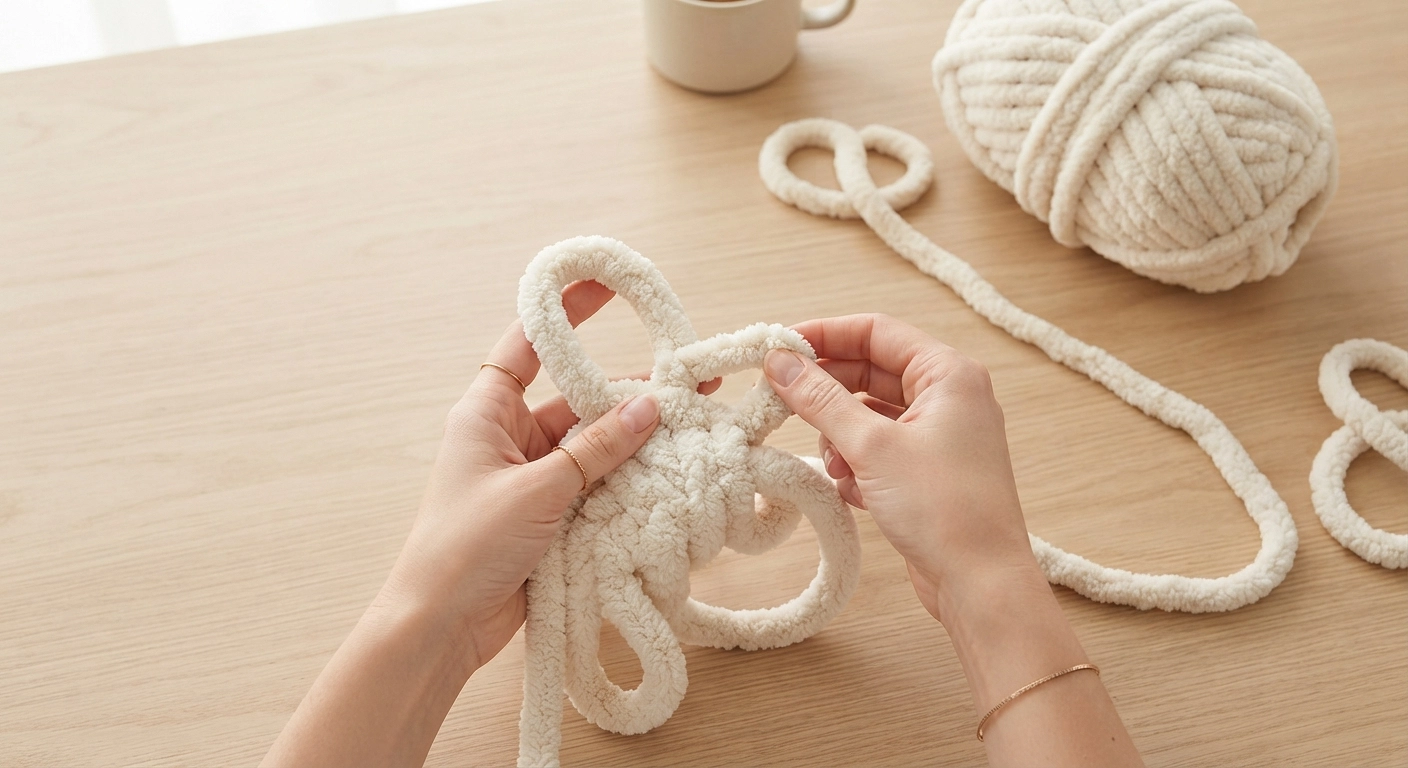
Diving into a new craft project can feel a bit overwhelming, especially when the materials are so unusually large. But learning how to make a chunky knit blanket is actually one of the most forgiving DIY projects you can tackle this year. You are essentially just pulling loops of yarn through other loops of yarn. If you make a mistake, you simply pull the yarn back out and try again. There is no cutting, no gluing, and no permanent damage if you mess up a row.
Why Tabletop Knitting is Better Than Giant Needles
Let’s talk about the physical mechanics of knitting with jumbo yarn. Traditional knitting needles for this weight class (usually 25mm or larger) resemble heavy wooden broomsticks. They are awkward to maneuver, they bump into your body as you work, and they can cause severe wrist fatigue within twenty minutes. Tabletop hand knitting completely eliminates all that physical strain.
By laying your work flat on a kitchen table, a large desk, or even a clean hardwood floor, you let gravity do the heavy lifting. You can clearly see every single loop laid out in front of you, making it incredibly easy to spot a dropped stitch before you are ten rows deep into the project. Plus, manipulating the yarn with your bare hands gives you direct tactile feedback, allowing you to gauge the tension naturally.
What Makes 2026’s Yarn Trends Different?
The crafting and textile world has shifted significantly over the past few years. While raw, unspun merino wool was the viral sensation that started this trend, crafters quickly realized its fatal flaw: it sheds aggressively and pills the moment you look at it. Today, the focus is entirely on durability, washability, and longevity. Modern synthetic yarns have taken center stage, offering that same massive, cozy aesthetic without the high maintenance. If you want to know how to make a chunky knit blanket that actually survives daily use, understanding these modern materials is your very first hurdle.
Step 1: Gathering Your Supplies and Choosing the Right Yarn
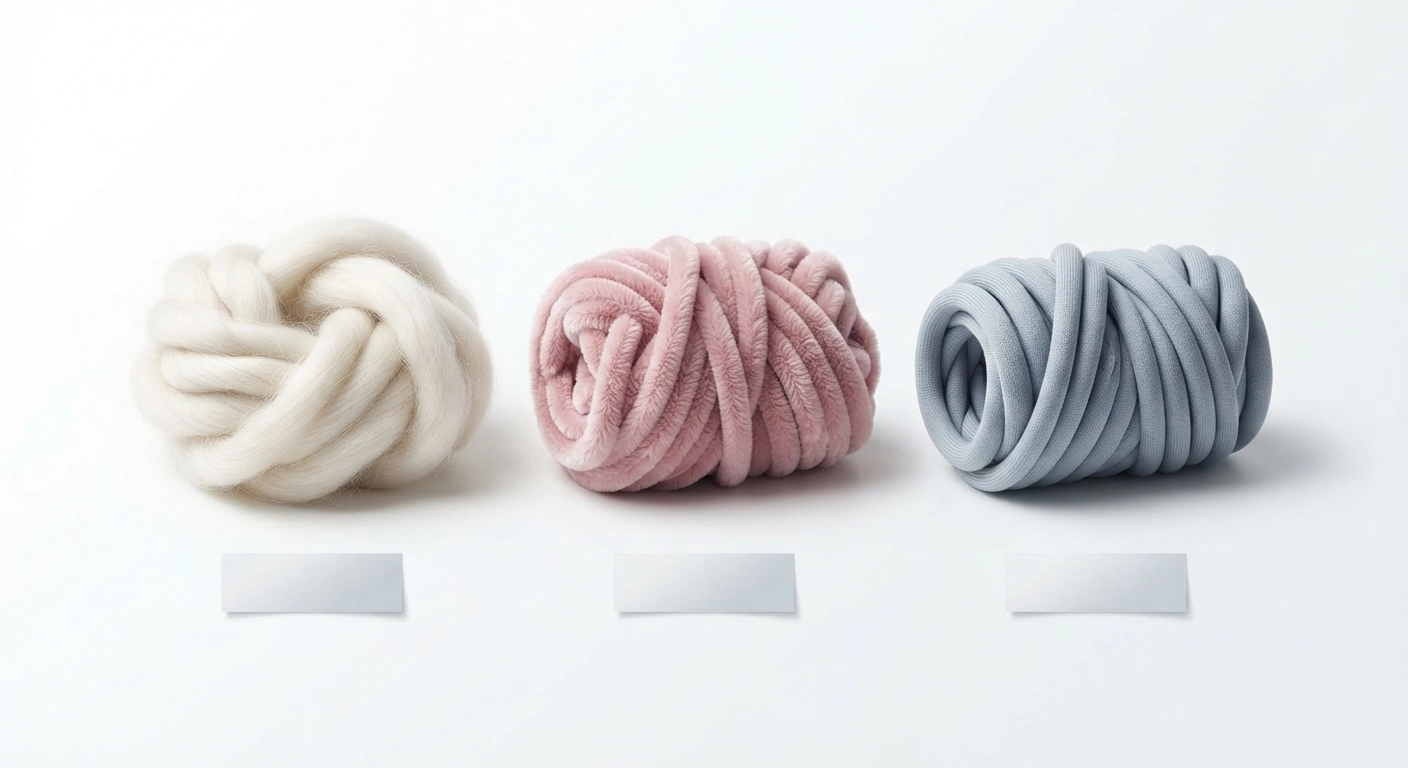
Before you pull a single loop, you need the right raw materials. Getting this step wrong can lead to a frustrating experience and a blanket that falls apart after one week on the couch. The yarn aisle can be confusing, but we are going to simplify it for you.
Chenille vs. Merino Wool vs. Tube Yarn
Let’s break down your three main options so you can make an informed, practical decision:
- Chenille Yarn: This is the absolute gold standard for beginners. It is typically 100% polyester, incredibly soft, machine washable, and does not shed. According to historical textile data on chenille fabric, its unique pile construction gives it a velvety texture that holds its shape beautifully over time. It slides easily through your fingers, making the knitting process incredibly smooth.
- Cotton Tube Yarn: A modern, structured favorite. It consists of a woven cotton exterior stuffed with soft polyfill. It has a smooth, minimalist look. It is heavier than chenille and fantastic for homes with pets because cat and dog claws will not easily snag the smooth exterior.
- Unspun Merino Wool: Gorgeous for styled photography, terrible for real life. It is highly delicate, requires professional dry cleaning, and will pill immediately upon friction. We strongly recommend skipping this unless the blanket is strictly for decorative, untouched display.
Sizing Chart: How Many Skeins Do You Actually Need?
Nothing kills your crafting momentum faster than running out of yarn halfway through a project. Here is a quick reference guide based on standard jumbo chenille yarn (typically categorized as size 7 jumbo, roughly 32 yards or 29 meters per skein):
| Blanket Size | Dimensions | Skeins Needed |
|---|---|---|
| Baby / Pet Blanket | 25″ x 30″ | 2 – 3 skeins |
| Standard Throw | 40″ x 50″ | 5 – 6 skeins |
| Large Afghan | 50″ x 60″ | 7 – 8 skeins |
| Queen Bed Runner | 60″ x 80″ | 10 – 12 skeins |
If you are planning to turn your newfound crafting skills into a profitable side hustle, getting your material costs right from the beginning is crucial. Once you master how to make a chunky knit blanket, you might want to start selling them at local craft fairs or online. I highly recommend checking out our comprehensive guide on How to Price Your DIY Crafts for Etsy to ensure you are actually turning a solid profit on these beautiful creations.
Step 2: Casting On Your Foundation Row
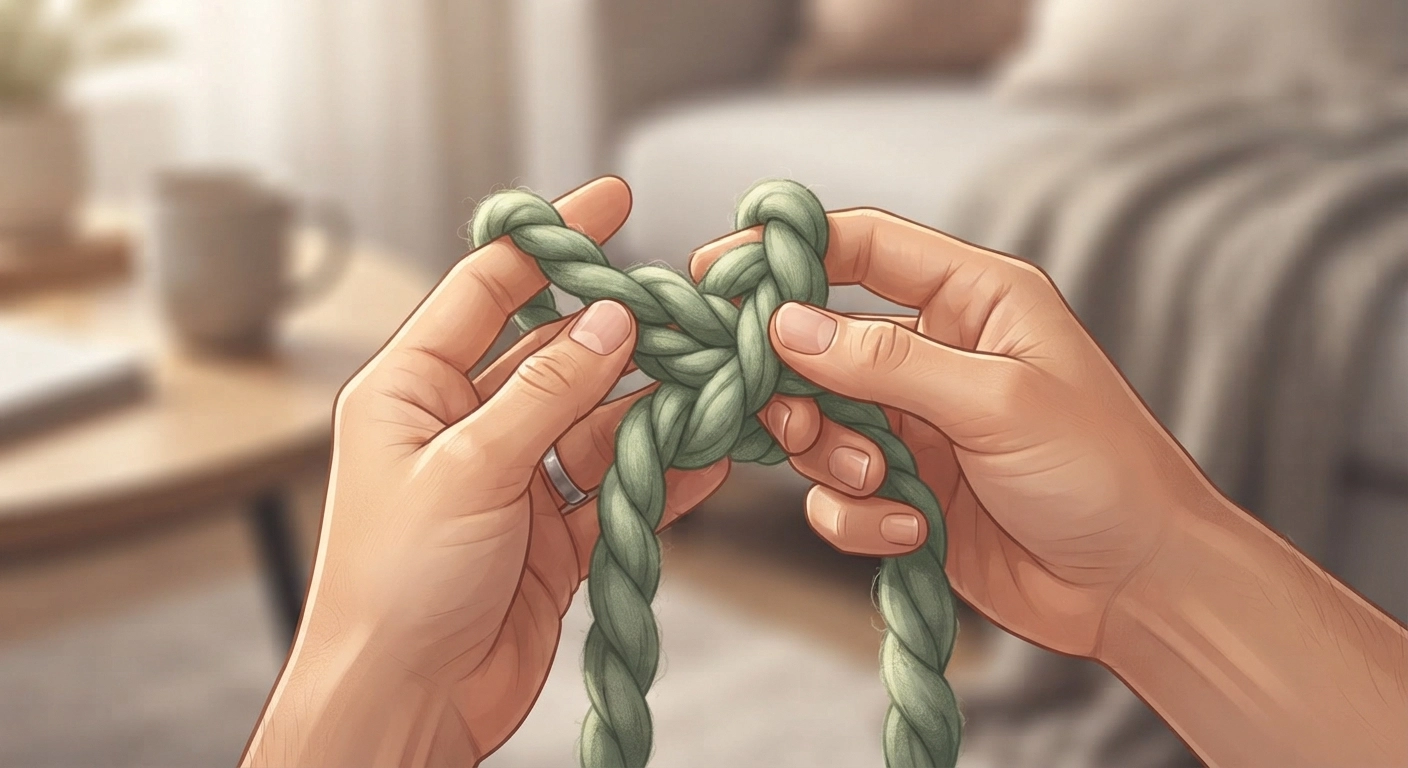
The foundation row is the anchor of your entire project. If this initial row is too tight, your finished blanket will curve into a stiff rainbow shape. If it is too loose, the bottom edge will look sloppy and uneven. Taking your time here sets you up for success.
Creating the First Slip Knot
Start by unwinding a few yards of yarn from your first skein. Leave a “tail” of about 6 to 8 inches. Take the working yarn (the long part attached to the skein) and cross it over the tail to form a simple loop. Reach your fingers through that loop, grab the working yarn, and pull it back through to create a slip knot.
Tighten it gently, but leave the loop large enough to easily fit two or three of your fingers inside. This loop is the starting point of your foundation chain. Do not pull it incredibly tight; chunky yarn needs room to breathe.
Building the Braided Chain
Now, lay the slip knot flat on your table. Reach your fingers through the loop, grab the working yarn, and pull a new loop through.
Here is the secret to a perfect, professional edge: make sure every single loop you pull through is exactly the same size. For a standard chunky blanket, aim for loops that are about 2 to 2.5 inches long. Continue pulling loops through the previous loop until you reach your desired width. For a standard throw blanket (40 inches wide), you will need to create a chain of about 25 to 30 loops. Count them twice just to be sure!
Step 3: Knitting the Main Body of Your Blanket
Once your foundation chain is complete, the real fun begins. This is where you will see exactly how to make a chunky knit blanket come to life, row by row. It is highly repetitive, rhythmic, and incredibly relaxing once you get the hang of it.
Pulling the First Row of Loops
Turn your foundation chain so the braided side (the side that looks like a series of V’s) is facing you. You will notice that each “V” shape in the braid has a top bump and a bottom bump. Starting from the side opposite your working yarn, skip the very first bump.
Take your finger, push it under the top half of the next braid, grab the working yarn, and pull a loop straight up. Move to the next braid, push your finger under, and pull another loop up. Continue this all the way across the chain. When you reach the end, you should have a row of open loops sticking straight up in the air like little bunny ears.
Maintaining Consistent Loop Tension
As you work back and forth across the table, row after row, tension becomes your biggest priority. If you pull the loops too high, the blanket will have massive holes that toes can easily poke through. If you pull them too tight, the blanket will be stiff, heavy, and lack that signature drape.
A great rule of thumb is to measure the loops against your own hand. I usually make sure each loop is roughly the height of three of my fingers. Check your work after every single row. If you notice a loop that is way too big, just gently tug the working yarn to tighten it up before moving on to the next stitch.
Creating cozy textiles like this is a fantastic way to upgrade your living space. If you are looking for more ways to spruce up your home without spending a fortune, take a look at our Easy DIY Room Decor Aesthetic guide for some minimalist inspiration that pairs perfectly with your new chunky throw.
Step 4: Connecting New Skeins Like a Professional
Unless you bought a massive, custom-ordered wholesale spool of yarn, you are going to run out of your first skein. Knowing how to attach a new one seamlessly is what separates a beginner’s messy project from a professional-quality piece. You do not want hard, scratchy knots ruining the softness of your blanket.
The Magic Knot Technique
The magic knot is incredibly secure and works wonderfully for fluffy chenille yarn.
- Lay the tail of your old yarn and the beginning of your new yarn parallel to each other, pointing in opposite directions on the table.
- Take the new yarn and tie a simple overhand knot around the old yarn. Pull it tight.
- Take the old yarn and tie a simple overhand knot around the new yarn. Pull it tight.
- Now, grab the two main strands of yarn and pull them away from each other. The two knots will slide together and lock tightly against one another.
- Snip the excess tails right at the base of the knot.
Because chunky yarn is so thick and plush, this tiny knot will completely disappear into the fluff of the blanket. You will never feel it.
The Sewing Method for Invisible Joins
If you want an absolutely flawless join with zero hard spots, the sewing method is your best bet. Strip away a tiny bit of the fuzz from the ends of both yarn pieces (about half an inch), exposing the inner core string. Overlap the two core strings and use a regular sewing needle and thread to stitch them together securely.
This method takes a few extra minutes, but when you are learning how to make a chunky knit blanket to sell or give as a high-end gift, these small details matter immensely. It guarantees the blanket will stretch naturally without any weak points.
Step 5: Binding Off for a Clean, Braided Edge
You have knitted your way through five or six skeins of yarn, your blanket looks massive and cozy, and you are finally ready to finish. Binding off (also known as casting off in traditional hand knitting) secures the final row of open loops so the entire blanket does not unravel the moment you pick it up.
The Braided Cast-Off Method
Start on the side of the blanket where your working yarn is currently located. You need to ensure you have at least three to four yards of working yarn left to complete the bind-off comfortably.
Take the first two loops in the row. Hold them in one hand. Take your working yarn, pass it through BOTH of those loops, and pull up a brand new loop.
Now, take that new loop you just made, and hold it together with the next loop in the row. Pass the working yarn through both of them, and pull up another new loop.
Repeat this exact process all the way across the top edge of your blanket. You will see a beautiful, clean braided edge forming that perfectly matches the foundation chain you created at the very beginning. This symmetry is what makes the blanket look professionally made.
Weaving in the Loose Ends
When you reach the very last loop, cut your working yarn, leaving an 8-inch tail. Pull that tail completely through the final loop and pull it tight to create a secure knot.
Now, you have a tail hanging off the corner of your finished blanket. Do not just cut it off! Take that tail and weave it in and out of the back side of the stitches, following the natural curve of the yarn. Once it is woven through three or four stitches, it is locked in place, and you can safely trim any excess.
Once your blanket is finished, it creates the ultimate cozy atmosphere in any room. Imagine draping it over your couch while burning a custom fragrance. If you want to complete that relaxing, high-end aesthetic, you can easily learn how to make easy scented candles right in your own kitchen to pair with your new throw.
Step 6: Troubleshooting Mistakes and Care Instructions
Even the most careful and experienced crafters make mistakes. Part of mastering how to make a chunky knit blanket is knowing how to fix errors without panicking or throwing the whole project in the closet.
Fixing Dropped Loops and Uneven Rows
If you accidentally skip a loop while knitting, you will eventually notice a hole in your blanket and a random loop hanging loose in the middle of your work. Do not worry—you do not have to unravel the whole thing.
Simply find the dropped loop, grab a piece of scrap yarn, and tie it temporarily so it does not run further down. Carefully unravel just the stitches directly above the mistake, hook the dropped loop back into the pattern, and re-knit that specific column back up to the top row.
If your blanket starts looking narrower at the top than it does at the bottom (a very common beginner mistake), your tension is getting too tight as you work. Force yourself to relax your hands, take a deep breath, and measure your loops against your fingers again. You can always gently pull the sides of the blanket to stretch the stitches back into a square shape.
How to Wash Your Chunky Blanket Safely
If you used chenille yarn, you are in luck. It is completely machine washable! However, you must handle it with care to prevent the heavy, wet yarn from stretching out of shape.
- Use a Front-Loading Washer: Top loaders with central agitators can catch, stretch, and tear the chunky stitches. If you only have a top loader, place the blanket in a massive mesh laundry bag first.
- Cold Water Only: Wash on the delicate or gentle cycle using strictly cold water to protect the polyester fibers.
- Avoid Heavy Detergents: Use a mild, gentle liquid detergent. Avoid fabric softeners entirely, as they can leave a sticky residue on polyester yarn that ruins its fluffiness.
- Air Dry Flat: Never hang a wet chunky blanket on a clothesline; the weight of the water will stretch it out permanently. Lay it flat on a clean surface, dry towels, or a large drying rack out of direct sunlight.
The Hidden Benefits of Hand-Knitting Your Own Decor
Beyond just having a nice blanket for your sofa, the act of making it provides incredible mental benefits. In a world dominated by screens, notifications, and fast-paced digital work, sitting down to manipulate physical materials is incredibly grounding.
Why Crafting Reduces Stress in 2026
The rhythmic, repetitive motion of hand knitting has been shown to lower heart rates and reduce cortisol levels. When you focus solely on pulling the next loop, counting your stitches, and feeling the soft texture of the yarn, your brain enters a state of flow. It is essentially a form of active meditation. You aren’t just learning how to make a chunky knit blanket; you are carving out three hours of uninterrupted peace for yourself.
The Satisfaction of Functional Art
There is a unique psychological boost that comes from creating something that serves a daily, functional purpose. Every time you or a guest uses that blanket, you get a small hit of pride knowing you made it from scratch.
Learning how to make a chunky knit blanket is just the gateway into the world of profitable and relaxing DIY projects. Once you have the hand-knitting bug, you might find yourself exploring other creative avenues. If you are curious about what else is trending this year, check out our curated list of DIY Crafts to Make and Sell for more inspiration on turning your hobbies into income.
Conclusion
Figuring out how to make a chunky knit blanket does not have to be an intimidating process reserved for textile experts. By utilizing the tabletop method, selecting the right durable chenille yarn, and focusing on consistent loop tension, you can create a luxurious, high-end home decor piece in a single afternoon. It is the perfect weekend project to keep your hands busy, reduce your stress, and keep your home cozy. Grab your yarn, clear off your dining table, and start casting on—your perfect winter throw is just a few hours away.
Frequently Asked Questions
Can I make a chunky knit blanket if I have never knitted before?
Absolutely. Hand knitting on a flat surface requires zero previous knitting experience. The technique is essentially just pulling loops through other loops. Because the yarn is so large, you can easily see what you are doing, making it highly beginner-friendly.
How long does it take to hand knit a chunky blanket?
For a complete beginner making a standard 40″ x 50″ throw, expect the process to take about 3 to 4 hours. Once you get the rhythm down and your muscle memory kicks in, you can easily finish a blanket of that size in under two hours.
Why is my chunky blanket stretching out of shape?
Stretching usually occurs for two reasons: inconsistent loop tension during the knitting process, or improper washing. If you pull your loops too loosely, the blanket lacks structural integrity. Additionally, hanging the blanket to dry while it is wet will cause gravity to permanently warp the heavy yarn.
How much does it cost to make a chunky blanket yourself?
The cost depends entirely on the yarn you choose. Jumbo chenille yarn typically costs between $7 and $12 per skein. For a standard throw requiring 6 skeins, your total material cost will be roughly $45 to $70, which is significantly cheaper than buying a pre-made one for $150 to $250.
Can I use unspun merino wool instead of chenille?
You can, but it is not recommended for daily use. Unspun merino wool is beautiful and incredibly warm, but it sheds heavily and pills almost immediately when rubbed against clothes or furniture. It is best reserved for decorative blankets that will not see heavy, everyday usage.