how to make digital stickers for goodnotes: 7 Critical Steps to Start Selling in 2026
- how to make digital stickers for goodnotes: 7 Critical Steps to Start Selling in 2026
- 📋 Key Takeaways
- Table of Contents
- Why Digital Stickers Are the Perfect Passive Income in 2026
- Low Overhead, High Profit Margins
- Constant Demand for Niche Digital Planners
- Essential Tools You Need to Get Started
- Hardware Requirements: iPads and Styluses
- Software Options: Procreate vs. Canva
- Step 1: Designing Your Digital Stickers (Procreate & Canva)
- Drawing in Procreate (Adding the White Border Magic)
- Using Canva for Quick & Easy Designs
- Step 2: Exporting Your Designs as Transparent PNGs
- The Importance of Transparent PNGs
- Organizing Your Files for Customers
- Step 3: how to make digital stickers for goodnotes (The Pre-Cropped File)
- Importing PNGs into a GoodNotes Notebook
- Exporting as a .goodnotes File
- Step 4: Utilizing the GoodNotes Elements Tool
- Creating an Elements Collection File
- Step 5: Packaging Your Files for Customers
- Using Cloud Storage for Large Files
- Creating a Beautiful PDF Delivery Document
- Step 6: Creating Etsy Listing Photos That Convert
- Designing Lifestyle Mockups
- Pricing Your Digital Stickers
- Step 7: Marketing and Scaling Your Sticker Business
- Mastering Etsy SEO (Search Engine Optimization)
- Using Pinterest to Drive Massive Traffic
- Common Mistakes Beginners Make (And How to Avoid Them)
- Conclusion: Start Your Digital Stationery Journey Today
- Frequently Asked Questions (FAQ)
- Can I make digital stickers without an iPad?
- Do I need to buy a commercial license for fonts and graphics?
- Why are my digital stickers blurry when I put them in GoodNotes?
- What is the difference between a PNG and a .goodnotes file?
- How many stickers should be in a pack to sell well?
- Is the digital sticker market too saturated in 2026?
Imagine waking up, grabbing your morning coffee, checking your phone, and seeing a notification that you just made a sale while you were fast asleep. That is the true magic of creating digital products, and figuring out how to make digital stickers for goodnotes is one of the absolute easiest and most profitable ways to get started. Unlike physical products, you design a digital sticker pack exactly once. After that, you can sell it an infinite number of times without ever worrying about shipping labels, running out of inventory, or dealing with expensive material costs.
If you have ever used a digital planner on your iPad, you know how ridiculously addictive it is to decorate your weekly spreads with cute, aesthetic stickers. It turns a boring to-do list into a visually pleasing experience. But instead of just buying them from other creators, what if you were the one designing and selling them? If you have been wondering how to make digital stickers for goodnotes, you are in the right place. In this comprehensive, step-by-step guide, we will walk you through the entire process—from staring at a blank digital canvas to publishing a highly profitable Etsy listing. Whether you are an experienced digital artist using Procreate or a complete beginner relying on Canva, this tutorial will show you exactly what it takes to succeed in the booming digital stationery market this year.
📋 Key Takeaways
- Digital stickers offer a 100% profit margin after the initial design phase, making them a top-tier passive income stream for creators.
- You can design professional-quality stickers using advanced tools like Procreate or beginner-friendly platforms like Canva.
- Exporting your designs as transparent PNG files is a non-negotiable step for a seamless user experience.
- Creating a pre-cropped .goodnotes file significantly increases the perceived value of your product and saves your customers time.
- Proper Etsy SEO, keyword research, and incredibly attractive listing photos are the secrets to standing out in a crowded marketplace.
Why Digital Stickers Are the Perfect Passive Income in 2026
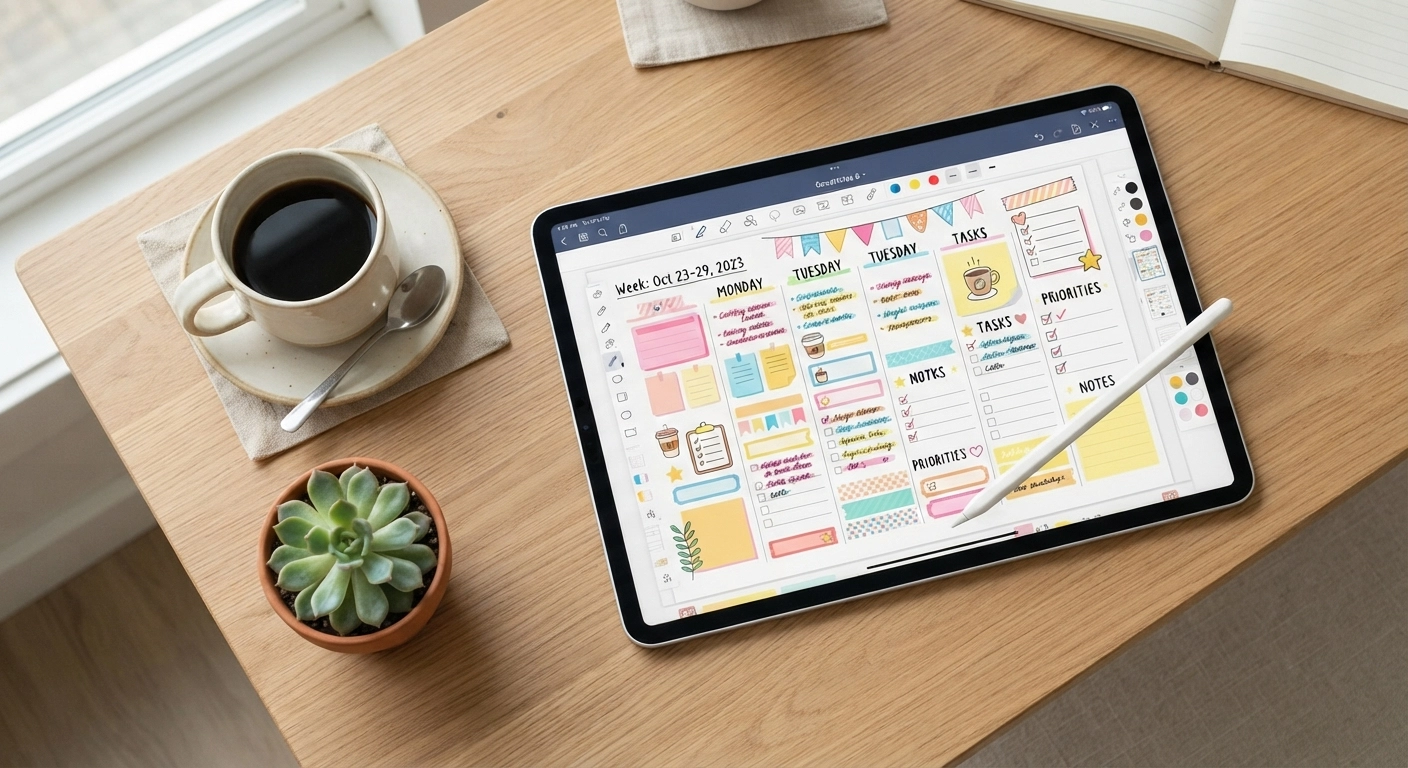
Let’s get straight to the point: the digital stationery market is absolutely booming. People are ditching heavy, bulky paper planners and moving their entire lives onto their iPads. But let’s be honest, a plain digital planner can feel a bit sterile and boring. That is exactly where digital stickers come in. They add personality, color, and visual organization to digital pages.
When you learn how to make digital stickers for goodnotes, you are tapping into a highly engaged, passionate audience that loves to customize their digital workspace. They are actively looking for ways to make their digital planners feel more like traditional paper planners.
Low Overhead, High Profit Margins
Think about traditional, physical sticker making. You need to buy a $300 Cricut machine, expensive weatherproof sticker paper, printer ink that costs an arm and a leg, shipping envelopes, and you have to make daily trips to the post office. It is exhausting, and the profit margins are often razor-thin.
Digital stickers eliminate literally all of that. Anyone asking how to make digital stickers for goodnotes will be thrilled to know that your only investment is your time and the software you use to design them. Once the file is uploaded to your Etsy shop, it can sell ten times or ten thousand times with zero extra physical effort on your part. It is the ultimate definition of scalable income.
Constant Demand for Niche Digital Planners
As more students, corporate professionals, and busy moms adopt digital planning, the demand for highly specific sticker niches grows exponentially. Need a sticker set specifically for keto meal planning? There is a massive market for that. What about nursing school study stickers with anatomical diagrams? Huge demand.
If you are already looking into how to make digital planners to sell: 7 Critical Steps to Build a Profitable Etsy Shop in 2026, adding complementary digital stickers to your shop is the most logical next step. You can even bundle them together to instantly increase your average order value and make your listings irresistible.
Essential Tools You Need to Get Started
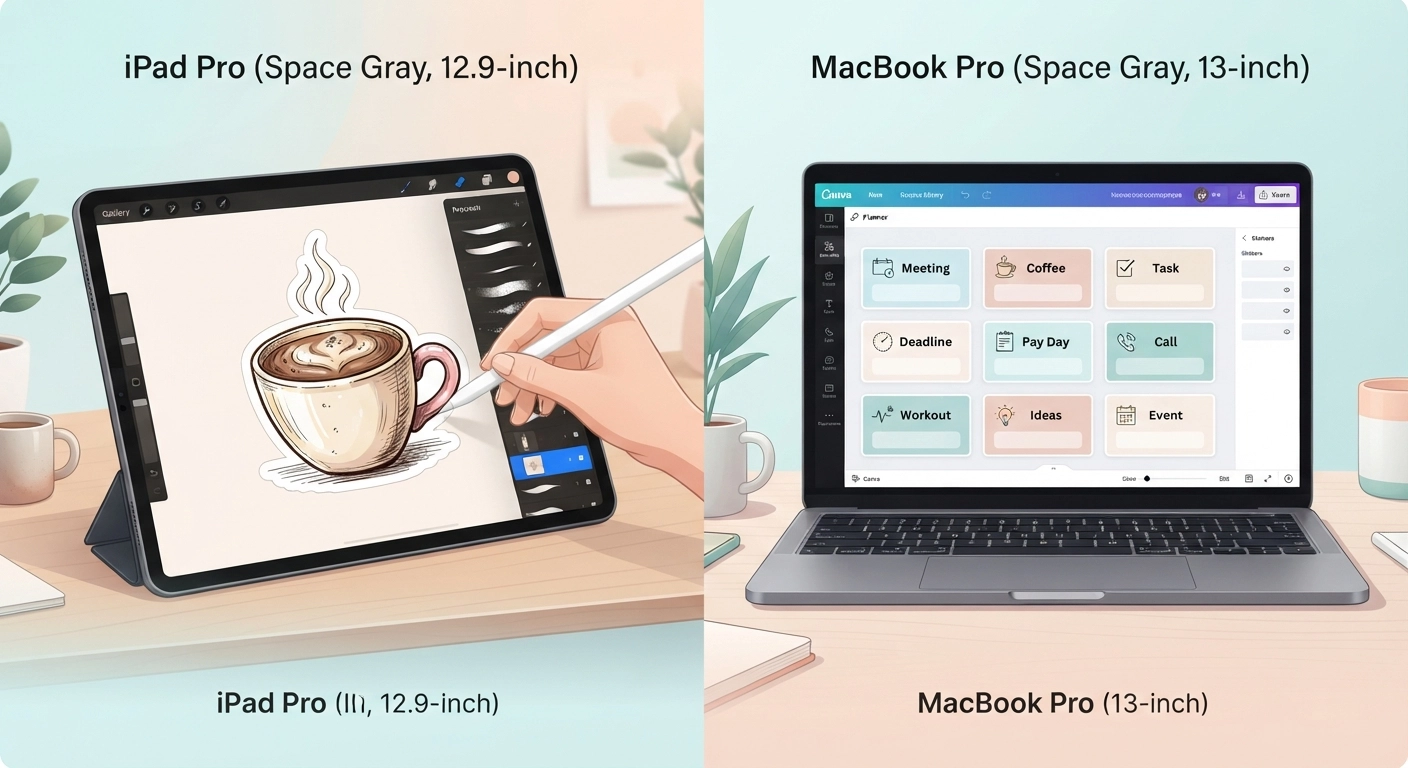
Before we dive into the nitty-gritty design process, let’s look at the hardware and software you will need. You do not need to break the bank, but having the right tools makes the process infinitely smoother and much more enjoyable.
Hardware Requirements: iPads and Styluses
Ideally, you should have an iPad and an Apple Pencil. While it is technically possible to design stickers on a desktop computer using a mouse, an iPad gives you the freedom to hand-draw unique illustrations. More importantly, it allows you to easily test your stickers directly in the GoodNotes app to ensure they look and function perfectly.
You don’t need the newest iPad Pro, either. A standard iPad Air or even a base model iPad from the last few years works perfectly fine, as long as it is compatible with an Apple Pencil (1st or 2nd generation). If you are on a strict budget, third-party styluses from brands like Logitech can also do the trick, though they might lack the pressure sensitivity of the Apple Pencil.
Software Options: Procreate vs. Canva
You have two main paths when it comes to software, and your choice depends entirely on your artistic skills and the style of stickers you want to make:
- Procreate: This is the holy grail for digital artists. It costs a one-time fee of around $12.99 on the App Store. It allows you to draw custom, hand-lettered, and beautifully shaded stickers. If you want to create unique character art, watercolor effects, or highly detailed illustrations, Procreate is your best friend.
- Canva: Perfect for beginners who don’t want to draw from scratch or who prefer a minimalist, functional aesthetic. You can use shapes, fonts, and commercial-use graphics to build functional stickers like sticky notes, washi tape strips, and text labels. Canva is incredibly intuitive and operates on a drag-and-drop interface.
Step 1: Designing Your Digital Stickers (Procreate & Canva)
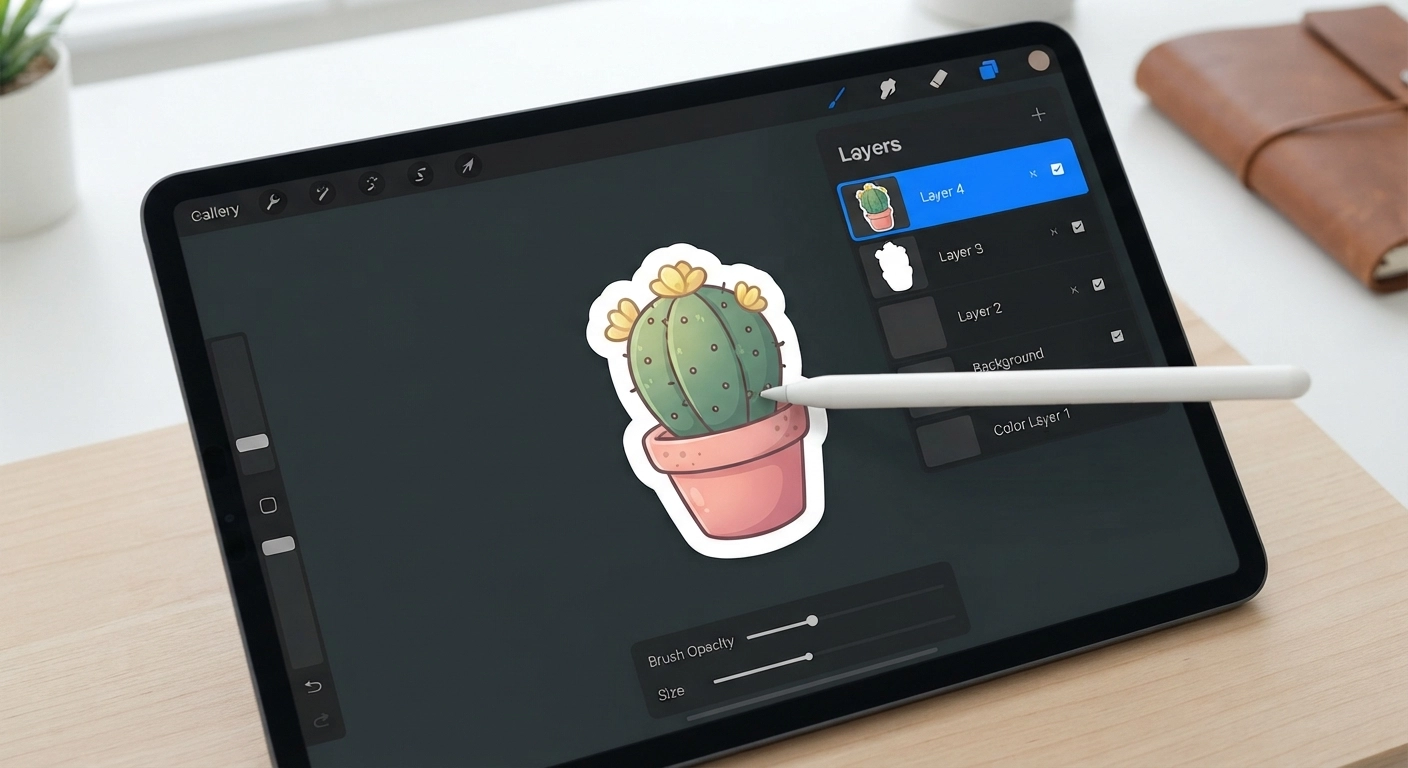
The design phase is where your creativity truly shines. This is the core of understanding how to make digital stickers for goodnotes. Let’s break down exactly how to approach this using both of the popular methods we just discussed.
Drawing in Procreate (Adding the White Border Magic)
Mastering how to make digital stickers for goodnotes often starts with setting up your canvas correctly. If you are using Procreate, start by creating a canvas that is at least 3000 x 3000 pixels with a DPI (Dots Per Inch) of 300. Why? Because GoodNotes users love to zoom in on their planners. If your canvas is too small, your stickers will look pixelated and blurry when zoomed in, leading to bad reviews.
Draw your designs on separate layers. A massive pro-tip that many top Etsy sellers use is adding a distinct white border around their illustrations. This gives the digital graphic the appearance of a real, physical die-cut sticker, which adds a wonderful touch of realism to a digital planner.
Here is exactly how to do it in Procreate:
- Finish drawing and coloring your sticker on one layer.
- Duplicate that drawing layer.
- Select the bottom duplicated layer, go to your adjustments menu, and turn the brightness all the way up until the shape is entirely white.
- Add a slight Gaussian blur to this white layer (around 2-5% depending on your canvas size).
- Use the Automatic Selection tool to tap the blurred white area, which will select a slightly expanded border around your original art.
- Create a new layer underneath, and fill that selection solidly with white. You now have a perfect die-cut border!
This small, seemingly insignificant detail instantly elevates the quality of your product and makes it look incredibly professional.
Using Canva for Quick & Easy Designs
Not an artist? Can’t draw a straight line? No problem at all. Canva is an absolute powerhouse for creating functional, everyday planner stickers. People need stickers that say “Pay Day”, “Doctor’s Appointment”, “Gym”, or “Meal Prep”. You can easily design digital sticky notes by layering colored squares with subtle drop shadows to create a 3D effect.
If you want to dive deeper into using Canva for creating digital products, I highly recommend checking out our comprehensive guide on How to Make Easy Printables Using Canva. The exact same design principles apply here.
Just remember one critical rule: if you are using Canva’s pre-made elements or graphics, you must ensure you are adhering to their commercial use licensing. You cannot just export a single Canva graphic (like a picture of a flower they provide) and sell it as-is. You must alter it, add text to it, or combine it with other elements to create a fundamentally new design.
Step 2: Exporting Your Designs as Transparent PNGs
Once your beautiful designs are ready, the way you save them is absolutely critical. If you save them as standard JPEGs, they will have an ugly, solid white square background attached to them, rendering them completely useless as stickers.
The Importance of Transparent PNGs
You must export your files as PNGs with the background turned off.
In Procreate, this is incredibly simple: open your layers panel, scroll all the way to the bottom, and uncheck the box next to “Background color”. The background will turn into a dark grid. Then, tap the wrench icon, go to Share, and select PNG.
In Canva, you will need a Canva Pro account to do this efficiently. When you go to download your file, you must check the box that says “Transparent background” before hitting the download button.
When someone asks me how to make digital stickers for goodnotes, I always emphasize this step heavily. A sticker without a transparent background is just a photo. It won’t blend into the planner pages, and your customers will immediately ask for a refund.
Organizing Your Files for Customers
Customers love having options and flexibility. When you sell a sticker pack, you should always provide the individual PNG files as part of the purchase. Create a folder on your computer, name it something clear and professional like “Individual_PNGs”, and drop all your transparent stickers in there.
This is perfect for users who prefer alternative note-taking apps like Notability, Noteshelf, or Xodo, which might not support GoodNotes-specific formatted files. By providing the PNGs, you are instantly expanding your customer base beyond just GoodNotes users.
Step 3: how to make digital stickers for goodnotes (The Pre-Cropped File)
Here is the secret sauce that separates amateur Etsy sellers from top-tier, highly profitable shops. GoodNotes users do not want to import 100 individual PNG files from their camera roll one by one. It is tedious and frustrating. They want a “Pre-Cropped Sticker Book.”
This is the most crucial part of mastering how to make digital stickers for goodnotes. If you only offer PNGs, you will lose out to competitors who offer pre-cropped files.
Importing PNGs into a GoodNotes Notebook
First, open your GoodNotes app and create a new blank notebook. You can design a cute, branded cover for it in Canva, or just use a standard blank page.
Next, use the split-screen feature on your iPad. Have GoodNotes open on the left side of your screen and your photo gallery (or the Files app) containing your transparent PNGs open on the right side.
Now, simply drag and drop each sticker from your files directly onto the GoodNotes page. Resize them so they fit neatly on the page without overlapping each other. Group them logically—put all the sticky notes on one page, all the text labels on another, and all the decorative icons on a third.
Exporting as a .goodnotes File
Once all your stickers are neatly arranged on the pages, tap the share/export icon in the top navigation bar of GoodNotes and select “Export All”.
When prompted for the file format, you must choose GoodNotes (do not choose PDF, and do not choose Image).
This creates a proprietary .goodnotes file. When your customer downloads this specific file from Etsy and imports it into their GoodNotes app, they will open a beautifully organized notebook where every single sticker is already imported, perfectly sized, and ready to be lassoed, copied, and pasted into their actual planner. It is a massive time-saver for them and a huge, premium selling point for you.
Step 4: Utilizing the GoodNotes Elements Tool
GoodNotes introduced the “Elements” tool a few years ago, and it completely revolutionized the digital planning game. It allows users to save their absolute favorite, most-used stickers into collections directly within the app’s top toolbar, so they don’t even have to open a separate sticker book notebook to access them.
Creating an Elements Collection File
As an advanced seller, you can create an Elements collection file (a .collection file) to give your customers yet another incredibly convenient way to import your stickers.
To do this, tap the Elements tool (the icon with the small star) in GoodNotes. Scroll to the right and tap the “+” button to create a new collection. Title it the name of your sticker pack (e.g., “Boho Neutral Planner Stickers”). Then, tap “Import From” and select all your transparent PNG files. Once they are loaded into the collection, tap the three dots next to the collection name and select “Share”. This will export a .collection file.
This comprehensive approach is a hallmark of truly understanding how to make digital stickers for goodnotes. By offering the individual PNGs, the pre-cropped .goodnotes file, and the .collection file in your Etsy listing, you are providing a premium, luxury digital product that caters to every conceivable type of user preference.
Step 5: Packaging Your Files for Customers
A big part of how to make digital stickers for goodnotes successfully is how you deliver them. Etsy has a strict file size limit of 20MB per file, and you can only upload a maximum of 5 files per listing. High-quality digital sticker packs, especially those with 100+ stickers and a GoodNotes file, will almost always exceed this limit.
Using Cloud Storage for Large Files
Because of Etsy’s limits, the industry standard is to upload your heavy files (the ZIP folder of PNGs, the .goodnotes file, and the .collection file) to a reliable cloud storage service like Google Drive or Dropbox. Make sure you set the folder sharing permissions to “Anyone with the link can view/download”.
Creating a Beautiful PDF Delivery Document
Instead of uploading the files directly to Etsy, you will upload a single, beautifully designed PDF document that you can easily create in Canva. This PDF acts as your digital storefront’s delivery boy.
It should include:
- A warm, friendly thank-you note for supporting your small business.
- A large, obvious, clickable button that says “Click Here to Download Your Stickers” (which links to your Google Drive folder).
- A brief, step-by-step guide (with screenshots if possible) on how to import the stickers into GoodNotes.
- A link to your social media or an invitation to join your email list for future discounts.
Never assume your customer knows the technical steps of importing files. Excellent, proactive customer service prevents confused buyers and bad reviews!
Step 6: Creating Etsy Listing Photos That Convert
You can have the most beautiful, meticulously designed stickers in the world, but if your Etsy listing photos are terrible, absolutely no one will click on them. Etsy is a highly visual platform, and buyers judge a book by its cover.
Designing Lifestyle Mockups
Your main thumbnail image must clearly show exactly what the customer is getting in a real-world scenario. Use an iPad mockup showing the stickers in action on a digital planner page. You can find fantastic, realistic iPad mockups on Canva, Creative Market, or Etsy itself.
Make sure to clearly state “DIGITAL DOWNLOAD” in bold text on your main image so confused buyers don’t expect a sheet of physical stickers to arrive in their mailbox. Show a preview of all the stickers included in the pack on the second and third listing photos so they know exactly what they are paying for.
Pricing Your Digital Stickers
Pricing digital products can be a psychological minefield. You want to remain competitive in the market while properly valuing your time and effort. Look at what top sellers in your specific niche are charging for similar sticker packs. Usually, digital sticker packs range from $2.00 to $5.00 depending on the quantity and detail of the art.
If you are struggling with pricing strategies and feeling overwhelmed, take a moment to read our comprehensive guide on How to Price Your DIY Crafts for Etsy: A Beginner’s Guide. While that article focuses heavily on physical crafts, the exact same psychological pricing principles and competitor analysis tactics apply perfectly to digital goods.
Step 7: Marketing and Scaling Your Sticker Business
Learning how to make digital stickers for goodnotes is only the first half of the battle. The second half is getting eyeballs on your products and converting those views into sales.
Mastering Etsy SEO (Search Engine Optimization)
Etsy is, at its core, a search engine just like Google. You need to use the right keywords in your listing title, description, and tags. Do not just name your listing “Cute Stickers”. Use long-tail phrases that your ideal customer is actually typing into the search bar, such as “GoodNotes stickers minimalist”, “digital planner stickers boho”, “pre-cropped digital stickers”, and “iPad digital planner widgets”.
Using Pinterest to Drive Massive Traffic
Pinterest is a literal goldmine for digital stationery sellers. The demographics match perfectly. Create highly aesthetic pins showing your stickers being used in a beautifully decorated planner spread.
Even better, create short video pins (Idea Pins) showing the process of lassoing, moving, and resizing a sticker in GoodNotes. Video content performs exceptionally well on Pinterest and Instagram Reels because it visually demonstrates how satisfying and easy digital planning can be.
If you find success here and want to expand your shop’s overall offerings later, consider checking out our curated list of DIY Crafts to Make and Sell: 10 Profitable Ideas for 2026 to see how offering a mix of digital and physical products can complement a growing creative brand.
Common Mistakes Beginners Make (And How to Avoid Them)
When you are first figuring out how to make digital stickers for goodnotes, it is easy to stumble. Here are a few pitfalls to watch out for:
- Ignoring Commercial Licenses: If you use a font or a graphic element from a site like Canva or Creative Fabrica, you must read the license. You cannot resell someone else’s raw artwork as your own sticker. Always modify and combine elements.
- Making Files Too Large: While you want high quality (300 DPI), creating a canvas that is 10,000 pixels wide will make the final file size massive. Massive files cause the GoodNotes app to lag and crash on older iPads. Stick to a reasonable size like 2000×2000 or 3000×3000 pixels.
- Forgetting the Instructions: Never assume a buyer knows how to unzip a file or import a .goodnotes file. Always provide a clear, step-by-step PDF guide. This alone will save you hours of answering customer service messages.
Conclusion: Start Your Digital Stationery Journey Today
Building a reliable passive income stream doesn’t have to be a complicated, stressful endeavor. By figuring out how to make digital stickers for goodnotes, you are equipping yourself with a highly monetizable, scalable skill. The entire process—from sketching your first designs in Procreate or assembling shapes in Canva, to exporting transparent PNGs, and finally creating that coveted pre-cropped GoodNotes file—becomes second nature once you do it a few times.
The best time to start your digital product shop was yesterday; the second best time is right now, today. Grab your iPad, open up your design software, and start creating. There is a very high chance that your future customers are already on Etsy, searching for the exact sticker designs you are about to make!
Frequently Asked Questions (FAQ)
Can I make digital stickers without an iPad?
Yes, absolutely! While an iPad and Apple Pencil make hand-drawing much easier, you can easily learn how to make digital stickers for goodnotes using a standard desktop computer and a program like Canva, Adobe Illustrator, or even PowerPoint. You will just be creating more graphic, text, or shape-based stickers rather than hand-drawn, illustrative art.
Do I need to buy a commercial license for fonts and graphics?
Yes, this is incredibly important. If you are using third-party fonts or graphics to create your stickers, you must ensure they come with a commercial use license. Websites like Creative Fabrica or Creative Market clearly state their licensing terms on every product. Never, ever use images pulled directly from a Google Image search.
Why are my digital stickers blurry when I put them in GoodNotes?
Blurry stickers are almost always the result of a low-resolution canvas during the design phase. Always design your stickers on a canvas with a minimum of 300 DPI (Dots Per Inch) and ensure the pixel dimensions are large enough (e.g., 2000×2000 pixels or higher). When exporting, make sure you are saving them at maximum quality.
What is the difference between a PNG and a .goodnotes file?
A PNG is an individual image file with a transparent background; it is just the raw sticker. A .goodnotes file is a proprietary file format created specifically by the GoodNotes app. When you sell a .goodnotes file, it acts as a complete digital sticker book where all the individual PNGs are already imported, perfectly sized, and ready to be used instantly by the customer.
How many stickers should be in a pack to sell well?
There is no strict rule, but most successful Etsy listings offer between 50 to 150 stickers per pack. If you are creating highly detailed, beautifully hand-drawn art, a pack of 20-30 might suffice and command a premium price. If you are creating simple functional stickers (like color-coordinated sticky notes and banners), aiming for 100+ offers great perceived value to the buyer.
Is the digital sticker market too saturated in 2026?
While the market is certainly competitive, it is absolutely not too saturated if you know how to niche down. Instead of selling generic “planner stickers,” try creating highly specific bundles like “ADHD management and focus stickers,” “small business finance tracking stickers,” or “nursing student clinical rotation stickers.” Hyper-niche products always find their dedicated audience.