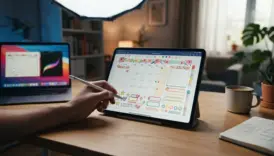
How to Make Digital Stickers in Procreate to Sell Online
- How to Make Digital Stickers in Procreate to Sell Online
- 📋 Key Takeaways
- Table of Contents
- 1. The Essential Tools You Need to Get Started
- Hardware Requirements
- Software (Procreate vs. Alternatives)
- Why Selling Digital Stickers is a Low-Risk Side Hustle
- 2. Setting Up Your Procreate Canvas for High Quality
- Choosing the Right Dimensions and DPI
- Understanding Color Profiles (RGB vs. CMYK)
- 3. Finding Profitable Niche Ideas Before You Draw
- Finding Profitable Niches on Etsy
- Targeting Specific Planner Users
- 4. Designing Your First Sticker Collection
- Sketching and Inking Your Designs
- Coloring and Shading Techniques
- 5. The Secret to the Perfect White Border
- The Procreate Gaussian Blur Method
- 6. Exporting and Formatting Your Files Correctly
- Saving as Transparent PNGs
- Creating GoodNotes Specific Files
- 7. Listing and Selling Your Stickers on Etsy
- Crafting Clickable Listing Images
- SEO Basics for Digital Products
- 8. Marketing Your New Digital Product Business
- Utilizing Pinterest and TikTok
- Building a Loyal Customer Base
- Wrapping Up Your Digital Sticker Journey
- Frequently Asked Questions
- Can I make digital stickers without an iPad?
- Do I need to pay for Procreate every month?
- What is the difference between a PNG and a GoodNotes file?
- How much should I charge for a digital sticker pack?
- Is the digital sticker market too saturated in 2026?
how to make digital stickers: 9 Critical Steps to Create and Sell in Procreate (2026)
Imagine waking up, checking your phone, and seeing a notification that you just made a sale while you were sleeping. That is the exact reality for thousands of creators who have figured out how to make digital stickers and turned their iPad doodles into a passive income stream. You do not need to worry about shipping costs, running out of inventory, or dealing with lost packages. You create the file once, and you can sell it an infinite number of times.
If you have an iPad and a creative itch, you are already halfway there. But figuring out exactly how to make digital stickers that look professional, format correctly for apps like GoodNotes, and actually attract paying customers on platforms like Etsy requires a specific roadmap. Today, we are going to walk through every single tap, swipe, and strategy you need to launch your digital sticker business from scratch. Let’s get right into it.
📋 Key Takeaways
- You only need an iPad, an Apple Pencil, and the Procreate app to start your digital sticker business.
- Setting your canvas to 300 DPI with the sRGB color profile ensures your stickers look crisp on all screens.
- Adding a realistic white border around your designs is a crucial step in learning how to make digital stickers that buyers love.
- Exporting your files as transparent PNGs is mandatory for digital planners.
- Offering pre-cropped GoodNotes files alongside your standard PNGs will drastically increase your sales and positive reviews.
1. The Essential Tools You Need to Get Started
Before we dive into the technical steps of how to make digital stickers, we need to talk about your workspace. The beauty of this side hustle is the incredibly low barrier to entry. You are not buying expensive vinyl cutting machines or bulk sticker paper. Your entire studio fits in your backpack.
Hardware Requirements
First things first: you need an iPad. It does not have to be the newest, most expensive iPad Pro. A standard iPad or an iPad Air works perfectly fine as long as it is compatible with an Apple Pencil. The Apple Pencil is non-negotiable here. While you can technically draw with your finger or a cheap stylus, the pressure sensitivity of the Apple Pencil is what gives your digital art that professional, hand-drawn feel.
Software (Procreate vs. Alternatives)
For the software, we will be using Procreate. It is a one-time purchase on the App Store (around $12.99), making it incredibly budget-friendly compared to subscription-based software like Adobe Illustrator. Procreate is powerful, intuitive, and the undisputed king of iPad illustration. If you want to check out the official specs, you can visit the official Procreate website to see if your current iPad is supported.
Why Selling Digital Stickers is a Low-Risk Side Hustle
Let’s be completely transparent about why this is such a great business model. When you learn how to make digital stickers, your profit margins are essentially 100% after platform fees. There is no physical inventory. If a design flops, you lose nothing but an hour of your time. If it succeeds, it can generate revenue for years without any extra effort on your part.
If you are exploring other ways to monetize your creativity, we highly recommend checking out our guide on DIY Crafts to Make and Sell: 10 Profitable Ideas for 2026. It is packed with ideas that pair beautifully with a digital product shop.
2. Setting Up Your Procreate Canvas for High Quality
One of the biggest mistakes beginners make when figuring out how to make digital stickers is starting with the wrong canvas settings. If your canvas is too small, your stickers will look pixelated and blurry when your customers zoom in on their digital planners.
Choosing the Right Dimensions and DPI
Open Procreate and tap the ‘+’ icon in the top right corner, then tap the small folder icon with a ‘+’ to create a custom canvas. For a standard sticker sheet or individual high-quality stickers, set your dimensions to 3000 x 3000 pixels. Next, look at the DPI (Dots Per Inch) setting. Set this to 300. This is the industry standard for high-resolution digital art. Even though these are digital products, setting it to 300 DPI ensures maximum crispness.
Understanding Color Profiles (RGB vs. CMYK)
Tap over to the ‘Color Profile’ tab in that same menu. You will see options for RGB and CMYK. Because you are learning how to make digital stickers specifically for digital planners (like GoodNotes or Notability) which are viewed on screens, you must select an RGB profile. Specifically, ‘sRGB’ or ‘Display P3’ works best. CMYK is for physical printing, and using it for digital products can make your colors look dull and muddy on a screen.
3. Finding Profitable Niche Ideas Before You Draw
You can create the most beautiful digital stickers in the world, but if nobody is searching for them, you won’t make any sales. Market research is a mandatory step in the process of learning how to make digital stickers that actually generate income.
Finding Profitable Niches on Etsy
Open Etsy and type “digital stickers” into the search bar. Do not hit enter just yet. Look at the auto-suggested dropdown menu. You will see things like “digital stickers goodnotes,” “digital stickers nursing,” “digital stickers student,” or “digital stickers budget.” These are your golden keywords. These are exactly what real buyers are actively typing into the search bar.
Targeting Specific Planner Users
Instead of making generic “cute stickers,” narrow your focus. Create a sticker pack specifically for teachers tracking their lesson plans, or fitness enthusiasts tracking their gym days and macros. The more specific your niche, the easier it is to rank on the first page of search results.
Speaking of specific niches, if you are interested in expanding your digital product empire, you should definitely read our comprehensive tutorial on how to make digital planners to sell: 7 Critical Steps to Build a Profitable Etsy Shop in 2026. Planners and stickers go hand-in-hand!
4. Designing Your First Sticker Collection
Now comes the fun part: actually drawing. When you are learning how to make digital stickers, consistency is key. A sticker pack usually contains anywhere from 20 to 100 individual stickers that share a cohesive theme and color palette.
Sketching and Inking Your Designs
Start by creating a new layer for your sketch. Use a brush like the ‘6B Pencil’ under the Sketching category to roughly map out your designs. Once you are happy with the layout, lower the opacity of your sketch layer, create a new layer on top, and use a smooth brush (like the ‘Studio Pen’ or ‘Monoline’ brush under the Inking category) to draw your final, clean lines.
Coloring and Shading Techniques
Create another layer underneath your line art for colors. A great trick is to use the ‘Color Drop’ feature in Procreate. Simply drag the color from the top right circle directly into your closed line art shapes to fill them instantly. To keep your sticker pack cohesive, create a custom color palette in Procreate and stick to 5-7 main colors for the entire collection.
5. The Secret to the Perfect White Border
If you want to know how to make digital stickers look like actual, physical stickers inside a digital planner, you need to add a white border. This small detail separates amateur designs from professional products.
The Procreate Gaussian Blur Method
Here is the absolute best way to create a perfect white border in Procreate:
- Merge your line art and color layers for a single sticker into one layer.
- Swipe left on that layer and tap ‘Duplicate’.
- Select the bottom duplicated layer. Tap the magic wand icon (Adjustments) and select ‘Gaussian Blur’.
- Slide your pencil to the right until the blur reaches about 10-15%.
- Now, tap the ‘Selection’ tool (the S icon), make sure it is set to ‘Automatic’, and tap on the blurred area.
- Tap the ‘Color Fill’ option at the bottom of the screen, ensuring your selected color is pure white.
Boom! You now have a solid, perfectly contoured white border around your illustration. This is a game-changer when you are mastering how to make digital stickers.
6. Exporting and Formatting Your Files Correctly
Your artwork is finished, but the technical side is just beginning. How you save and format your files is critical to your customers’ experience.
Saving as Transparent PNGs
First and foremost, you must turn off the background. Open your layers panel and uncheck the box next to ‘Background Color’ at the very bottom. Your background should now look like a dark grid. This means it is transparent. Next, tap the wrench icon (Actions), go to ‘Share’, and select ‘PNG’. Save these images to your iPad files or Airdrop them to your computer. Never save them as JPEGs, as JPEGs will automatically add a solid white background to your file.
Creating GoodNotes Specific Files
While transparent PNGs are great, iPad users love convenience. The top sellers on Etsy always include a pre-cropped GoodNotes file. This means the customer imports one single file into their GoodNotes app, and all the stickers are already laid out, perfectly cropped, and ready to be lassoed and used.
If you want to master this specific formatting step, we have an entire dedicated guide on how to make digital stickers for goodnotes: 7 Critical Steps to Start Selling in 2026. We highly recommend reading that before you list your first product.
7. Listing and Selling Your Stickers on Etsy
You have learned how to make digital stickers, exported them perfectly, and now it is time to open your shop. Etsy is the best platform for beginners because it already has millions of buyers actively searching for digital planners and accessories.
Crafting Clickable Listing Images
Your main listing image (the thumbnail) is the most important part of your Etsy shop. People buy with their eyes. You need to create a beautiful mockup showing your digital stickers being used inside an iPad. You can design these mockups easily in Canva or Procreate. Show the stickers laid out neatly, and add text highlighting that they are “Pre-cropped for GoodNotes” and “Transparent PNGs included.”
SEO Basics for Digital Products
Etsy is a search engine. When creating your listing title, use all 140 characters to include relevant keywords. Instead of calling your product “Cute Dog Stickers,” use a title like “Digital Dog Stickers for GoodNotes, Digital Planner Stickers, Cute Puppy PNGs, iPad Planner Accessories.” Fill out all 13 tags with similar keyword phrases.
If you are also interested in expanding into other digital vector formats, the SEO principles are very similar. Check out our guide on how to make svg files to sell: 9 Critical Steps to Build a Profitable Etsy Shop in 2026 to see how keyword strategy applies across different digital products.
8. Marketing Your New Digital Product Business
Relying solely on Etsy’s organic search is a slow game. To truly succeed after learning how to make digital stickers, you need to drive your own traffic.
Utilizing Pinterest and TikTok
Digital stickers are highly visual, which makes them perfect for platforms like Pinterest and TikTok. On TikTok, post satisfying time-lapse videos of your Procreate drawing process. Show the “before and after” of adding the white border. Show a video of you dragging and dropping the finished sticker into a digital planner.
On Pinterest, create aesthetic pins linking directly to your Etsy listings. Create boards around “Digital Planning Inspiration” and “iPad Aesthetics.” Pinterest is a visual search engine, and digital planner users spend hours there looking for new ways to customize their setups.
Building a Loyal Customer Base
Include a thank-you PDF with every purchase. In this PDF, provide clear instructions on how to download and use the stickers (this reduces customer service messages). More importantly, include a discount code for their next purchase and a link to your email newsletter or Instagram page. Repeat customers are the backbone of a successful digital product shop.
Wrapping Up Your Digital Sticker Journey
Learning how to make digital stickers is one of the most rewarding and accessible side hustles you can start today. By investing a little time into mastering Procreate, understanding file formats, and optimizing your Etsy listings, you are building a digital asset that can pay you repeatedly. Remember, the key is consistency. Your first sticker pack might not make you a millionaire, but your tenth pack just might be the one that goes viral.
Keep refining your art style, pay attention to what the market is searching for, and most importantly, have fun with the process. If you are ready to take your digital product business to the absolute next level, don’t forget to pair your stickers with a custom planner by following our ultimate guide on how to make digital planners to sell.
Frequently Asked Questions
Can I make digital stickers without an iPad?
Yes, you can use software like Adobe Illustrator or Canva on a computer. However, learning how to make digital stickers on an iPad with Procreate is generally considered the most intuitive and cost-effective method for hand-drawn designs. The Apple Pencil provides a natural drawing experience that is hard to replicate with a mouse.
Do I need to pay for Procreate every month?
No, and that is one of the best parts about this software. Procreate is a one-time purchase on the Apple App Store. There are no monthly subscription fees, making it an incredibly affordable tool for starting your digital product business.
What is the difference between a PNG and a GoodNotes file?
A PNG is a standard image file with a transparent background that can be used in almost any app or software. A GoodNotes file (.goodnotes) is a specific file type that can only be opened in the GoodNotes app. It contains your stickers already imported, cropped, and ready to be copied and pasted by the user.
How much should I charge for a digital sticker pack?
Pricing varies depending on the size and quality of the pack. Generally, beginner sticker packs on Etsy sell for anywhere between $2.00 and $5.00. As you build a brand and offer larger bundles (e.g., 500+ stickers), you can charge $10 or more. Always check your competitors to see the current market rates.
Is the digital sticker market too saturated in 2026?
While there are many sellers, the market is not “too saturated” for high-quality, niche products. If you create generic designs, it will be hard to stand out. But if you learn how to make digital stickers for specific niches (like nursing students, ADHD planners, or specific hobbies), there is absolutely still room to build a highly profitable shop.