How to Make a Chunky Knit Blanket With Your Arms (No Needles!)
- How to Make a Chunky Knit Blanket With Your Arms (No Needles!)
- arm knitting chunky blanket: 7 Critical Steps to Make Yours in 2026
- 📋 Key Takeaways
- Table of Contents
- 1. Why an Arm Knitting Chunky Blanket is the Ultimate DIY Project
- The Psychology of Cozy (Hygge) and Crafting
- Cost vs. Store-Bought Blankets
- 2. Choosing the Best Yarn for Your Arm Knitting Chunky Blanket
- Merino Wool Roving vs. Chenille vs. Tube Yarn
- How Much Yarn Do You Actually Need?
- 3. Preparing Your Space and Materials
- Setting Up a Clean, Flat Surface
- Prepping the Yarn (Preventing Tangles)
- 4. Step-by-Step: Casting On (The Foundation)
- Creating the Perfect Slip Knot
- Looping Onto Your Arm
- 5. The Core Technique: Knitting the Rows
- Transferring Stitches (Right to Left)
- Row 2: Left to Right
- Maintaining Consistent Tension
- 6. Binding Off and Finishing the Blanket
- The Bind-Off Process
- Tying Off and Weaving in the Ends
- 7. Care, Maintenance, and Troubleshooting
- How to Wash Your Chunky Knit Blanket
- Troubleshooting: Fixing Dropped Stitches or Uneven Tension
- 8. Conclusion: Wrap Yourself in Coziness
- 9. Frequently Asked Questions (FAQ)
- How many skeins of yarn do I need for an arm knit blanket?
- Can I wash an arm knit chunky blanket?
- How long does it take to arm knit a blanket?
- Why is my arm knit blanket curling at the edges?
- Do I need to know how to knit normally to arm knit?
- What is the best yarn for beginners?
arm knitting chunky blanket: 7 Critical Steps to Make Yours in 2026
I still remember the first time I saw one of those massive, cloud-like throws draped effortlessly over a luxury sofa on Pinterest. I immediately wanted one, but then I checked the price tag, and let me tell you, spending $250 on a throw was not in my budget. That is exactly why learning how to make an arm knitting chunky blanket is one of the most rewarding and cost-effective skills you can pick up this year. You get all the aesthetic appeal of a high-end designer piece, but you make it yourself using just your hands, some giant yarn, and a spare afternoon.
If you have never knitted a single thing in your life, do not panic. You do not need expensive knitting needles, you do not need years of practice, and you certainly do not need to spend weeks agonizing over tiny stitches. In fact, you can literally finish an entire blanket in about 45 minutes to two hours. The process is incredibly forgiving and deeply satisfying. In this comprehensive guide, we are going to walk through the exact, foolproof framework to cast on, knit, and bind off your very own giant throw. Grab a cup of coffee, clear off your dining table, and let’s dive into the ultimate cozy weekend project.
📋 Key Takeaways
- You do not need traditional knitting needles; your own arms act as the needles, making the process incredibly fast.
- Choosing the right yarn (like jumbo chenille or unspun merino wool) is the absolute most critical step for the longevity of your blanket.
- A standard throw-sized blanket requires about 4 to 6 pounds (approx. 30 to 40 yards) of size #7 jumbo yarn.
- The entire arm knitting process consists of three simple phases: casting on, knitting the rows back and forth, and binding off the edges.
- These giant throws are highly profitable if you plan to start a side hustle selling handmade home decor.
Table of Contents
- 1. Why an Arm Knitting Chunky Blanket is the Ultimate DIY Project
- 2. Choosing the Best Yarn for Your Arm Knitting Chunky Blanket
- 3. Preparing Your Space and Materials
- 4. Step-by-Step: Casting On (The Foundation)
- 5. The Core Technique: Knitting the Rows
- 6. Binding Off and Finishing the Blanket
- 7. Care, Maintenance, and Troubleshooting
- 8. Conclusion: Wrap Yourself in Coziness
- 9. Frequently Asked Questions (FAQ)
1. Why an Arm Knitting Chunky Blanket is the Ultimate DIY Project
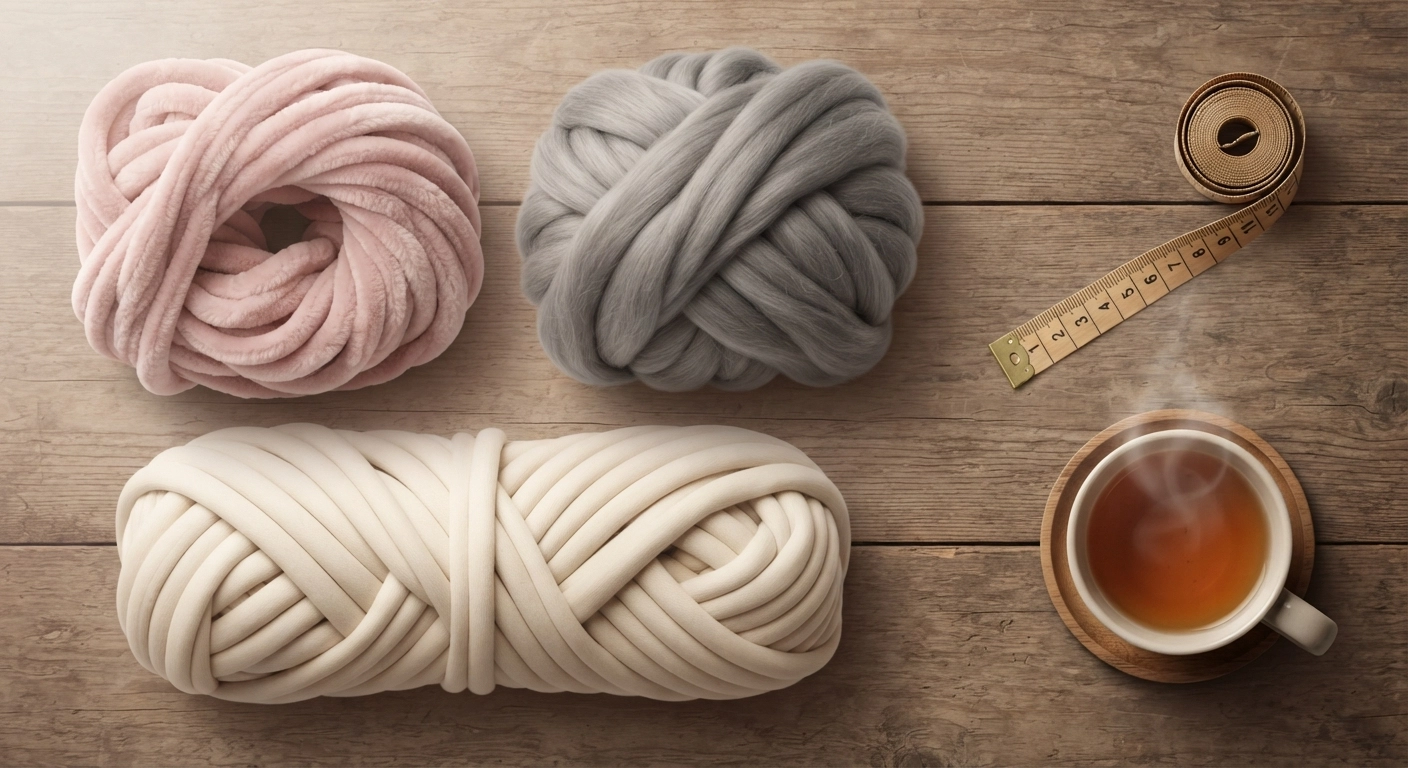
There is something inherently magical about creating a functional, beautiful object from a simple ball of yarn. But traditional knitting can be intimidating. It requires precision, counting tiny stitches, and a whole lot of patience. Arm knitting flips that script entirely. By using your arms as the needles, the stitches become massive, which means the fabric grows at an astonishing rate. You can literally watch a blanket take shape right before your eyes.
The Psychology of Cozy (Hygge) and Crafting
Over the last few years, the Danish concept of “Hygge”—a mood of coziness and comfortable conviviality with feelings of wellness and contentment—has taken the interior design world by storm. A giant knit throw is the physical embodiment of Hygge. Beyond the aesthetic appeal, the repetitive motion of pulling yarn through loops is incredibly meditative. Studies have shown that the history of knitting techniques has always been intertwined with stress relief and mindfulness. When you are focused on the rhythm of your hands, the stress of the workday simply melts away.
Pair your crafting session with a cozy atmosphere. If you want to elevate your space even further, learning how to make easy scented candles is a fantastic complementary project. The combination of a crackling wooden wick and the soft texture of giant yarn is the ultimate self-care weekend setup.
Cost vs. Store-Bought Blankets
Let’s get real for a second about the economics of home decor. If you walk into a boutique home goods store, a genuine merino wool chunky blanket will easily set you back $200 to $400. Even the synthetic versions at big-box retailers hover around $100 to $150. By sourcing your own jumbo yarn, you can create a customized, high-quality arm knitting chunky blanket for a fraction of the cost—usually between $40 and $80 depending on the material you choose. Plus, you get to customize the exact color and dimensions to fit your living room perfectly.
If you are looking to turn this fun hobby into a legitimate income stream, these blankets are massive crowd-pleasers. Check out our comprehensive guide on DIY crafts to make and sell to see how you can price and market your handmade creations.
2. Choosing the Best Yarn for Your Arm Knitting Chunky Blanket
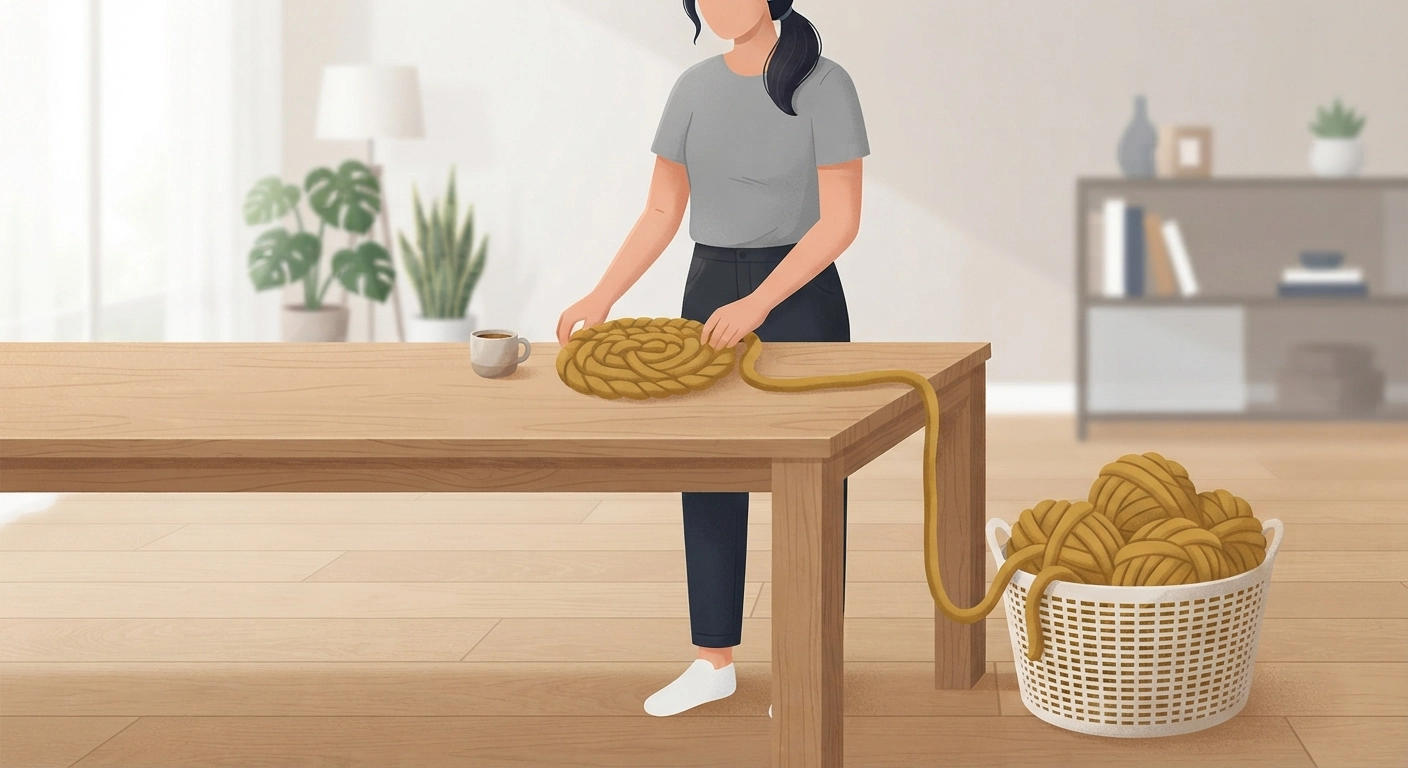
The success of your project hinges entirely on one decision: the yarn. Because the stitches are so large, the texture and quality of the material are front and center. You cannot hide cheap, scratchy yarn in a chunky knit. You need what the craft industry classifies as “Jumbo Size 7” yarn. But within that category, there are three main contenders, and they all behave very differently.
Merino Wool Roving vs. Chenille vs. Tube Yarn
Here is a breakdown of the most popular materials used for giant knitting:
| Yarn Type | Pros | Cons | Best For |
|---|---|---|---|
| Unspun Merino Wool | Luxurious, incredibly warm, natural, breathable. | Expensive, sheds easily, requires dry cleaning. | Decorative throws, high-end gifts. |
| Polyester Chenille | Affordable, machine washable, extremely soft, zero shedding. | Synthetic feel, less breathable than natural fibers. | Everyday use, homes with pets or kids. |
| Cotton Tube Yarn | Very durable, structural, machine washable, modern look. | Heavy, can be harder to manipulate for beginners. | Floor cushions, heavy weighted blankets. |
If this is your very first time, I highly recommend starting with Polyester Chenille yarn. It is forgiving, it doesn’t break apart if you pull it too hard, and you can throw it in the washing machine when you spill coffee on it. If you want to dive into the luxury route, look for wool from Merino sheep with a micron count of 21-23, which ensures it is soft enough to sit against your skin without itching.
How Much Yarn Do You Actually Need?
Nothing is more frustrating than getting 80% done with your blanket only to realize you are out of yarn. Because jumbo yarn is sold by weight (usually in pounds or ounces) rather than just yardage, calculating your needs can be tricky. Here is a reliable sizing guide based on standard chenille or merino roving:
- Baby Blanket (25″ x 30″): Approx. 2 to 3 lbs (15-20 yards)
- Standard Lap Throw (30″ x 50″): Approx. 4 to 5 lbs (30-40 yards)
- Medium Sofa Blanket (40″ x 60″): Approx. 6 to 7 lbs (50-60 yards)
- Large Bed Runner (50″ x 70″): Approx. 8 to 10 lbs (70-80 yards)
3. Preparing Your Space and Materials
Before you even think about creating your first loop, you need to set the stage. Arm knitting is a full-body activity. You cannot easily pause, put it down, and go answer the door once both of your arms are trapped in 20 loops of thick wool. Preparation is everything.
Setting Up a Clean, Flat Surface
You need space. A lot of it. As your blanket grows, it will become heavy and cumbersome. I recommend working at a large dining room table or on a freshly vacuumed hardwood floor. If you work on the floor, put down a clean sheet first. Jumbo yarn, especially unspun wool, acts like a magnet for pet hair, dust, and lint. You want your workspace to be pristine.
Also, dress for the occasion. Wear a short-sleeve shirt or a tank top. You need your bare arms to act as smooth needles. Take off any rings, watches, or bracelets. Chunky yarn snags very easily, and a sharp diamond ring can ruin a beautiful strand of merino wool in seconds.
Prepping the Yarn (Preventing Tangles)
Here is a pro tip that will save you a massive headache: do not just pull the yarn directly from the tightly wound ball as you knit. It will create uneven tension. Instead, take a few minutes to unroll a large amount of the yarn and let it pool loosely in a clean laundry basket or box on the floor next to you. This ensures the yarn feeds smoothly into your hands, allowing you to maintain consistent, beautiful stitches.
4. Step-by-Step: Casting On (The Foundation)
Alright, it is time to get your hands wrapped up. In knitting terminology, “casting on” simply means creating the very first row of loops that will serve as the foundation for the rest of your blanket. The width of your blanket is determined right here. Once you cast on, you cannot make the blanket wider without starting over.
Creating the Perfect Slip Knot
Every great arm knitting chunky blanket begins with a humble slip knot. Here is exactly how to do it:
- Pull out about 3 feet of yarn from your ball. This extra length is called the “tail.”
- Create a simple loop with the yarn, ensuring the working yarn (the part attached to the ball) crosses OVER the tail end.
- Reach your hand through the loop, grab the working yarn, and pull it up through the loop to create a new, secondary loop.
- Pull gently to tighten the knot at the base. You should now have a loop that can easily slide to become bigger or smaller when you pull the working yarn.
Looping Onto Your Arm
Now, slide your right hand through that slip knot and pull it up to your wrist. Tighten it so it is snug but not cutting off your circulation. You want it loose enough to slide over your hand later.
Next, we cast on the rest of the stitches:
- Hold the working yarn and the tail in your left hand.
- Use your left hand to create a loop with the working yarn.
- Slide your right hand through that new loop.
- Pull the working yarn gently to tighten the new loop next to your slip knot on your right arm.
Repeat this process until you have the desired number of stitches on your right arm. For a standard 40-inch wide blanket using jumbo yarn, you will need to cast on about 15 to 18 stitches. Your right arm will look like it is covered in thick, cozy bracelets.
5. The Core Technique: Knitting the Rows
You have your foundation. Now comes the fun part. The actual knitting process is just transferring the loops from your right arm to your left arm, and then back again, weaving the working yarn through each loop as you go. It sounds complicated in text, but once you do it three times, your muscle memory will take over.
Transferring Stitches (Right to Left)
Let’s knit our first row:
- Pick up the working yarn with your right hand (the hand holding all the loops).
- With your left hand, grab the loop closest to your right wrist and pull it UP and OVER your right hand, dropping it completely.
- You are now holding a brand new loop in your right hand (made from the working yarn).
- Slide your left hand into this new loop.
- Congratulations! You just knitted your first stitch.
Repeat this exact motion for every single loop on your right arm. Grab the working yarn, pull the old loop over it, and put the new loop on your left arm. By the end of this row, your right arm will be completely empty, and your left arm will be holding all 15-18 stitches. A beautiful row of V-shaped knits will be hanging down between your arms.
Row 2: Left to Right
To knit the next row, you simply reverse the process. Hold the working yarn in your left hand, pull the old loop over your left hand, and place the new loop onto your right arm. You will bounce back and forth, right to left, left to right, watching your arm knitting chunky blanket grow longer with every pass.
Maintaining Consistent Tension
The biggest mistake beginners make is pulling the yarn too tight. Your arms are tapered (wider at the forearm, narrower at the wrist). If you push the loops too far up your forearm, your stitches will be massive and loose. If you keep them tightly bunched at your wrist, the blanket will become stiff and narrow. Try to keep the loops consistently positioned just above your wrist bone. If you notice your blanket starting to look like a triangle (getting narrower at the bottom), you are pulling the working yarn too tightly on the edges. Relax your hands and let the yarn breathe.
Once you master this repetitive, soothing motion, you might find yourself addicted to yarn crafts. If you want to try something that requires a bit more precision later, crochet amigurumi for beginners is a fantastic next step to explore.
6. Binding Off and Finishing the Blanket
You have been knitting back and forth for an hour. The blanket is long, heavy, and incredibly soft. But how do you stop? If you just pull your arm out, the whole blanket will unravel in seconds. You need to “bind off” to lock the stitches in place.
The Bind-Off Process
You should start binding off when you have about 3 to 4 yards of working yarn left. Do not wait until you only have a few inches, or you won’t make it across the row.
- Knit the first two stitches normally (transfer them from one arm to the other). You now have two loops on your receiving arm.
- Using your free hand, pick up the FIRST loop you transferred (the one closest to your elbow) and pull it completely OVER the second loop (the one closest to your wrist) and drop it.
- You now have one loop left on your arm.
- Knit one more stitch normally so you have two loops on your arm again.
- Pull the back loop over the front loop and drop it.
- Repeat this all the way across the row. You will see a beautiful, braided edge forming at the top of your blanket.
Tying Off and Weaving in the Ends
When you get to the very last stitch, you will have one loop left on your arm. Carefully slide your hand out of it. Take the remaining tail of your working yarn, pass it through that final loop, and pull it tight to create a secure knot.
Now you have two tails: one at the beginning where you cast on, and one at the end where you bound off. To finish your blanket, simply weave these tails in and out of the chunky stitches along the edge of the blanket. Because the yarn is so thick, the tails will easily hide inside the fabric. If you used chenille yarn, you can use a needle and some regular sewing thread to stitch the very end of the tail to a hidden part of the blanket to ensure it never pops out.
7. Care, Maintenance, and Troubleshooting
You did it! You have a massive, gorgeous piece of handmade home decor. A giant knit throw is the absolute centerpiece for an easy DIY room decor aesthetic. But because the stitches are so large and the yarn is so delicate, you need to know how to take care of it properly.
How to Wash Your Chunky Knit Blanket
The care instructions depend entirely on the yarn you chose in Step 2:
- Polyester Chenille: You are in luck. Chenille is highly durable. You can place the blanket in a large mesh laundry bag and wash it in your machine on the gentle cycle with cold water. Never use bleach. To dry, lay it flat on a clean surface. Do not hang it, as the weight of the wet yarn will stretch the blanket out of shape.
- Unspun Merino Wool: This requires extreme care. Unspun wool will “felt” (clump together into a hard, matted mess) if agitated in water. You must spot-clean spills immediately with a damp cloth. If the whole blanket needs cleaning, it must be professionally dry-cleaned. Over time, merino wool will pill (form little fuzz balls). You can gently pull these off by hand or use a fabric shaver carefully.
Troubleshooting: Fixing Dropped Stitches or Uneven Tension
What happens if you accidentally drop a loop off your arm while knitting? Do not panic. Look down at your blanket. You will see a loose loop of yarn hanging out of place. Simply reach through the stitch directly below it, grab the loose yarn, and pull it through to recreate the loop. Slide it back onto your arm and continue.
If you finish the blanket and realize one side is much tighter than the other, you can gently massage the blanket. Lay it flat on the floor and gently tug the fabric diagonally and horizontally. Chunky yarn has a lot of give, and you can often manually adjust the tension to make the blanket lay perfectly square.
8. Conclusion: Wrap Yourself in Coziness
Creating an arm knitting chunky blanket is proof that you do not need complex tools or years of training to make something spectacular. In just a few hours, you have transformed a giant ball of fluff into a functional, stylish, and incredibly warm piece of home decor. Whether you drape it over your favorite reading chair, lay it across the foot of your bed, or wrap it around yourself while watching movies, it will always carry the special warmth of something made by your own two hands.
The best part? Once you know the technique, you can make them in every color. They make unforgettable wedding gifts, perfect housewarming presents, and fantastic inventory for a small craft business. So clear off your table, order some jumbo yarn, and get ready to experience the most satisfying DIY project of the year.
9. Frequently Asked Questions (FAQ)
How many skeins of yarn do I need for an arm knit blanket?
It depends on the size of the skein and the blanket. Generally, jumbo size 7 chenille yarn comes in 8-ounce skeins (about 30 yards). You will need roughly 6 to 8 skeins for a standard 40″ x 60″ throw blanket. Always check the yardage on the label.
Can I wash an arm knit chunky blanket?
Yes, if you use polyester chenille or cotton tube yarn, you can wash it on a cold, gentle cycle and lay it flat to dry. However, if you use unspun merino wool, it cannot be machine washed and must be spot-cleaned or dry-cleaned to prevent felting.
How long does it take to arm knit a blanket?
For a beginner, a standard throw-sized blanket usually takes about 1.5 to 2 hours from casting on to binding off. Once you get the hang of the repetitive motion, you can easily finish one in under 45 minutes.
Why is my arm knit blanket curling at the edges?
Curling edges usually happen when your tension is too tight, particularly on the first and last stitches of a row. Try to relax your hands and keep the loops slightly looser when transferring them at the ends of your rows.
Do I need to know how to knit normally to arm knit?
Not at all! Arm knitting is completely beginner-friendly. While the concept of transferring loops is the same as traditional knitting, using your arms is much more intuitive and requires zero prior needlework experience.
What is the best yarn for beginners?
Jumbo polyester chenille yarn is highly recommended for beginners. It is durable, doesn’t shed, is easy to grip, and won’t break if you accidentally pull a stitch too tightly while learning the motions.