How to Make Easy Polymer Clay Earrings
- How to Make Easy Polymer Clay Earrings
- 📋 Key Takeaways
- Table of Contents
- Essential Materials & Tools for Polymer Clay Earrings
- The Absolute Must-Have Supplies
- Nice-to-Have Tools Worth the Upgrade
- How to Condition Polymer Clay Properly
- What Is Conditioning (and Why Does It Matter)?
- The Pasta Machine Method (Fastest and Most Even)
- The Hand-Warming Method (No Extra Equipment)
- The Clay Softener Shortcut
- Basic Shaping & Cutting Techniques for Beginners
- Cutout Earrings: Using Cookie Cutters for Perfect Shapes
- Marbling: The Technique That Looks Hard but Isn't
- Sculpted & 3D Shapes
- Texture & Pattern Techniques That Elevate Your Designs
- Using Found Objects as Texture Tools
- Slab-Built Patterns (Caning for Beginners)
- Color Blending and Ombré Effects
- How to Bake Polymer Clay Earrings Without Cracks
- Temperature: The Single Most Important Variable
- Baking Time and Thickness Guidelines
- Preventing Burned Clay and Bubbles
- Cooling and Testing for Doneness
- Sanding, Finishing & Assembling Your Earrings
- Wet Sanding for a Professional Finish
- Buffing and Glazing Options
- Attaching Earring Findings Securely
- Design Ideas & How to Start Selling in 2026
- Trending Polymer Clay Earring Styles for 2026
- Pricing Your Earrings for Profit
- Where to Sell Polymer Clay Earrings
- Frequently Asked Questions
- What is the best polymer clay brand for earrings?
- Do I need a pasta machine to make polymer clay earrings?
- How do I make polymer clay earrings shiny without glaze?
- Can I use a toaster oven to bake polymer clay earrings?
- Why did my polymer clay earrings crack after baking?
- Are polymer clay earrings safe for sensitive ears?
- How long does it take to make one pair of polymer clay earrings?
- Can I make polymer clay earrings without an oven?
- Your First Pair of Polymer Clay Earrings Awaits
- 🔗 İlgili İçerikler

You know that moment when you spot a gorgeous pair of clay earrings at a boutique, flip them over to check the price tag, and your jaw drops? Fifteen dollars for something the size of a quarter? I’ve been there more times than I can count. Last spring, I added up how much I’d spent on statement earrings in one year alone. The number made me cringe. So I walked into a craft store, grabbed a block of polymer clay for under $3, and sat down at my kitchen table with zero experience. Three hours later, I was holding a pair of earrings that looked so good my sister asked where she could buy them. That’s the magic of learning how to make polymer clay earrings — the barrier to entry is absurdly low, but the creative ceiling is limitless.
Whether you want a relaxing hobby, custom accessories that match your wardrobe perfectly, or a side hustle that actually turns a profit, polymer clay delivers on all fronts. In this guide, I’m walking you through every single step I wish someone had shown me on day one. From the exact tools worth your money to the baking tricks that prevent cracked, ruined pieces — it’s all here. Let’s get your hands on some clay.
📋 Key Takeaways
- You don’t need expensive tools to make beautiful polymer clay earrings — a rolling pin, an X-Acto knife, and your oven will get you started for under $20 total.
- Conditioning the clay is non-negotiable. Skipping this step leads to brittle earrings that snap. Use a pasta machine or warm it with your hands for 3-5 minutes.
- Baking temperature precision matters more than bake time. Use an oven thermometer — polymer clay burns and releases toxic fumes if your oven runs hot by even 25°F.
- Design possibilities are endless: marbling, texture stamping, cutters, sculpting, and appliqué techniques each produce dramatically different looks.
- You can sell these for $12-$30 per pair on Etsy or at craft fairs, with material costs averaging $1-$3 per pair once you buy in bulk.

Table of Contents
- Essential Materials & Tools for Polymer Clay Earrings
- How to Condition Polymer Clay Properly
- Basic Shaping & Cutting Techniques for Beginners
- Texture & Pattern Techniques That Elevate Your Designs
- How to Bake Polymer Clay Earrings Without Cracks
- Sanding, Finishing & Assembling Your Earrings
- Design Ideas & How to Start Selling in 2026
- Frequently Asked Questions
Essential Materials & Tools for Polymer Clay Earrings
Before you dive into making your first pair, let’s talk about what you actually need versus what craft stores want to sell you. I wasted about $40 on gadgets I’ve never used. Here’s the real deal, broken down into must-haves and nice-to-haves.
The Absolute Must-Have Supplies
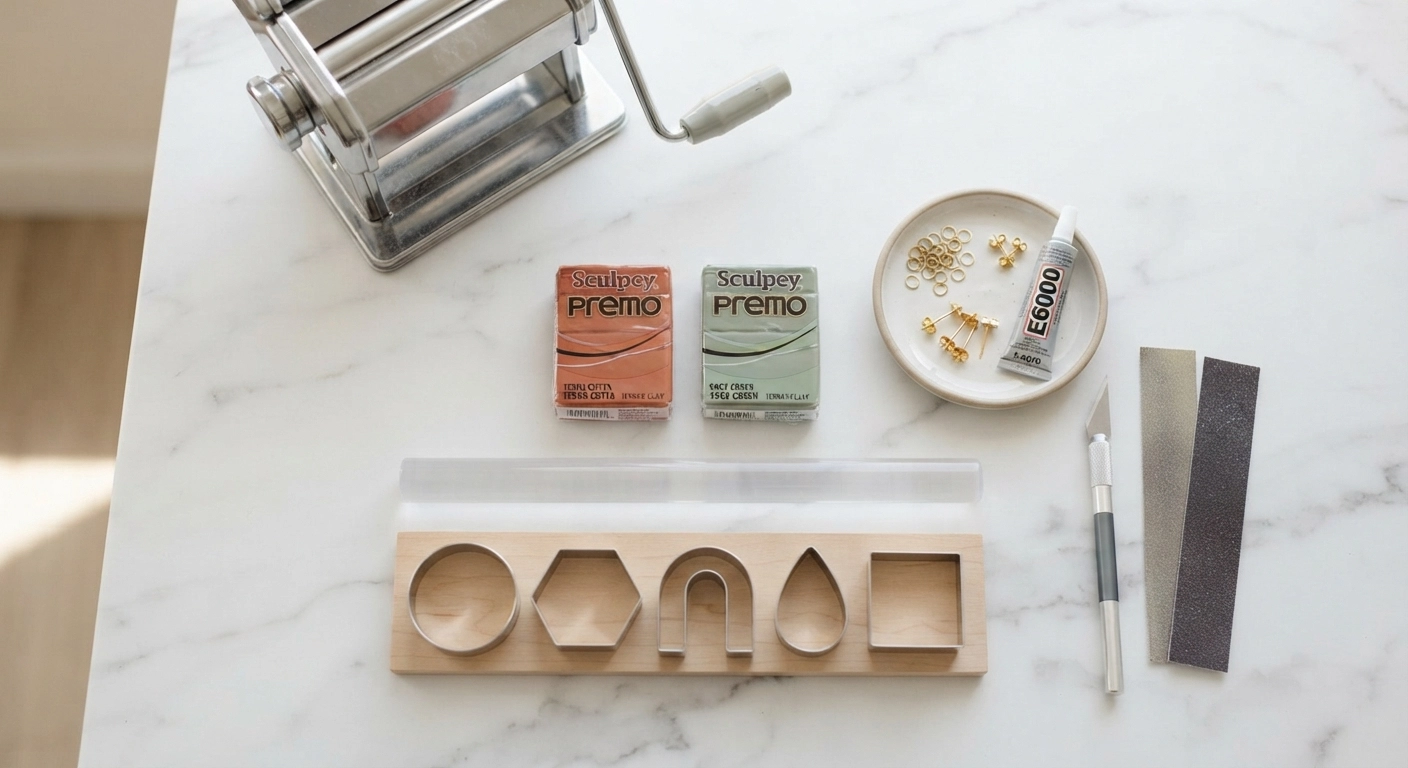
These are the essentials. Without them, you can’t really make functional earrings. The good news? The total startup cost for basics lands around $25-$35.
| Item | Why You Need It | Estimated Cost |
|---|---|---|
| Polymer clay (Sculpey Premo, Fimo, or Kato) | Your core material. Premo is the best beginner-friendly option — strong, flexible, and easy to condition. | $3-$5 per 2 oz block |
| X-Acto knife or craft blade | For cutting clean shapes and trimming edges after baking. | $4-$8 |
| Acrylic rolling pin | Rolls clay evenly. Avoid wooden ones — clay sticks to them badly. | $6-$12 |
| Baking tray + parchment paper | Dedicated tray for clay only. Never reuse for food. | $5-$10 |
| Jewelry findings (earring posts, jump rings, hooks) | Hardware to turn baked clay into wearable earrings. Gold-plated or stainless steel are best for sensitive ears. | $5-$15 per variety pack |
| E6000 glue or super glue gel | Attaches earring posts to baked clay securely. | $4-$6 |
Nice-to-Have Tools Worth the Upgrade
Once you’ve made a few pairs and know you enjoy the craft, these tools will speed up your process and open up new design possibilities.
- Pasta machine: Hands-down the best investment for conditioning clay and rolling uniform sheets. An Atlas 150 runs about $60-$80, but a basic craft-dedicated model for $25-$30 works fine. Just don’t use the same machine for food and clay.
- Shape cutters: Metal clay cutters in circles, teardrops, arches, and hexagons. A starter set of 8-10 shapes costs around $12-$18.
- Silicone-tipped sculpting tools: For smoothing edges, adding fine details, and blending seams. $8-$12 for a set.
- Texture sheets and stamps: These create patterns on flat clay surfaces — think linen textures, geometric grids, and floral impressions. $5-$10 each or make your own with found objects.
- Sandpaper (400-2000 grit): For wet-sanding baked pieces to a glass-smooth finish. $6-$10 for a variety pack.
A quick note on polymer clay brands — I strongly recommend avoiding the cheapest store-brand clays for earrings. They’re often too soft, don’t hold fine details, and become brittle after baking. I learned this the hard way when three pairs of earrings snapped during assembly. Sculpey Premo, Fimo Professional, and Kato Polyclay are the three brands professional jewelry makers trust. They’re slightly more expensive but dramatically more durable. For context, a 2024 survey of 400 polymer clay artists on Craft Industry Alliance showed 78% preferred Premo or Fimo for jewelry applications.
If you’re curious about how polymer clay compares to other jewelry-making mediums, check out our guide on How to Make Easy Resin Jewelry for Beginners. Resin and polymer clay actually complement each other beautifully — many artists combine them in a single piece.
How to Condition Polymer Clay Properly
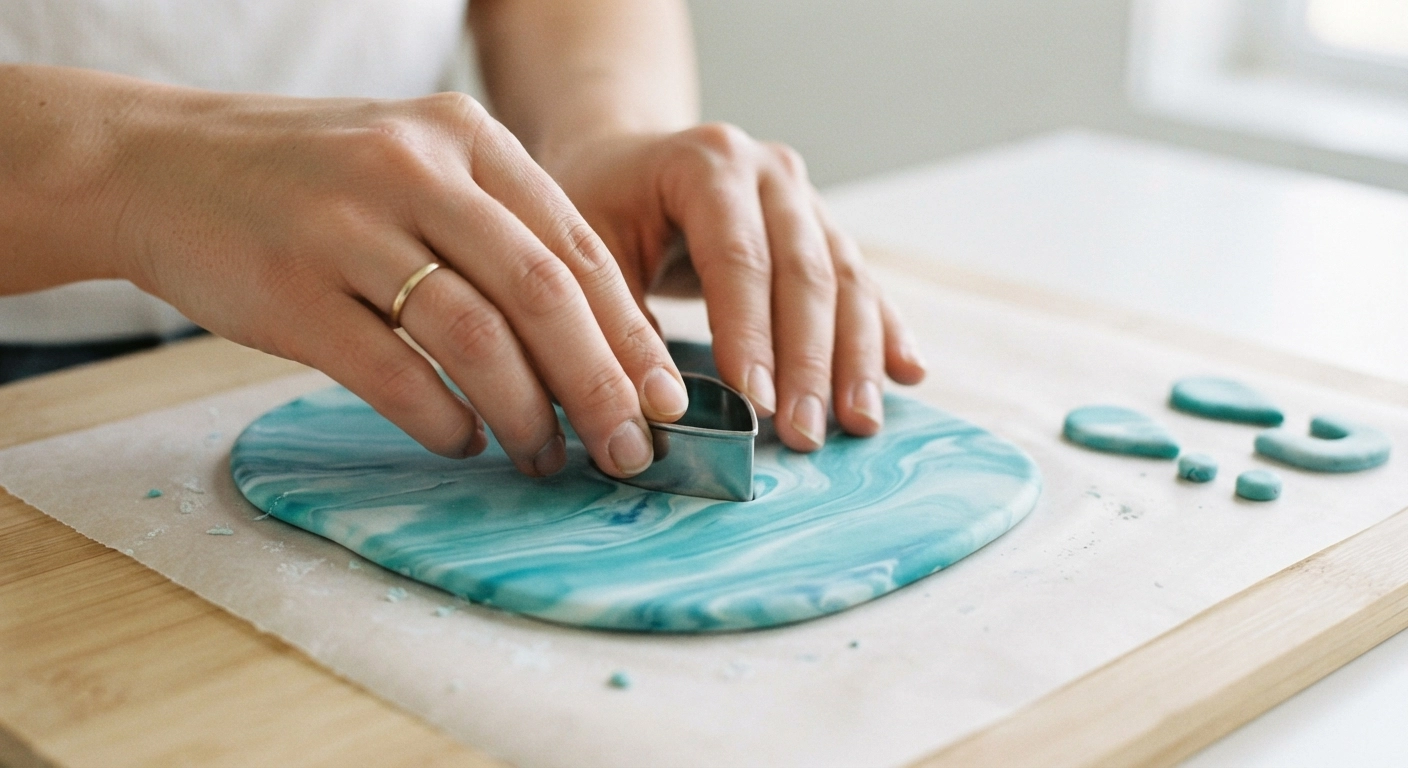
I’m going to be blunt: if you skip conditioning, your earrings will crack. Maybe not today, maybe not tomorrow, but eventually the clay will fail at a stress point — usually right where the earring post attaches. Conditioning distributes the plasticizers evenly throughout the clay, making it flexible and strong rather than crumbly and weak.
What Is Conditioning (and Why Does It Matter)?
Fresh out of the package, polymer clay is often stiff, especially if it’s been sitting on a store shelf for months. The plasticizers — chemicals that make the clay malleable and allow it to fuse during baking — settle unevenly. Conditioning warms and kneads the clay until those plasticizers are uniformly distributed. Think of it like kneading bread dough. Properly conditioned clay should feel smooth, pliable, and slightly warm to the touch. It should fold without cracking and stretch without snapping.
The Pasta Machine Method (Fastest and Most Even)
If you bought a pasta machine, congratulations — you just saved yourself 10 minutes of hand-kneading per color. Here’s the process:
- Slice your clay block into thin slabs (about 1/4 inch thick) using a blade.
- Set the pasta machine to its thickest setting (usually setting 1).
- Feed a slab through the rollers. It’ll come out flattened and slightly warmed.
- Fold the sheet in half, rotate it 90 degrees, and feed it through again.
- Repeat this fold-rotate-roll cycle 10-15 times. You’re looking for a uniform sheet with no cracks at the edges.
- Gradually move to thinner settings (up to setting 3 or 4 for earring work).
This method is particularly useful if you’re making multiple pairs in a session. You can condition an entire block in under two minutes once you get the rhythm down.
The Hand-Warming Method (No Extra Equipment)
No pasta machine? No problem. Your body heat and some elbow grease work just fine. Here’s how:
- Slice the clay into small, thin pieces — the smaller, the faster they’ll warm up.
- Stack the pieces and begin rolling them between your palms. The friction generates heat.
- Once the pieces start sticking together, begin kneading like bread dough. Push the clay away from you with the heel of your hand, fold it back, and repeat.
- Continue for 3-5 minutes. Test readiness by rolling a snake shape and folding it in half. If the fold line shows no cracks, you’re done. If it crumbles, keep kneading.
Pro tip: Cold hands make conditioning take twice as long. Run your hands under warm water and dry them thoroughly before starting. Or sit near a sunny window. Warm clay is happy clay.
The Clay Softener Shortcut
Some clays are stubbornly firm regardless of brand — looking at you, white Premo. A few drops of Sculpey Clay Softener ($6-$8 per bottle) mixed into the clay during conditioning works wonders. Liquid polymer clay (like Sculpey TLS) serves the same purpose. Add it sparingly — 2-3 drops per 2 oz block is plenty. Too much makes the clay sticky and hard to work with.
Peki bu ne anlama geliyor? Conditioning isn’t optional if you want earrings that survive months of wear. The extra five minutes at the start of your project prevents heartbreak at the finish line.
Basic Shaping & Cutting Techniques for Beginners
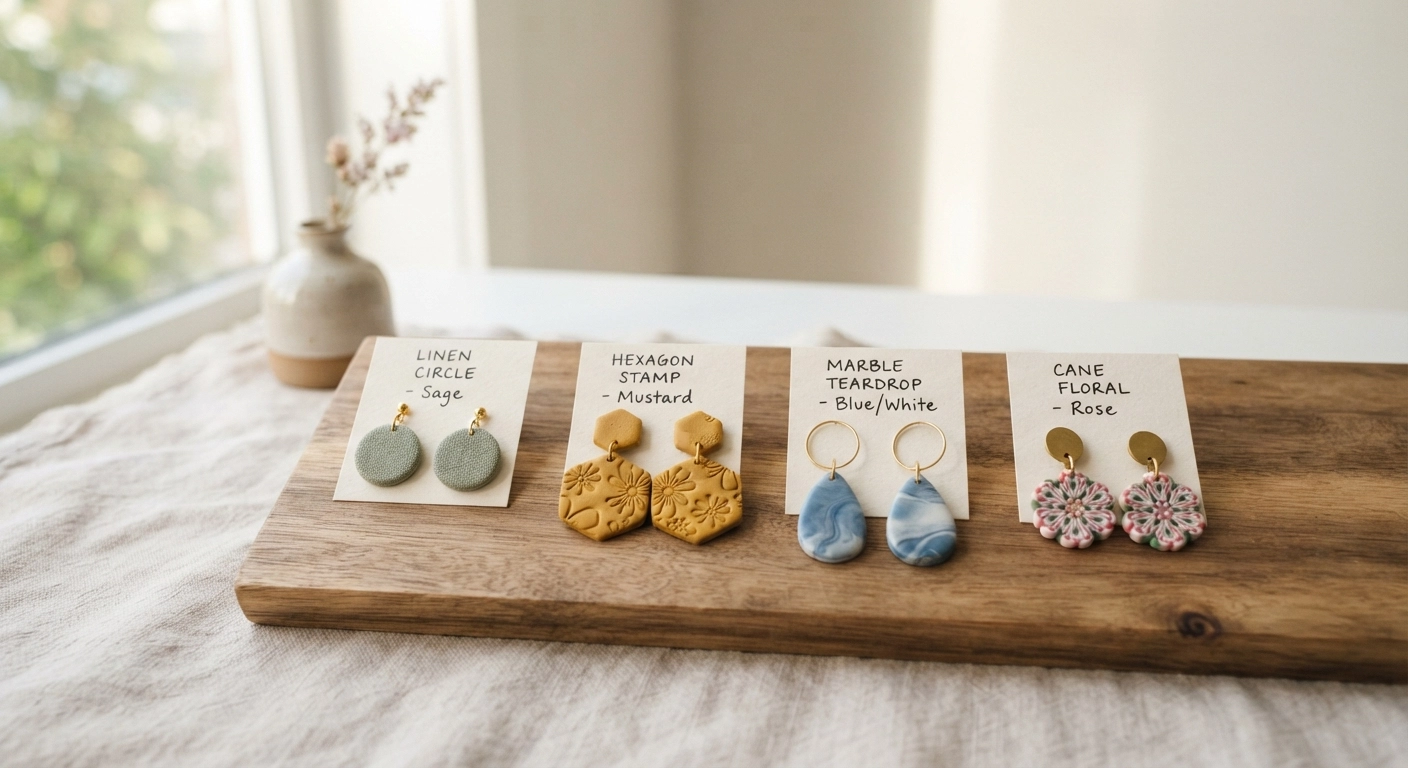
Here’s where the real fun starts. You’ve got your tools, your clay is conditioned, and now you’re staring at a ball of colored clay wondering what to do with it. Earring shapes fall into three broad categories for beginners: cutout designs, sculpted forms, and slab-built shapes. Let’s walk through each one.
Cutout Earrings: Using Cookie Cutters for Perfect Shapes
This is the fastest path to professional-looking earrings and the technique I teach in workshops. Here’s the step-by-step:
- Roll your conditioned clay into a flat, even slab. Aim for 2-3mm thickness — roughly the thickness of two credit cards stacked together. Uneven thickness leads to uneven baking.
- Place your slab on a sheet of parchment paper. This prevents sticking and makes it easy to transfer cut shapes to your baking tray.
- Press your metal cutter firmly into the clay. Give it a slight wiggle — this helps separate the shape cleanly.
- Lift the cutter and gently push the shape out from the top (use a cotton swab if it’s stuck).
- Use your X-Acto knife to clean up any rough edges around the cutout.
- Before baking, use a piercing tool or toothpick to make a small hole where the jump ring or earring post will attach. Make the hole slightly larger than you think you need — clay shrinks slightly during baking, and a too-small hole is a nightmare to fix afterward.
For perfectly matched pairs, roll your slab evenly, cut all your shapes at once, and compare them side by side before baking. Trim any shapes that look larger or smaller than their partner.
Marbling: The Technique That Looks Hard but Isn’t
Marbled earrings are consistently top sellers on Etsy, and here’s the secret — they’re easier to make than solid-color designs. Marbling hides small imperfections, and no two pairs are identical, which buyers love.
Here’s how to achieve a beautiful marble effect:
- Choose 2-3 complementary clay colors. (White + terracotta + dusty rose is a classic combo.)
- Roll each color into a log shape, then twist the logs together loosely.
- Roll the twisted clay into a ball, then flatten it slightly. Do not over-mix. You want distinct swirls, not a uniform blend.
- Roll the ball out with your acrylic rolling pin. Stop when you see a marbled pattern you like.
- Use your cutters to punch out shapes from the marbled slab.
The key to beautiful marbling is restraint. Overworking the clay turns your swirls into muddy brown. Stop while you can still see distinct color variation. If you roll too far, ball it up and start over — the beauty of polymer clay is that it’s endlessly forgiving before baking.
Sculpted & 3D Shapes
Ready to move beyond flat shapes? Sculpted earrings — tiny bows, fruits, abstract organic forms — are having a major moment in 2026. These require more patience but unlock completely unique designs.
Start with simple sculpted forms like:
- Mini bows: Roll two small logs, fold them into loops, pinch the center, and attach a tiny clay strip to wrap the middle.
- Abstract arches: Roll a snake of clay, bend it into a U-shape, and flatten the ends slightly where the earring findings will attach.
- Textured discs: Roll a ball, flatten to 3-4mm, and press a texture stamp into one side.
For sculptural pieces, work on a ceramic tile that can go directly into the oven. Transferring delicate sculpted clay from a work surface to a baking tray often distorts the shape. A tile eliminates that problem entirely.
Texture & Pattern Techniques That Elevate Your Designs
Plain, smooth earrings have their place — minimalists, I see you — but adding texture transforms a simple shape into something that catches the light and draws the eye. Texture is what separates homemade-looking earrings from boutique-quality pieces.
Using Found Objects as Texture Tools
You don’t need to buy specialized texture plates. Walk around your house right now and you’ll find a dozen texture-making tools:
- Linen or burlap fabric: Press it into raw clay for a subtle woven texture.
- Coarse salt: Sprinkle on the clay surface, roll it in gently, then rinse the salt off after baking for a pitted, organic look.
- Toothbrush bristles: Stipple the surface for a fine dotted pattern.
- Lace trim: Press it in firmly for a delicate floral relief.
- Bottle caps and screw threads: Roll them across the clay for industrial circular impressions.
- Roll a log of white clay (about 1/2 inch diameter).
- Roll out a thin sheet of black clay and wrap it completely around the white log.
- Roll another thin sheet of a bright color (say, coral) and wrap that around the black layer.
- Gently roll the completed cane on your work surface to compress and elongate it slightly.
- Slice thin rounds using a sharp blade — each slice reveals concentric circles.
- Place these slices onto a base clay shape and roll gently to embed them.
- Roll two clay colors into triangles with matching long edges.
- Place them together to form a rectangle (one color on each diagonal half).
- Fold the rectangle in half and pass it through your pasta machine on the thickest setting.
- Repeat the fold-and-roll process 8-10 times. The colors will gradually blend in the middle.
- Stop when the gradient looks smooth and seamless.
- Burned or yellowed clay: Your oven temperature is too high. Use a thermometer and consider tenting your clay with aluminum foil to deflect direct heat from the heating element. Dark colors (black, navy) are especially prone to scorching.
- Air bubbles appearing during baking: You trapped air while conditioning or rolling. When you see a bubble forming during baking, you can’t fix it — prevention is the only cure. Roll your clay slowly and deliberately to minimize trapped air.
- Uneven baking (some spots hard, others soft): Your oven has hot spots. Rotate your baking tray 180 degrees halfway through the bake time to even things out.
- Fill a small bowl with water and add a drop of dish soap.
- Start with 400-grit sandpaper. Dip the paper in water and gently sand the edges and surface of your earring in circular motions.
- Progress through grits: 400 → 600 → 800 → 1000 → 1500 → 2000. Each finer grit removes the scratches left by the previous one.
- Rinse and dry your piece between grits to check your progress.
- By 2000 grit, the surface should feel silky smooth. This takes time — expect to spend 5-10 minutes per pair.
- Buffing with a soft cloth: Denim or a microfiber cloth rubbed vigorously against the sanded clay creates a soft, natural sheen. No products required. This is my personal preference for earrings — it looks and feels like stone.
- Glazing with a polymer clay varnish: Varathane Polyurethane (water-based) or Sculpey Gloss Glaze add a glassy, protective topcoat. Apply thin layers with a soft brush and let each layer dry completely before adding the next. Avoid nail polish — it reacts with polymer clay and turns sticky over time.
- For flat-backed studs: Apply a small dot of E6000 glue to the flat pad of the earring post. Press it firmly onto the back of your clay piece. Hold for 30 seconds, then leave it undisturbed for 24 hours to fully cure. E6000 creates a flexible, permanent bond.
- For dangles with jump rings: Use two pairs of jewelry pliers to open a jump ring by twisting (never pull apart — that weakens the metal). Thread the ring through the pre-baked hole in your clay piece and through the earring hook. Twist it closed. If the jump ring gap isn’t perfectly flush, it’ll snag on clothing and hair.
- For embedded posts: Some artists embed the earring post directly into raw clay before baking. This works if the post has a flat, wide pad at its base. Press it in firmly so clay surrounds the pad, then bake as normal. Test the bond after baking — embedded posts can sometimes loosen.
- Organic abstract shapes: Asymmetrical blobs, free-form curves, and amoeba-like shapes in neutral tones (cream, terracotta, sage). These feel sculptural and high-end.
- Miniature sculpted objects: Tiny fruits, mushrooms, flowers, and celestial motifs (stars, moons). These appeal to the “whimsical accessory” crowd and command premium prices — often $25-$35 per pair.
- Textured metallics: Clay mixed with metallic powders (mica powders brushed onto the surface before baking) in gold, copper, and bronze. These look like hammered metal but weigh almost nothing.
- Color block and checkerboard: Sharp, graphic patterns in bold color combinations. Think black-and-white checkerboard or primary-color geometric panels.
- Nature-inspired textures: Leaf impressions, bark textures, and stone-like surfaces. These pair beautifully with how to make paper flowers displays at craft booths — the natural aesthetic creates a cohesive brand vibe.
- Etsy: The dominant marketplace for handmade jewelry. Polymer clay earrings are a saturated category, but well-photographed, on-trend designs still find buyers. Etsy charges $0.20 per listing plus 6.5% transaction fee.
- Instagram and TikTok Shop: Visual platforms where short-form video content (you making earrings in real-time, styling them with outfits) drives direct sales. TikTok’s algorithm can push a small account to thousands of views overnight.
- Local craft fairs and pop-ups: Higher effort but no platform fees. A $50-$100 booth fee at a weekend market can yield $300-$800 in sales if your pricing and display are right.
- Your own Shopify store: More control, no marketplace competition on your own page, but you’re responsible for driving all your own traffic. If you want a deeper comparison of selling platforms, read our Etsy vs Shopify: Where to Sell Your Easy DIY Crafts in 2026? breakdown.
Hadi daha yakından bakalım: The trick to using any texture tool is even pressure. Uneven pressing creates shadows and distortions that look messy rather than intentional. Practice on a scrap piece before committing to your final slab.
Slab-Built Patterns (Caning for Beginners)
Polymer clay canes are essentially logs of clay with an internal pattern that runs the entire length — when you slice the cane, every cross-section reveals the same design. Some artists spend years mastering complex millefiori canes, but simple canes are surprisingly beginner-friendly.
A simple bullseye cane takes 10 minutes and looks striking:
Cane work rewards patience. The first cane you make might be slightly wonky, and that’s completely normal. By your third attempt, you’ll have something you’re proud to wear.
Color Blending and Ombré Effects
Ombré earrings — where color transitions smoothly from light to dark — are consistently among the most-pinned polymer clay designs on Pinterest. They look sophisticated but use a simple technique called the Skinner Blend. Without getting too technical, here’s the beginner-friendly version:
This technique pairs beautifully with our guide on diy macrame wall hanging easy projects — macrame and polymer clay earrings share that handmade, boho aesthetic that’s everywhere in 2026.
How to Bake Polymer Clay Earrings Without Cracks
Baking is where most beginner projects go wrong. I’ve ruined at least six batches by rushing through this step. Polymer clay doesn’t dry out — it cures through heat, and precision is everything.
Temperature: The Single Most Important Variable
Every polymer clay package lists a recommended baking temperature — usually 275°F (130°C) for Sculpey Premo, 230°F (110°C) for Fimo, or 300°F (149°C) for Kato. Do not trust your oven’s built-in dial. Home ovens routinely run 25-50°F above or below the set temperature, and that margin of error is enough to scorch your clay.
Solution: Buy an oven thermometer. They cost $6-$10 and sit right on the baking rack. Place it next to your clay, monitor the actual temperature, and adjust your oven dial accordingly. If your clay burns, it releases hydrogen chloride gas — unpleasant and potentially irritating to your lungs. Proper ventilation (open a window, turn on the exhaust fan) is always recommended.
Baking Time and Thickness Guidelines
| Clay Thickness | Recommended Bake Time at 275°F | Notes |
|---|---|---|
| 1-2mm (very thin) | 15-20 minutes | Watch carefully; thin pieces scorch faster. |
| 2-3mm (standard earring) | 25-30 minutes | Ideal for most cutout earrings. |
| 4-5mm (sculptural pieces) | 35-45 minutes | Extend time rather than raise temperature. |
| 6mm+ (thick sculpted work) | 45-60 minutes | Consider baking in two stages if very thick. |
Longer bake times at the correct temperature strengthen polymer clay. Unlike food, polymer clay doesn’t “overcook” if the temperature stays accurate. A 45-minute bake produces stronger earrings than a 20-minute bake, as long as the temperature doesn’t exceed the clay’s rating. Many professional clay artists bake their jewelry for a full hour regardless of thickness.
Preventing Burned Clay and Bubbles
Three common baking problems and their fixes:
Şöyle düşünün: Baking is chemistry, not cooking. You’re not making dinner — you’re curing plastic. Precision matters more than intuition.
Cooling and Testing for Doneness
Remove your tray from the oven and do not touch the clay for at least 30 minutes. Hot polymer clay is fragile and deforms easily. Let pieces cool completely on the tray.
How do you know if your clay is fully cured? The bend test: take a scrap piece from the same batch and try to bend it. Properly cured polymer clay bends slightly before snapping — it should feel like a flexible plastic, not a cracker. If it snaps immediately with no flex, it’s underbaked. Pop it back in the oven (correct temperature!) for another 15-20 minutes. If it crumbles, you may have scorched it.
Once you’ve mastered baking, you might want to explore 15 Most Profitable DIY Crafts to Make and Sell in 2026 — polymer clay jewelry consistently ranks among the top five craft categories for profit margins.
Sanding, Finishing & Assembling Your Earrings
Your pieces are baked, cooled, and sitting on your table. They look… okay. Maybe a little rough around the edges. Maybe the surface has tiny fingerprints you didn’t notice before baking. This is where finishing work transforms “craft project” into “jewelry.”
Wet Sanding for a Professional Finish
Wet sanding uses water as a lubricant to smooth polymer clay without generating dust. Here’s the process:
Not every design needs wet sanding. Marbled earrings with organic edges can look beautiful with just a light edge buffing. Smooth, minimalist shapes benefit the most from the full sanding treatment.
Buffing and Glazing Options
After sanding, you have two paths to shine:
Bir de şuna bakalım: Resin coating is another option, but it’s a more advanced technique with its own learning curve. If you’re interested, our How to Make Easy Resin Jewelry for Beginners guide walks you through the fundamentals.
Attaching Earring Findings Securely
Nothing is more embarrassing than having an earring fall apart while someone is admiring it. Here’s how to attach findings so they stay put:
Design Ideas & How to Start Selling in 2026
By now you’ve got the technical skills to make beautiful polymer clay earrings. The question becomes: what should you make, and who’s going to buy them?
Trending Polymer Clay Earring Styles for 2026
Based on Pinterest trends, Etsy search data, and what I’m seeing at craft fairs, these five styles are dominating in 2026:
Pricing Your Earrings for Profit
One pair of medium-complexity earrings uses about 1/4 to 1/2 block of clay ($0.75-$2.50 in materials) plus findings ($0.30-$0.80), glue ($0.10), and packaging ($0.25-$0.50). Total material cost per pair: roughly $1.50-$4.00.
Pricing formula that experienced craft sellers use: (Materials × 2) + (Hourly rate × Hours spent) = Wholesale price. Wholesale × 2 = Retail price.
So if a pair takes 30 minutes to make and you value your time at $20/hour, your math looks like: ($3 × 2) + ($20 × 0.5) = $16 wholesale, $32 retail. Adjust based on your market — earrings that sell for $32 at a boutique in a major city might sell for $18 at a local craft fair in a smaller town.
Where to Sell Polymer Clay Earrings
You’ve got options, and they aren’t mutually exclusive:
Frequently Asked Questions
What is the best polymer clay brand for earrings?
Sculpey Premo is the best all-around choice for beginners making earrings. It’s strong after baking, holds fine details well, and comes in a wide color range that blends beautifully. Fimo Professional is slightly firmer — ideal for intricate cane work and sculpting. Kato Polyclay produces the strongest finished pieces but requires more effort to condition. Avoid Sculpey III and bargain clays for earrings; they’re too brittle for jewelry that gets handled and worn regularly (Source: Craft Industry Alliance member survey, 2025).
Do I need a pasta machine to make polymer clay earrings?
No, you absolutely do not need a pasta machine to get started. An acrylic rolling pin and a bit of patience will produce perfectly usable clay slabs. However, a pasta machine makes conditioning faster, produces more uniform thickness, and reduces hand fatigue if you’re making earrings in batches. If you make more than 10 pairs, the $25-$30 investment in a craft-dedicated machine starts paying for itself in saved time.
How do I make polymer clay earrings shiny without glaze?
Wet sanding followed by buffing with a piece of denim or microfiber cloth produces a soft, natural sheen. For higher gloss without commercial glaze, progress through all sanding grits up to 2000, then buff vigorously with a cloth for 3-5 minutes. The friction generates enough heat to slightly polish the clay surface. Some artists also use a Dremel with a buffing wheel at low speed for a mirror finish. Avoid nail polish — it chemically reacts with polymer clay and becomes sticky over months.
Can I use a toaster oven to bake polymer clay earrings?
Yes, but with an important caveat: never use the same toaster oven for food again. Polymer clay releases plasticizer residues during baking that can transfer to food. A dedicated $30 toaster oven from a thrift store or discount retailer works perfectly for clay projects. The same rule applies — always use a separate oven thermometer, as toaster ovens have even less accurate temperature controls than full-sized ovens.
Why did my polymer clay earrings crack after baking?
Cracks after baking usually point to one of three causes: under-conditioned clay (plasticizers weren’t evenly distributed), thermal shock (pieces were transferred from a cold surface directly into a hot oven), or insufficient bake time for the clay thickness. To prevent cracking, condition thoroughly, place your tray in the oven while it preheats so the clay warms gradually, and err toward slightly longer bake times at the correct temperature rather than shorter times.
Are polymer clay earrings safe for sensitive ears?
The clay itself is inert once cured and generally non-irritating. The earring findings are what matter for sensitive ears. Use hypoallergenic findings: surgical stainless steel, niobium, titanium, or 14k gold-plated posts. Avoid nickel-containing metals — nickel allergy affects roughly 15% of the population and is the most common cause of earring irritation. Always disclose your finding materials in product descriptions so buyers with allergies can make informed decisions.
How long does it take to make one pair of polymer clay earrings?
For a beginner making simple cutout earrings, expect 45-60 minutes of active work plus 30 minutes of baking and 30 minutes of cooling time. Design time varies. A pair of marbled teardrop studs might take 30 active minutes; complex sculpted or caned designs can take 2-3 hours. With practice, you’ll batch-process steps — for example, conditioning all your clay for five pairs at once, then cutting all shapes, then baking everything together — which dramatically reduces time per pair.
Can I make polymer clay earrings without an oven?
Traditional polymer clay requires heat curing. There’s no reliable way to air-cure it. Some crafters experiment with boiling or using a heat gun, but results are inconsistent and often produce weak, brittle pieces. If you don’t have access to an oven, consider air-dry clay as an alternative medium — it won’t match polymer clay’s durability, but it works for decorative earrings. Alternatively, friends or local maker spaces often allow oven use by arrangement.
Your First Pair of Polymer Clay Earrings Awaits
So here we are. You’ve learned what tools you actually need, how to condition clay until it’s strong and pliable, three different shaping techniques, texture tricks that make your work look professional, the baking precision that prevents disasters, and how to finish and assemble pieces that last. That’s the entire workflow from raw material to finished jewelry.
The thing about polymer clay is that you can read about it for weeks, but the real learning happens the moment your hands touch the clay. Your first pair might be slightly imperfect. So was mine. So was everyone’s. The second pair will be better, and by the fifth pair you’ll have developed instincts — how the clay should feel, when a design is working, the exact moment to stop marbling before the colors muddy. That muscle memory can’t be taught; it can only be earned.
If you discover you love making earrings and want to turn your hobby into income, remember to check out 15 Most Profitable DIY Crafts to Make and Sell in 2026 for more ideas, and Etsy vs Shopify: Where to Sell Your Easy DIY Crafts in 2026? for platform guidance. Meanwhile, clear off that table, preheat your oven, and make something you’ll be proud to wear — or sell.
Ready to start crafting? Grab a block of Premo in your favorite color, condition it for five minutes, cut out a simple shape, and bake it. That’s it. One pair. See how it feels. The rest builds from there.