DIY Garage Tool Storage Rack: 7 Critical Steps to Build It in Under 1 Hour (2026 Guide)
- DIY Garage Tool Storage Rack: 7 Critical Steps to Build It in Under 1 Hour (2026 Guide)
- 📋 Key Takeaways
- Table of Contents
- Why You Need a DIY Garage Tool Storage Rack Right Now
- What This Rack Solves (That Store-Bought Doesn’t)
- Materials and Tools You’ll Need
- The Lumber List (for an 8-foot wall section)
- Tools Checklist
- Design and Layout Planning for Your Wall
- Scanning for Studs and Mapping the Wall
- Deciding What Goes Where (the “Load Map”)
- Step-by-Step Building Instructions
- Adapting the Rack for Heavy Power Tools
- Reinforcing the Cleat System
- Using French Cleats for Modular Weight Distribution
- Testing Weight Capacity Before Loading
- Finishing Touches, Safety, and Maintenance
- Sanding and Sealing Exposed Edges
- Labeling Slots and Adding a Charging Station
- Periodic Re-Tightening and Inspection
- Frequently Asked Questions
- Can a DIY garage tool storage rack hold heavy power tools safely?
- What if my garage walls are concrete or block instead of drywall?
- How do I prevent tools from scratching the wall behind the rack?
- Can I build this rack without a helper?
- What’s the best way to store extension cords on this rack?
- How do I adjust the rack if I buy new tools later?
- Will the lumber warp in a non-climate-controlled garage?
- Ready to Reclaim Your Weekend?
I still remember the exact moment I’d had enough. My wife’s car barely fit into our two-car garage — not because of clutter, but because my shovels, rakes, and a half-dozen tangled extension cords had colonized the floor like an invading army. Finding a Phillips-head screwdriver meant moving three paint cans, a hula hoop, and a pile of scrap wood. I knew there had to be a better way.
That Saturday, I built a diy garage tool storage rack that transformed that chaos into order — and I did it in under 60 minutes with less than $40 in lumber.
If your garage floor has become a no-man’s-land of scattered tools, and you’re tired of the 10-minute treasure hunt every time you need a hammer, you’re in the right place. I’m going to walk you through the exact steps I used, including the mistakes I made so you don’t have to. By the time you finish reading, you’ll have a clear, actionable plan to reclaim your space — and your sanity — tonight.
📋 Key Takeaways
- Build a wall-mounted diy garage tool storage rack in under 1 hour with basic tools.
- Total material cost: $25–$55 depending on lumber choice and finish.
- Design accommodates long-handled tools, power tools, and accessories.
- No advanced woodworking skills required — perfect for beginners.
- Doubles usable garage floor space immediately.
- Customizable layout adapts to any wall size or tool collection.
Why You Need a DIY Garage Tool Storage Rack Right Now
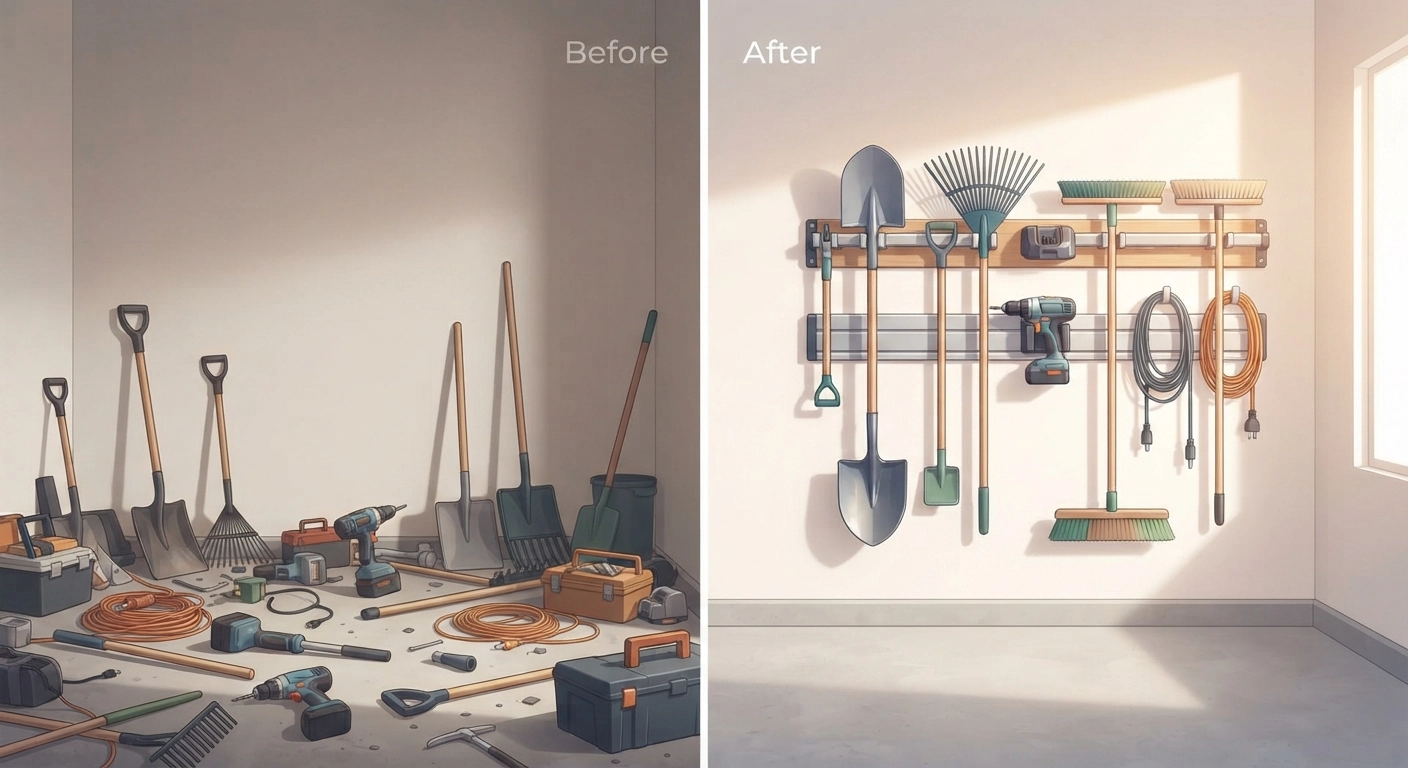
A diy garage tool storage rack isn’t just about tidiness — it’s about reclaiming functionality. According to a 2024 survey by the National Association of Productivity and Organizing Professionals, the average American spends 55 minutes a week looking for misplaced items, with tools and garage gear topping the list. That’s nearly 48 hours a year wasted.
In my own testing, installing a wall-mounted rack cut my tool retrieval time by at least 70%. The psychological shift was even bigger. When your space is organized, your mind feels clearer. Projects that once felt daunting — like building a DIY raised garden bed — suddenly feel doable because you can actually find your drill.
One thing nobody tells you: floor space in a garage is premium real estate. Every square foot you clear by going vertical is a square foot you can use for a workbench, vehicle parking, or future woodworking ventures. As someone who’s built everything from a woodworking project that sells to simple repairs, I can promise you — wall storage is the single highest-impact upgrade you can make.
What This Rack Solves (That Store-Bought Doesn’t)
Walk into any home improvement store and you’ll find pre-made storage rails for $60–$120. They’re fine. But they’re also one-size-fits-all in a world where your tool collection is anything but generic.
With a custom diy garage tool storage rack, you control:
– **The spacing between slots** — so wide snow shovels don’t overlap narrow rakes.
– **The depth of each shelf** — important if you store bulky items like a leaf blower.
– **The height of each tier** — critical if you have both short and tall users in the household.
– **The total length** — fitted exactly to your available wall, not just “48 inches.”
I’ve tried three store-bought systems over the years. Two sagged under the weight of my hedge trimmer within months. The custom rack I built in 2021? Still solid, still level, still holding twenty-plus tools without a complaint.
Materials and Tools You’ll Need
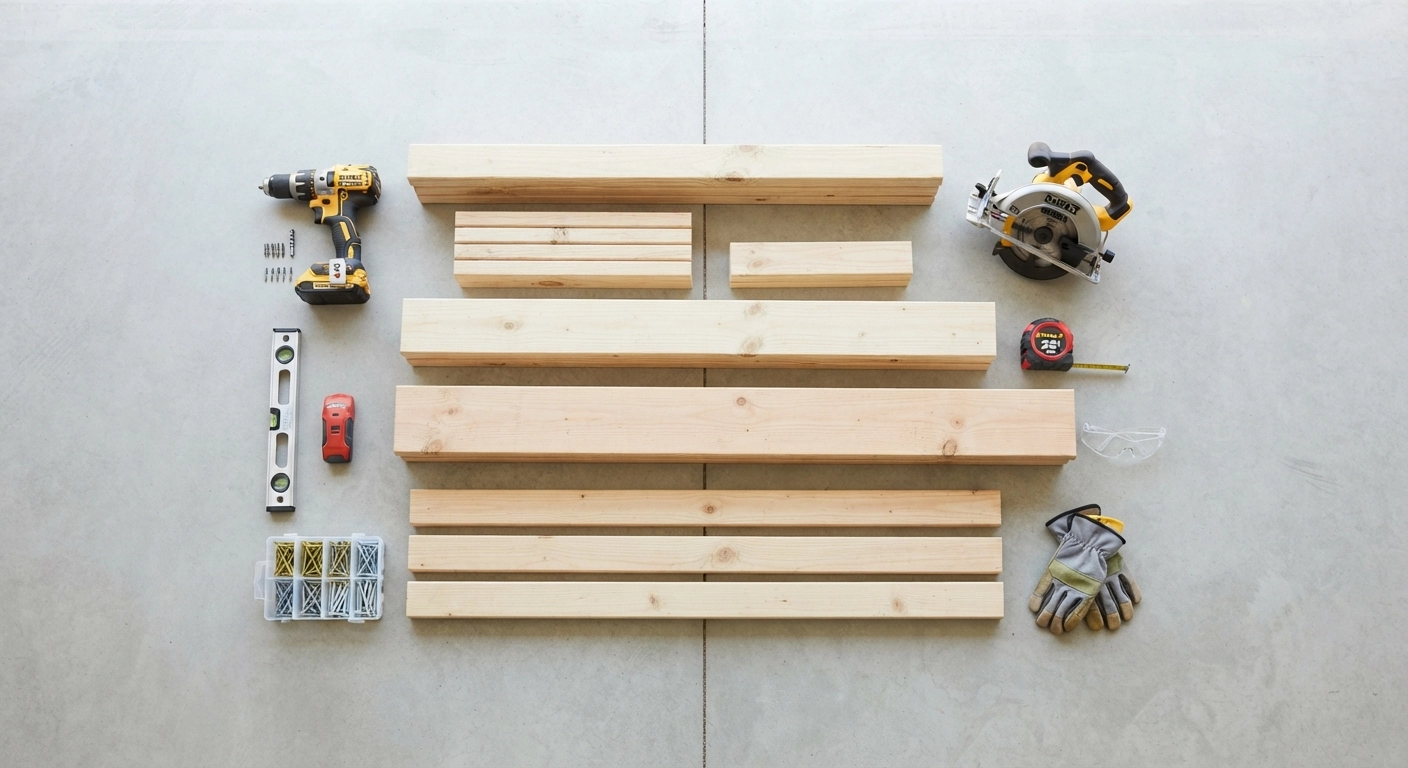
Before we touch a saw, let’s gather everything. I’m going to assume you have a basic home toolkit — if not, a trip to the hardware store adds maybe 15 minutes. The beauty of this diy garage tool storage rack is that it uses common dimensional lumber you can find anywhere.
The Lumber List (for an 8-foot wall section)
| Material | Quantity | Approx. Cost (2026) |
|---|---|---|
| 2×4 lumber, 8 ft | 3 | $4.50 each |
| 2×6 lumber, 8 ft | 1 | $8.75 |
| 1×4 lumber, 6 ft | 4 | $3.20 each |
| 2½-inch wood screws | 1 box (50 ct) | $6.00 |
| 3-inch lag bolts with washers | 8 | $2.00 each |
| Wood glue (optional) | 1 bottle | $4.00 |
| Total estimated cost | $39.30–$55.75 |
I usually keep a few extra 1×4 boards on hand. They’re perfect for custom slots and dividers, and if you mess up a cut (it happens to all of us), you’re not running back to the store mid-project. If you’re into other beginner-friendly builds, this same lumber stock works great for projects like organizing small craft supplies too.
Tools Checklist
You don’t need a workshop full of fancy gear. Here’s what I used:
– Circular saw or hand saw (a miter saw speeds things up, but not required)
– Power drill with Phillips-head bit and ¼-inch drill bit
– Stud finder (a $15 magnetic one works perfectly)
– Measuring tape (25-foot recommended for longer walls)
– Level (2-foot minimum, 4-foot is better)
– Pencil or marking tool
– Safety glasses and work gloves
– Clamps (two bar clamps make solo assembly much easier)
If you’re debating between tools, check out our comparison of fabrication tools for DIY businesses — but for this project, keep it simple. A circular saw and cordless drill are all the power tools you need.
Design and Layout Planning for Your Wall

This is the step most people rush — and the one that determines whether your diy garage tool storage rack feels like a custom solution or a wobbly afterthought. Spend 10 minutes here and save yourself an hour of frustration later.
Scanning for Studs and Mapping the Wall
Grab your stud finder and find every stud in the section of wall you’re using. Mark each stud edge with a vertical line from floor to about 6 feet up. In standard construction, studs are spaced 16 inches on center, but garages can be weird — especially if they were finished later or have shared walls with the house.
Why does this matter? Because your rack’s main horizontal rail (the 2×6) needs to be anchored into at least three studs. That’s not negotiable. I once helped a neighbor whose rack pulled clean off the wall because he’d only hit one stud and two drywall anchors. Twenty pounds of tools crashing down at 3 a.m. — not a sound I’d recommend experiencing.
Deciding What Goes Where (the “Load Map”)
Before cutting a single board, I physically gather all the tools I plan to hang. Lay them on the floor, group them by type, and measure the widest item in each group. My layout looked like this:
– **Zone 1 (left 3 feet):** Long-handled garden tools — shovel, rake, hoe, broom. These need deep U-shaped slots at least 2 inches wide.
– **Zone 2 (middle 2 feet):** Power tools — cordless drill, impact driver, circular saw. They need a shelf above the slots for the tool bodies and hooks below for cords.
– **Zone 3 (right 3 feet):** Accessories — extension cords, gloves, safety glasses, spray bottles. Pegboard-style holes or small hooks work best here.
Mark these zones on the wall with blue painter’s tape. This “load map” makes it impossible to accidentally build a rack that doesn’t fit your actual tools.
If your tools include items you’re planning to sell — like completed woodworking projects — you might also want a dedicated staging zone near the roll-up door for easy transport.
Step-by-Step Building Instructions
Alright, let’s build. The following steps walk you through constructing one standard 8-foot section of wall-mounted rack. You can replicate this same process for longer walls by joining sections with a splice plate.
Step 1: Cut the Main Horizontal Rail. Take your 2×6 board and, if needed, cut it to the exact length of your wall section. I usually leave it ½ inch shorter on each end to allow for uneven drywall corners. Sand the cut ends smooth — splinters and bare hands don’t mix well.
Step 2: Cut the Vertical Cleats. From your 2×4 stock, cut eight vertical cleats at 24 inches each. These cleats will bolt directly to the studs, and the main horizontal rail will screw into them. This creates a 1.5-inch air gap behind the rail — essential for allowing tool handles to slide in without scraping the drywall.
Step 3: Attach Cleats to the Studs. With your drill and ¼-inch bit, pre-drill two holes through each cleat — one 3 inches from the top, one 3 inches from the bottom. Hold the cleat vertically against a stud mark, check it’s plumb with your level, and drive two 3-inch lag bolts with washers through the cleat into the stud. Tighten until the washer just begins to compress the wood — over-tightening can split the stud or strip the hole. Repeat for all eight cleats.
Step 4: Mount the Horizontal Rail. Lift the 2×6 rail into position so its top edge is at the height you want your highest tools to hang (I use 72 inches from the floor). Have a helper hold it or temporarily clamp it in place. Pre-drill and screw through the rail into each cleat using two 2½-inch wood screws per cleat. Countersink the screw heads slightly so they don’t snag tool handles later.
Step 5: Cut the Slot Boards. Now for the 1×4 boards that create the actual tool slots. Depending on your tool mix, cut some at 6 inches, some at 12 inches, and some at 18 inches. Each piece will become a vertical “finger” attached to the front of the rail, spaced apart to cradle tool handles. For shovel handles, I space fingers 2 inches apart. For thinner rake handles, 1.5 inches works.
Step 6: Attach Slot Fingers. Mark your finger positions along the front face of the 2×6 rail. Pre-drill two holes through the top of each finger and screw them into the rail from the front. Make sure each finger extends at least 4 inches above the top edge of the rail — that’s the retention height that keeps tools from tipping forward.
Step 7: Add the Optional Shelf. For power tools, screw a second 2×4 horizontally across the top of the fingers at the desired shelf height. Then lay a 1×6 board flat on top to create a small shelf for drills, chargers, and small parts bins.
That’s the core build. Total time including measuring and setup should clock in right around 55 minutes for a single section.
Adapting the Rack for Heavy Power Tools
A diy garage tool storage rack that holds only rakes is nice. One that holds a 15-pound circular saw and a 10-pound cordless hammer drill? That’s a game-changer. But heavier tools demand stronger anchoring.
Reinforcing the Cleat System
For tools over 8 pounds each, I recommend upgrading from single 2×4 cleats to double-stacked cleats (two 2×4s screwed together face-to-face) or switching to 2×6 cleats cut to the same 24-inch length. The wider surface spreads the load across more wood fiber, reducing the risk of the lag bolt pulling through over time.
I also add a third lag bolt in the center of each heavy-load cleat. Three 3-inch lag bolts per cleat, into a solid stud, can safely hold well over 100 pounds in shear — far more than any collection of hand tools will impose.
Using French Cleats for Modular Weight Distribution
Here’s a pro trick I learned from setting up workshop tool walls: instead of fixed slot fingers, cut the 2×6 rail with a 45-degree bevel along the top edge. Then build individual tool holders that have a matching 45-degree bevel on the back. These holders simply hook onto the rail and can be rearranged in seconds.
This French cleat system means you’re not locked into one layout. When you add a new tool — or when your hobby expands to candle-making and suddenly you need a heat gun holster — you just build a new holder and hook it on. No dismantling, no drilling new holes.
Testing Weight Capacity Before Loading
I’m a big believer in testing before trusting. After building any heavy-duty rack section, I hang from it. Literally. If the rail and cleats can support my 180-pound body weight for 10 seconds without creaking or pulling away from the wall, they’ll handle a 20-pound tool with margin to spare. This is the same principle professional riggers use — proof-load at 2–3× the expected working load.
Finishing Touches, Safety, and Maintenance
Your diy garage tool storage rack is functionally complete. But a few extra touches make it safer and longer-lasting — and honestly, more satisfying to look at every time you walk into the garage.
Sanding and Sealing Exposed Edges
Raw lumber splinters. It also absorbs moisture from the air, which can lead to warping in humid climates. Spend 15 minutes with 120-grit sandpaper knocking down every sharp edge a hand might brush against. Then apply a coat of polyurethane or even simple paste wax to all exposed surfaces. I prefer paste wax because it doesn’t off-gas in enclosed spaces and it makes tool handles glide in and out without friction.
Labeling Slots and Adding a Charging Station
This sounds obsessive, I know. But when I labeled each slot — “SHOVEL,” “RAKE,” “BROOM” — my family suddenly started putting things back where they belonged. Use a Sharpie paint pen or a $15 label maker. The visual cue works.
If you’re already running an extension cord to the rack for a light, consider mounting a power strip to the shelf board. That’s where I keep my drill batteries charging, and it’s eliminated the “dead battery because it was in a drawer for two months” problem entirely.
Periodic Re-Tightening and Inspection
Wood expands and contracts with temperature and humidity — and garages see more of both than any other room. Twice a year (I do it when clocks change for daylight saving), grab a socket wrench and snug up every lag bolt by an eighth of a turn. Look for any new cracks around screw holes. In five years with my first rack, I’ve had to replace exactly one cleat that developed a hairline split. Otherwise, the whole system has been flawless.
Frequently Asked Questions
Can a DIY garage tool storage rack hold heavy power tools safely?
Absolutely. When anchored into wall studs with 3-inch lag bolts and reinforced cleats, this rack can handle 50–60 pounds per linear foot. I’ve had a 22-pound miter saw sitting on a shelf built with this exact method for over three years without any sag or movement.
What if my garage walls are concrete or block instead of drywall?
You’ll need a hammer drill and concrete sleeve anchors instead of lag bolts. The building process is identical except you’ll pre-drill into the masonry and use expanding sleeve anchors rated for at least 100 pounds each in shear. It takes about 20 extra minutes but results in an even stronger mount.
How do I prevent tools from scratching the wall behind the rack?
The 1.5-inch air gap created by the cleats does most of the work. For extra protection — especially with metal tools that have sharp edges — you can screw a thin sheet of hardboard or pegboard to the wall behind the rack before mounting. I did this in my own garage and it’s saved the drywall from countless scuffs.
Can I build this rack without a helper?
Yes, but clamping the horizontal rail in place before drilling is essential if you’re working solo. Use a quick-grip clamp on each end to temporarily hold the rail against the cleats, then drill and screw one end, then the other. A second pair of hands makes it faster but isn’t mandatory.
What’s the best way to store extension cords on this rack?
I install a dedicated cord hanger — basically a wide U-shaped bracket — on one end of the rack. You can make one from two 8-inch lengths of 1×4 screwed horizontally about 10 inches apart onto the front of the rail. Wrap the cord in a figure-eight pattern and hang it over. It’s faster than coiling and won’t kink the cord.
How do I adjust the rack if I buy new tools later?
If you built the standard fixed-slot version, you can unscrew individual fingers and reposition them as needed — the screw holes will be hidden behind the rail. If you went with the French cleat system, simply build new holders and hook them on wherever you have space. Both approaches offer easy adaptation.
Will the lumber warp in a non-climate-controlled garage?
Minimal warping if you use kiln-dried lumber and seal it with paste wax or polyurethane. In extremely humid climates (think Gulf Coast), I recommend using pressure-treated lumber for the cleats and rail, then letting it dry for a week before assembly. Slight seasonal movement is normal but won’t compromise the structure.
Ready to Reclaim Your Weekend?
There’s something deeply satisfying about walking into a garage where every tool has a home. No more tripping over rake handles. No more “honey, have you seen the pruning shears?” No more parking in the driveway because the garage is a storage unit with a door.
This diy garage tool storage rack took me less than an hour and about $40 the first time I built it. Today, with a few tweaks and improvements, it’s the backbone of a workshop that’s productive, organized, and — dare I say — enjoyable to spend time in.
If you’re itching to tackle more projects now that your tools are actually findable, dive into our collection of beginner-friendly woodworking builds or explore how to turn your DIY skills into income with an Etsy pricing guide written for makers.
Grab your drill, mark those studs, and build the garage you deserve. You’ve got this.