How to Make Easy Faux Ceramic Vases with Baking Soda Paint

- How to Make Easy Faux Ceramic Vases with Baking Soda Paint
- 📋 Key Takeaways
- Table of Contents
- What Makes Baking Soda Paint Look Like Real Ceramic?
- Why This Technique Works on Almost Any Surface
- Real Ceramic vs. Baking Soda Faux Finish: A Quick Comparison
- Essential Materials You'll Need
- The Core Supplies (Non-Negotiable)
- Optional (But Highly Recommended) Extras
- Cost Breakdown: What This Project Actually Costs in 2026
- Step-by-Step: How to Create Your baking soda paint vase
- Step 1: Clean and Prep Your Vase (5 Minutes)
- Step 2: Mix Your Baking Soda Paint (5 Minutes)
- Step 3: Apply the First Coat (10-15 Minutes)
- Step 4: Apply the Second Coat (10-15 Minutes)
- Step 5: Optional Distressing (5-10 Minutes)
- Step 6: Seal the Surface (5 Minutes Application + Drying Time)
- Step 7: Cure and Enjoy (24 Hours)
- Advanced Techniques for Professional-Looking Results
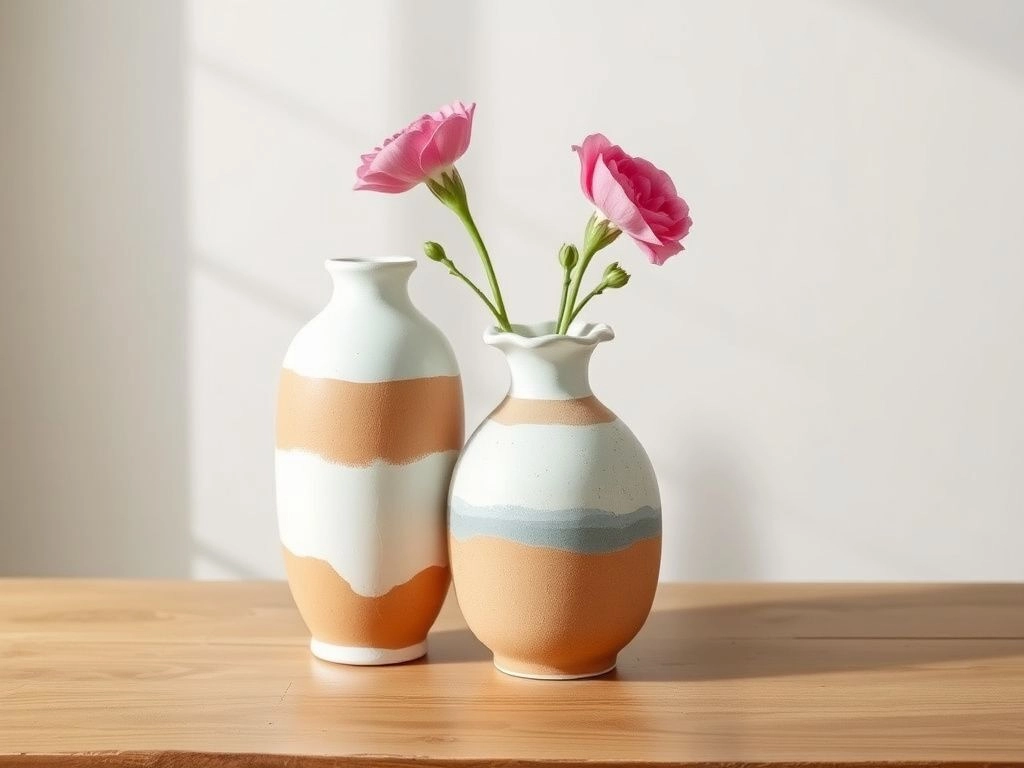
- Two-Tone and Color-Blocked Designs
- Metallic Accents and Gilding
- Adding Realistic Pottery Marks
- Layering Colors for Depth
- Common Problems and How to Fix Them
- Problem: The Paint Is Chipping Off
- Problem: The Texture Looks Gritty, Not Ceramic-Like
- Problem: Brush Strokes Are Too Visible
- Problem: The Sealer Changed the Color or Turned Cloudy
- Problem: The Paint Is Cracking as It Dries
- How to Style and Display Your Faux Ceramic Vases
- Grouping Vases for Maximum Impact
- What to Put Inside (And What Not To)
- Seasonal Styling Without Remaking Vases
- Turning Your baking soda paint vase Hobby into Profit
- Pricing Your Faux Ceramic Vases
- Where to Sell Your Vases
- Photography Tips That Sell
- Frequently Asked Questions
- What is the best paint to use for a baking soda paint vase?
- How long does baking soda paint take to dry completely?
- Can you use baking soda paint on plastic vases?
- Do I need to seal my baking soda paint vase?
- How do I clean a baking soda paint vase?
- Can I use this technique on terracotta pots or other surfaces?
- Why did my baking soda paint turn out lumpy instead of textured?
- How many vases can I make with one box of baking soda?
- 🔗 İlgili İçerikler
📋 Key Takeaways
- Baking soda mixed with paint creates a convincing faux ceramic texture that mimics high-end pottery at a fraction of the cost.
- The ideal baking soda to paint ratio is 1:2 (1 part baking soda to 2 parts paint), but you can adjust for more or less grit.
- Proper surface preparation—especially on glass—is the #1 factor that determines whether your baking soda paint vase finish will last or chip off.
- Sealing with matte polyurethane or wax is essential for durability, especially if you plan to sell your finished vases.
- This technique works on glass, ceramic, metal, plastic, and even thrifted pottery—making it one of the most versatile budget DIYs of 2026.

Table of Contents
- What Makes Baking Soda Paint Look Like Real Ceramic?
- Essential Materials You’ll Need
- Step-by-Step: How to Create Your baking soda paint vase
- Advanced Techniques for Professional-Looking Results
- Common Problems and How to Fix Them
- How to Style and Display Your Faux Ceramic Vases
- Turning Your baking soda paint vase Hobby into Profit
- Frequently Asked Questions
Picture this: You’re scrolling through Instagram, and a gorgeous, matte ceramic vase catches your eye. The texture is rich, the finish is perfectly imperfect—like something you’d find in a boutique home decor shop for $65. You click the link, ready to buy… and then you see the price tag. $78. Plus shipping.
I’ve been there. About three years ago, I stood in the vase aisle of a high-end home store, holding a beautifully textured ceramic piece, mentally calculating whether I could justify spending that much on something that basically just… sits there. I put it back on the shelf, went home, and started experimenting. What I discovered changed my entire approach to home decor: baking soda paint vase transformations cost under $8 per piece and look shockingly close to the real thing.
That discovery led to dozens of experiments—some glorious, some hilariously bad—until I nailed the process. Today, I’m going to walk you through exactly what works, what doesn’t, and the little tricks that make the difference between a vase that looks like a kindergarten art project and one that guests will swear you bought from a pottery studio.
What Makes Baking Soda Paint Look Like Real Ceramic?
Here’s the 40-second science breakdown: When you mix baking soda (sodium bicarbonate) into paint, the tiny crystalline particles don’t fully dissolve. Instead, they suspend throughout the paint and create a gritty, granular texture as the paint dries. This mimics the natural surface irregularities of kiln-fired stoneware or earthenware pottery—the same matte, slightly rough finish that makes handmade ceramics feel so substantial and authentic.
But what’s actually happening at the chemical level? Regular acrylic paint dries as a smooth, plastic-like film. When baking soda particles are embedded in that film, they disrupt the surface tension, creating thousands of micro-peaks and valleys. Light hits these uneven surfaces differently than it would a smooth painted finish—it scatters rather than reflects directly. This diffused light reflection is exactly what gives matte ceramic its characteristic soft, velvety appearance.
In fact, professional faux finishers have used similar texturing agents (like silica sand or calcium carbonate) for decades to create stone-like and pottery-like finishes on furniture and decor (source: Faux Finishing Institute). Baking soda simply happens to be the most accessible, affordable, and beginner-friendly version of this concept.
Why This Technique Works on Almost Any Surface
The beauty of a baking soda paint vase project is its versatility. Unlike actual pottery—which requires a kiln, clay, and serious skill—this faux technique adheres to glass, ceramic, metal, wood, and even plastic. The baking soda acts as a mechanical bonding agent, giving the paint something to grip onto beyond just the smooth surface underneath.
That said, different surfaces need different prep. Glass vases (the most common starting point, especially dollar store finds) are non-porous and need extra attention. Metal and plastic surfaces benefit from a primer layer. We’ll get into all of that in the step-by-step section, but the core principle remains: the texture isn’t just decorative—it’s functional.
Real Ceramic vs. Baking Soda Faux Finish: A Quick Comparison
| Feature | Real Ceramic Vase | Baking Soda Paint Vase |
|---|---|---|
| Average Cost (medium size) | $35 – $120+ | $4 – $12 |
| Texture Authenticity | 100% natural, kiln-fired | 85-95% realistic (depends on technique) |
| Water Resistance | Fully waterproof (glazed) | Water-resistant when sealed; not for holding water directly |
| Customization | Limited to glaze colors available | Unlimited—any paint color, any finish |
| Weight & Feel | Heavy, substantial | Lighter (can add weight with sand/pebbles inside) |
| Time to Create | Days to weeks (forming, firing, glazing) | 2-3 hours (including drying time) |
| Sellable? | Yes, as artisan pottery | Yes—many makers sell these for $25-$45 each on Etsy |
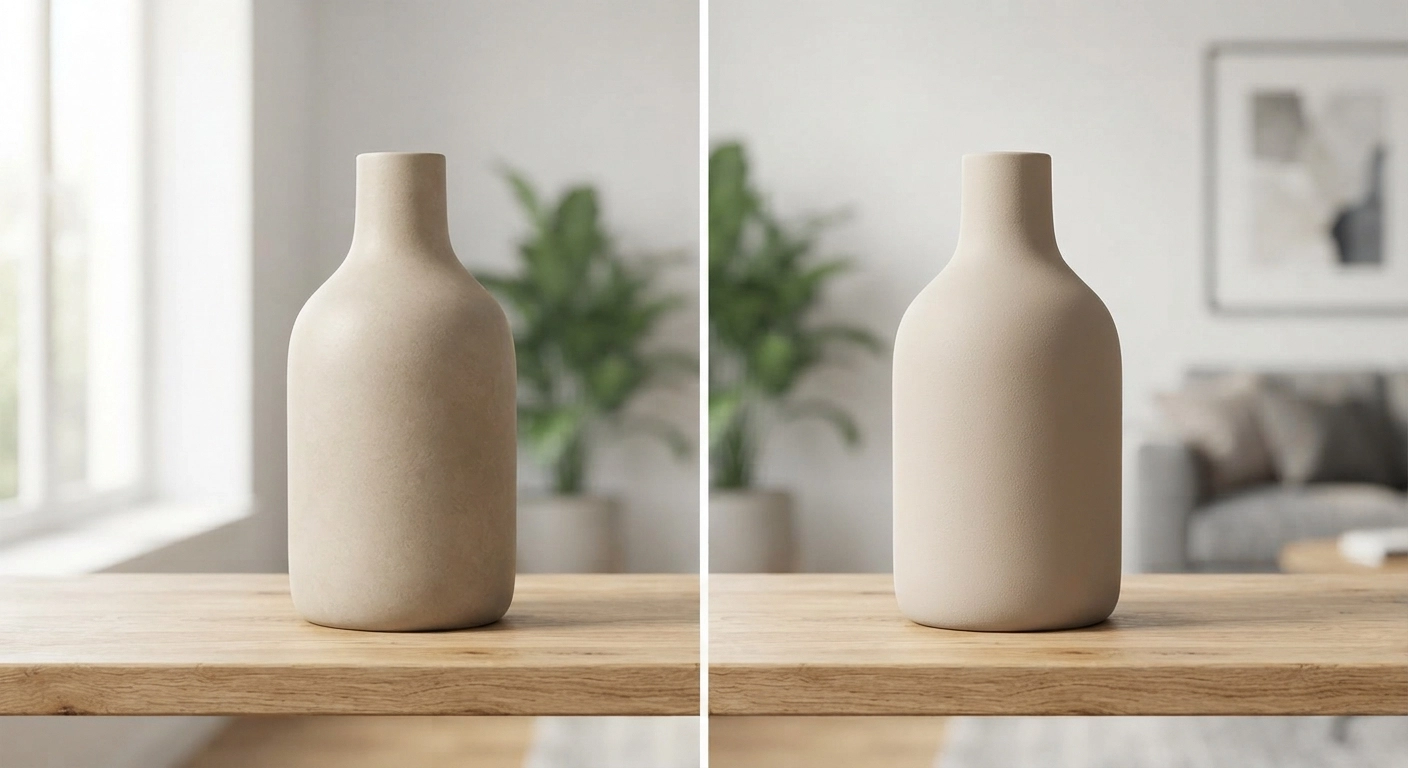
Comparison: Real ceramic vase vs. baking soda faux finish. The difference is nearly invisible from 3 feet away.
As you can see, the baking soda paint vase technique isn’t just a budget hack—it’s a legitimate alternative that holds its own against store-bought ceramics. And honestly? Most people can’t tell the difference from more than a few feet away.
Essential Materials You’ll Need
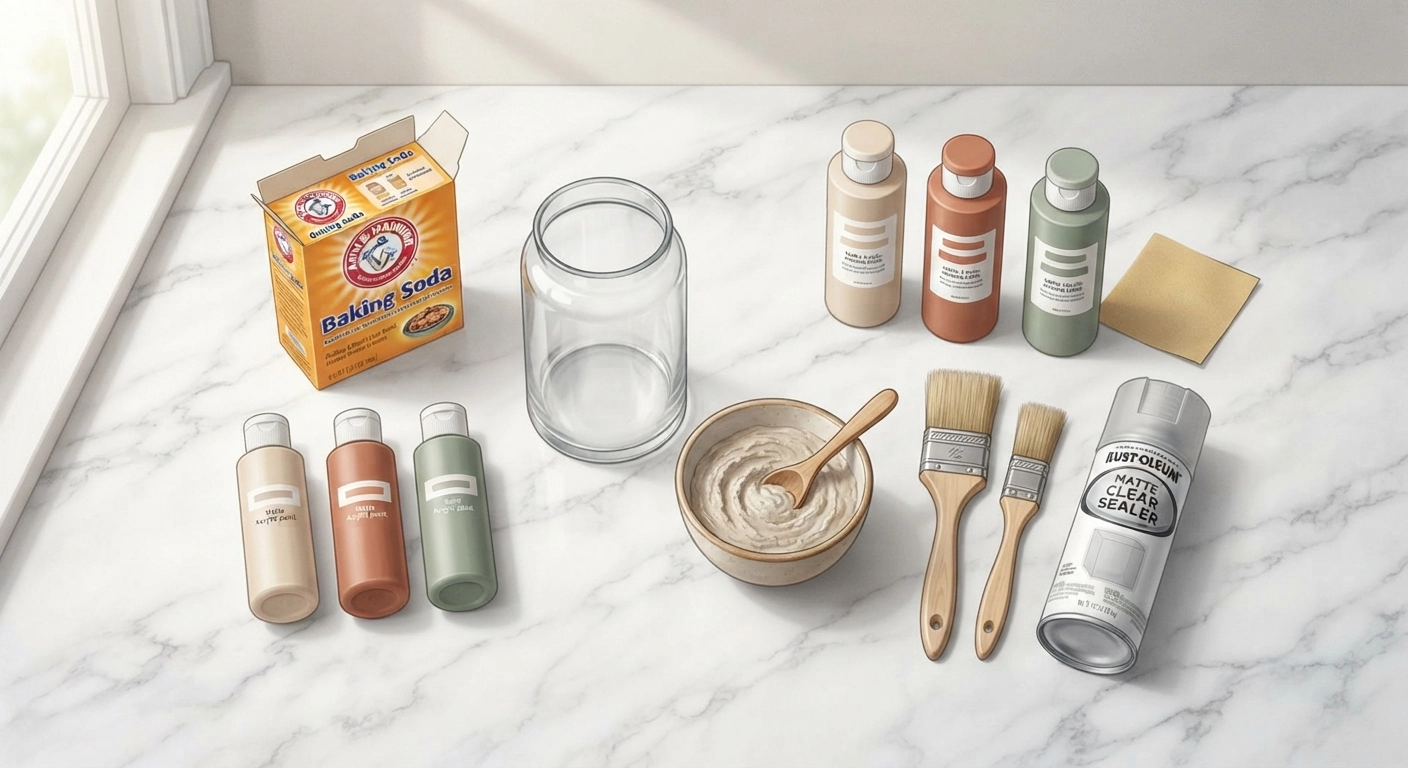
Before we jump into the tutorial, let’s talk supplies. I’ve tested this with cheap craft paint, premium acrylics, chalk paint, and even leftover wall paint. Some combinations work beautifully. Others… not so much. Here’s exactly what you need, along with my honest recommendations after years of trial and error.
The Core Supplies (Non-Negotiable)
- Baking soda — The star ingredient. Fresh baking soda works best; old, clumpy baking soda that’s been absorbing fridge odors for six months will affect your paint consistency. Grab a new box—it’s $1.
- Acrylic paint (matte finish) — This is critical. Matte acrylic paint gives the most convincing pottery-like finish. Glossy or satin paints can work, but they’ll require more sanding and sealing to look authentic. Chalk paint is an excellent alternative and naturally dries matte.
- A glass or ceramic vase — Dollar store vases are perfect for practice. Thrift stores are goldmines for interesting shapes at $1-$3 each. Look for clean lines and simple silhouettes—the texture is the star, not elaborate curves.
- Mixing bowl and stir stick — Disposable is ideal. Baking soda-paint mixture is a pain to clean once it dries.
- Paintbrush(es) — A 1.5-inch flat brush for the body and a smaller detail brush for crevices. Chip brushes (the cheap natural bristle kind) actually create nicer texture than expensive synthetic brushes for this project.
- Sandpaper (220-grit) — For light distressing if desired, and for smoothing any rough patches.
- Matte sealer or clear wax — Polycrylic matte spray, Mod Podge matte, or clear furniture wax all work. This step is not optional if you want your vase to last.
Optional (But Highly Recommended) Extras
- Primer (spray or brush-on) — Essential for glass vases; helps the textured paint grip the surface.
- Drywall compound or plaster of Paris — For an even thicker, more rustic texture. Mix a small amount into your paint along with the baking soda.
- Rub ‘n Buff or metallic wax — For adding subtle gold, silver, or bronze highlights to raised areas.
- Small pebbles or sand — Pour inside the vase before painting to add weight and make it feel more substantial.
- Painter’s tape — For creating clean lines if you’re doing two-tone designs.
- Disposable gloves — The texture feels cool on your vase but gritty on your hands for hours afterward.
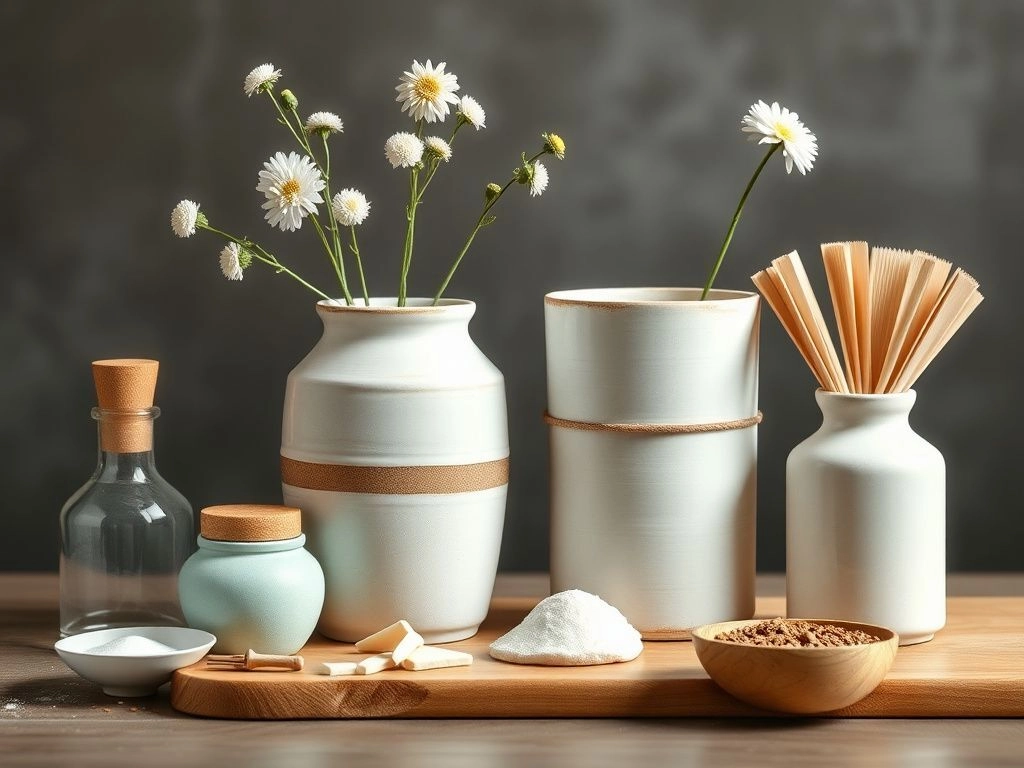
Everything you need for this project, most of which you probably already have at home.
One thing I learned the hard way: don’t skimp on the sealer. I once made six gorgeous vases for a craft fair, skipped the sealing step to save time, and within two weeks, three of them had noticeable chips. The texture itself is durable, but without a protective topcoat, it’s vulnerable to bumps and scrapes—especially on the bottom edge where the vase sits on surfaces.
Cost Breakdown: What This Project Actually Costs in 2026
| Item | Estimated Cost | Covers How Many Vases? |
|---|---|---|
| Glass vase (dollar store) | $1.25 – $3.00 | 1 |
| Baking soda (1 box) | $0.99 | 8 – 12 vases |
| Acrylic paint (8 oz bottle) | $3.50 – $6.00 | 4 – 6 vases |
| Matte sealer (spray can) | $7.99 | 8 – 10 vases |
| Misc (brushes, sandpaper, bowl) | $5.00 – $10.00 | 20+ vases (reusable) |
| Total per vase (first batch) | ~$5.00 – $8.00 | — |
| Total per vase (ongoing) | ~$2.50 – $4.00 | After initial supply purchase |
When you compare that to the $35-$120 price tag of real ceramic vases, the math speaks for itself. And if you’re interested in selling these, the profit margins are excellent—we’ll cover that in the selling section below.
Step-by-Step: How to Create Your baking soda paint vase
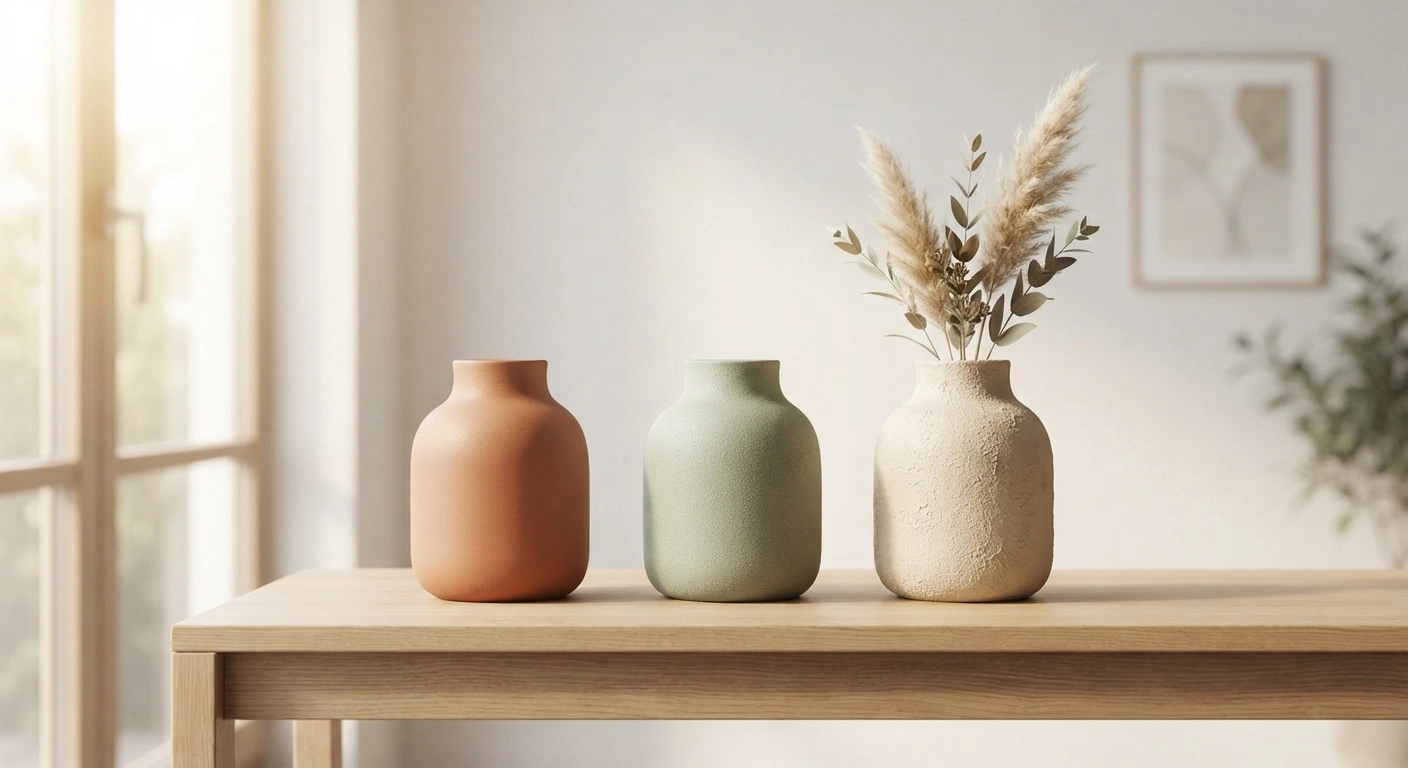
Alright, let’s get to the actual doing. This is the part where your dollar store vase transforms into something that looks like it came from a pottery studio in Marrakech. Follow these 7 steps in order—skipping or rushing any of them is what leads to those “why does mine look like a craft fail?” moments.
Step 1: Clean and Prep Your Vase (5 Minutes)
You might be tempted to skip this. Don’t. Any dust, grease, or residue on the vase surface will prevent the paint from adhering properly. Even the natural oils from your fingers can create invisible barriers that lead to peeling later.
What to do: Wash the vase with warm water and dish soap. Rinse thoroughly. Then, wipe the entire surface with rubbing alcohol (70% isopropyl) and a lint-free cloth. The alcohol removes any remaining oils and dries residue-free. Let it air dry completely—about 5 minutes.
For glass vases specifically: If your vase is extremely smooth (like most dollar store glass), apply a thin coat of spray primer or brush-on primer at this stage. This is the step that separates “lasted two years” from “chipped in two weeks.” Let the primer dry for at least 30 minutes before moving on.
I skipped primer on my first three vases. Two of them chipped within a month. The one primed vase from that batch? Still sitting on my shelf, looking perfect, three years later. Lesson learned.
Step 2: Mix Your Baking Soda Paint (5 Minutes)
This is where the magic happens. The ratio matters, but it’s also somewhat forgiving—you can adjust to get the exact texture you want.
The basic formula: For every 2 tablespoons of paint, add 1 tablespoon of baking soda. This 2:1 ratio produces a medium texture that most closely resembles matte stoneware.
Texture variations:
- Fine texture (smooth pottery look): 3 parts paint to 1 part baking soda. The finish is subtle—more like smooth earthenware than heavily textured stoneware.
- Medium texture (my sweet spot): 2 parts paint to 1 part baking soda. Noticeable grain that looks and feels like real ceramic.
- Heavy texture (rustic, artsy finish): 1.5 parts paint to 1 part baking soda. Dramatically gritty—almost like pumice stone. Works beautifully for larger statement vases.
How to mix: Pour the paint into your mixing bowl first, then add the baking soda gradually while stirring. If you dump it all in at once, you’ll get lumps that are nearly impossible to break up. Stir for about 1-2 minutes until the mixture is completely smooth with no visible clumps. The consistency should be similar to pancake batter—thick enough to hold texture, thin enough to brush on.
Pro tip: If the mixture feels too thick, add a few drops of water (not more paint). If it’s too thin, add a pinch more baking soda. The mixture will thicken slightly as it sits, so work efficiently once you start painting.
Step 3: Apply the First Coat (10-15 Minutes)
Now for the fun part. Using your flat brush, apply the baking soda paint vase mixture in even strokes. Don’t overthink the brush direction—in fact, slightly irregular strokes create a more natural, handmade look than perfectly uniform application.
Technique matters here:
- Use medium pressure. Too light, and the texture won’t transfer. Too heavy, and you’ll leave brush marks so deep they look intentional (in a bad way).
- Work in sections if the vase has curves or angles. Complete one “face” of the vase before rotating to the next.
- The first coat will look patchy and thin. That’s exactly what you want. Don’t try to make it perfect—the second coat is where everything comes together.
- Avoid brushing over areas that are already starting to dry. Baking soda paint sets up faster than regular paint, and over-brushing semi-dry areas creates a gummy, uneven mess.
Let the first coat dry for at least 45-60 minutes. It should be dry to the touch but doesn’t need to be fully cured. In humid conditions, give it 90 minutes.
Step 4: Apply the Second Coat (10-15 Minutes)
The second coat transforms your patchy first layer into a rich, opaque, beautifully textured surface. This is where you’ll see the real baking soda paint vase magic unfold.
For this coat, use a light dabbing or stippling motion in some areas rather than straight brush strokes. This creates subtle variations in texture that mimic the organic imperfections of handmade pottery. Don’t go overboard—just a few dabs across the surface give it that “was this made by hand?” quality.
Coverage should be complete after two coats for most colors. Darker paints (navy, charcoal, forest green) might need a third coat for full opacity. Lighter neutrals (cream, beige, terracotta, sage) typically look perfect at two.
Let this coat dry for 60-90 minutes before handling.
Step 5: Optional Distressing (5-10 Minutes)
This step is optional but highly recommended if you want your baking soda paint vase to look genuinely vintage rather than freshly painted. Light distressing removes the “craft project” look entirely.
How to distress: Once the second coat is fully dry, take your 220-grit sandpaper and gently rub it along the raised edges, rims, and any surface details. The goal is to reveal tiny hints of the original vase surface (or the primer layer) underneath. Focus on areas that would naturally wear over time—the bottom rim, the top opening, any handles or protrusions.
Use feather-light pressure. You can always distress more, but you can’t un-distress an area you’ve sanded too aggressively. I ruined a gorgeous charcoal vase this way by getting carried away with the sandpaper and exposing a silver-dollar-sized patch of clear glass. It looked like a wound. Don’t be like me.
Step 6: Seal the Surface (5 Minutes Application + Drying Time)
Sealing is non-negotiable for durability. The baking soda texture is slightly porous and will absorb moisture, oils, and dirt if left unprotected. It’s also moderately fragile—fingernails, rings, and cleaning cloths can all cause micro-chips over time without a sealant.
Your sealing options, ranked:
| Sealer Type | Finish | Durability | Best For |
|---|---|---|---|
| Matte spray polycrylic | Ultra-matte, invisible | ⭐⭐⭐⭐⭐ | Everyday vases, high-touch areas |
| Clear furniture wax | Soft sheen, slight warmth | ⭐⭐⭐⭐ | Display pieces, vintage aesthetic |
| Mod Podge matte (brush-on) | Matte, slight plastic feel | ⭐⭐⭐ | Budget option, indoor use only |
| No sealer | Chalky, powdery | ⭐ | Temporary decor only (not recommended) |
Apply 2-3 light coats of your chosen sealer, allowing each coat to dry fully (typically 30 minutes between spray coats, longer for wax). Spray sealers are the easiest to apply without disturbing the textured surface. If you brush on a sealer, use the lightest touch possible—heavy brushing can pull up the texture.
Step 7: Cure and Enjoy (24 Hours)
This is the hardest step: patience. Your vase needs a full 24 hours to cure completely. During this time, the paint, baking soda, and sealer bond together into a durable, unified surface. Handle it before 24 hours, and you risk fingerprints, dents, or sealer clouding.
Place the vase in a dust-free area and let it sit. Resist the urge to “just check if it’s dry.” (I know. I struggle with this too.)
After 24 hours, your baking soda paint vase is ready to display, gift, or sell. Run your hand over the surface—you’ll feel that satisfying, slightly rough, pottery-like texture. Pick it up, turn it in the light, and admire how the matte finish absorbs light instead of reflecting it. That’s the moment this whole process becomes addictive.
The finished result: three vases, three textures, all from the same simple technique.
Advanced Techniques for Professional-Looking Results
Once you’ve mastered the basic baking soda paint vase process, these next-level techniques will elevate your vases from “nice DIY” to “wait, you MADE that?” territory. I’ve tested every one of these, and they’re all beginner-friendly enough to try on your second or third vase.
Two-Tone and Color-Blocked Designs
Color blocking turns a simple textured vase into a statement piece. The key is clean lines and complementary colors.
How to do it: Paint the entire vase in your base color first (2 coats, fully dry). Then, use painter’s tape to mark off the section you want in a second color. Press the tape edges down firmly—baking soda texture can let paint seep under the tape if you’re not careful. Apply the second color, let it dry for about 20 minutes (still slightly tacky), and then carefully peel the tape off at a 45-degree angle. Peeling while the paint is slightly wet actually creates crisper lines than waiting for it to fully dry, which can cause the paint to tear at the tape edge.
Color combinations that work beautifully:
- Terracotta + Cream (warm Mediterranean vibe)
- Sage Green + Off-White (calm, organic feel)
- Charcoal + Blush Pink (modern, unexpected)
- Navy + Gold dipped rim (classic elegance)
Metallic Accents and Gilding
A touch of metallic takes a baking soda paint vase from rustic to refined. My favorite technique is a gold or copper rim—it adds instant perceived value and makes the vase look significantly more expensive.
Apply Rub ‘n Buff (available at most craft stores for about $8) to your fingertip and gently rub it along the rim, handles, or raised details of the vase. The warmth of your finger helps the metallic wax adhere smoothly. Use the tiniest amount—a little goes a very long way. Buff it lightly with a soft cloth after 5 minutes for a soft glow rather than a shiny glare.
For a more dramatic effect, you can gild an entire bottom third of the vase in metallic, creating an ombré transition where the metallic fades into the matte texture. This requires a dry-brush technique: load very little paint on your brush and sweep it lightly upward from the base so it naturally fades out.
Adding Realistic Pottery Marks
Want to trick people into thinking your vase came from an actual pottery studio? Add subtle maker’s marks. Using the back of a paintbrush or a dull pencil, lightly press small circular indentations into the still-damp second coat of paint on the bottom of the vase. A single small circle or two overlapping circles looks convincingly like a potter’s stamp.
This is a tiny detail that 95% of people will never consciously notice—but it adds to the overall illusion of authenticity. When someone does pick up your vase and see that mark, their brain registers “handmade pottery” without them even realizing why.
Layering Colors for Depth
Real ceramic glazes have depth. They’re not just one flat color—they have subtle variations where the glaze pooled thicker in crevices or thinned on raised areas. You can replicate this with two closely related paint colors.
The technique: Paint your base coat in the lighter shade. Let it dry completely. Then, mix a slightly darker version of the same color (add a drop of brown or gray to your base paint). Using a dry brush with very little paint, lightly sweep this darker shade into the crevices and curves of the vase. Blend it out so there are no harsh lines. The result looks like natural glaze pooling—absolutely stunning on vases with ridges or texture details.
Common Problems and How to Fix Them
Not every baking soda paint vase turns out perfect on the first try. Here are the most common issues I’ve encountered (and helped friends troubleshoot), along with exactly how to fix them—or better yet, prevent them entirely.
Problem: The Paint Is Chipping Off
Why it happens: Almost always, this is a surface preparation issue. Glass vases, in particular, are non-porous and don’t give paint anything to grip onto. If you skipped the cleaning or priming step, the paint is essentially sitting on top of the glass rather than bonding to it.
How to fix it: If the chipping is minor, you can spot-touch the area with a dab of your baking soda paint mixture, let it dry, and reseal. For major chipping, you’ll need to strip the vase (soak in warm water and peel off the paint) and start over—this time with proper prep. Always prime glass vases. I can’t emphasize this enough.
Problem: The Texture Looks Gritty, Not Ceramic-Like
Why it happens: Too much baking soda in the mixture, or the baking soda wasn’t stirred thoroughly enough, leaving clumps that dried into sand-like bumps.
How to fix it: If the vase is already dry and the texture is too aggressive, lightly sand the entire surface with 220-grit sandpaper to knock down the highest peaks. Then apply one more thin coat of paint with a slightly lower baking soda ratio (3:1 instead of 2:1). Reseal afterward. For future vases, sift your baking soda through a fine-mesh strainer before mixing to eliminate any clumps.
Problem: Brush Strokes Are Too Visible
Why it happens: You’re using a brush that’s too stiff, or you’re applying too much pressure. Some brush strokes add character; harsh, directional lines look like a rushed paint job.
How to fix it: Before the second coat dries, use a damp (not wet) sponge to softly pounce over the surface. This blurs harsh brush marks while preserving the overall texture. For future projects, try using a chip brush—the natural bristles are softer and leave more organic marks than synthetic brushes.
Problem: The Sealer Changed the Color or Turned Cloudy
Why it happens: Applying sealer too heavily, or applying it before the paint is fully dry. Trapped moisture reacts with the sealer and causes a milky white haze. This is especially common with spray sealers applied in humid conditions.
How to fix it: Unfortunately, once clouding occurs, it’s hard to reverse completely. You can try lightly buffing the surface with a soft cloth to reduce the haze. Prevention is the real solution: wait the full 24 hours before sealing, apply 2-3 thin coats rather than one heavy coat, and avoid sealing on rainy or humid days.
Problem: The Paint Is Cracking as It Dries
Why it happens: The paint mixture was too thick (too much baking soda), causing it to shrink and crack as the moisture evaporated. This can also happen if you applied the second coat before the first was sufficiently dry.
How to fix it: Lightly sand the cracked areas until smooth, then apply a thin coat of your paint mixture with a slightly reduced baking soda ratio. Let each coat dry fully before adding the next one. The 2:1 ratio is generally safe, but if you’re painting in a dry climate, consider going to 2.5:1 to account for faster evaporation.
How to Style and Display Your Faux Ceramic Vases
You’ve created something beautiful—now let’s make sure it actually looks good in your home. Styling is the difference between “nice craft project” and “interior design moment.”
Grouping Vases for Maximum Impact
A single baking soda paint vase is pretty. A group of three is stunning. When clustering vases, follow the rule of three: vary the heights, but keep the colors cohesive. For example, three vases in different neutral tones (cream, beige, terracotta) on a wooden tray create an intentional, curated look.
The vases don’t all need to be from the same batch—mixing textures (one heavily textured, two medium) and slightly different shapes keeps the grouping interesting without looking chaotic. Place the tallest vase in the back or at one end, not dead center, for a more dynamic composition.
If you’ve already tackled some DIY floating shelves, those are the perfect stage for displaying your vase collection at varying heights.
What to Put Inside (And What Not To)
Here’s a critical detail many tutorials skip: do not put water directly into your baking soda paint vase. Even with sealer, the interior is typically not sealed, and water will eventually seep through and cause peeling from the inside out.
Safe options for filling your vase:
- Dried flowers (pampas grass, eucalyptus, lavender bundles)
- Faux botanicals (the quality of artificial stems has improved dramatically in 2026)
- Branches or twigs for sculptural height
- Nothing at all—an empty vase with beautiful texture stands on its own as a sculptural object
If you absolutely need fresh flowers: Place a small glass jar or plastic liner inside the vase to hold water, hidden below the rim. This keeps water away from the painted surface entirely.
Seasonal Styling Without Remaking Vases
One of the best things about neutral-toned baking soda paint vases is their year-round versatility. A cream-colored textured vase works with spring tulips in March, autumn wheat stalks in October, and holiday greenery in December. You don’t need to make seasonal vases—just swap what’s inside them.
That said, if you enjoy the process (it’s genuinely fun once you get the hang of it), creating a few seasonal accent colors—a deep rust for fall, a soft blush for spring—adds variety to your decor rotation without breaking the bank.
Turning Your baking soda paint vase Hobby into Profit
Here’s something I didn’t expect when I first started experimenting with this technique: people will absolutely pay for these vases. Like, real money. I’ve sold baking soda paint vase sets at local craft markets for $35-$55 for groups of three, and individual statement vases for $25-$40 each. The profit margin, as you saw in our cost breakdown, is substantial.
But selling crafts successfully requires more than just making pretty things. It requires strategy.
Pricing Your Faux Ceramic Vases
Don’t underprice these. The finished product looks significantly more expensive than it costs to make, and pricing too low actually makes buyers suspicious. Here’s a realistic pricing framework for 2026:
- Small vase (4-6 inches): $15 – $22
- Medium vase (8-12 inches): $25 – $35
- Large statement vase (14+ inches): $40 – $60
- Set of 3 coordinating vases: $45 – $75
If you add metallic accents, two-tone designs, or intricate distressing, price at the higher end of those ranges. Buyers perceive hand-finished details as added value and are willing to pay accordingly.
For a deeper dive into which DIY crafts actually sell and how to price them, check out our guide on the 15 Most Profitable DIY Crafts to Make and Sell in 2026. Faux ceramic vases consistently rank among the top performers.
Where to Sell Your Vases
You have more options than you might think:
- Etsy: The natural home for handmade home decor. Search volume for “textured vase” and “faux ceramic vase” has grown significantly. Just make sure your product photos are excellent—natural light, styled settings, multiple angles.
- Local craft fairs and markets: Higher profit per vase (no shipping, no platform fees), and customers can touch the texture—which almost always leads to a sale. The tactile quality of these vases is a huge selling point in person.
- Instagram and TikTok Shop: This technique is incredibly satisfying to watch on video. A 30-second reel showing a plain glass vase transforming into a faux ceramic beauty can absolutely go viral.
- Consignment at local boutiques: Approach home decor shops and offer a wholesale or consignment arrangement. Many independent boutiques love carrying locally made decor with high perceived value.
If you’re trying to decide between platforms, our Etsy vs Shopify comparison breaks down exactly which platform makes more sense for craft sellers based on volume, fees, and audience.
Photography Tips That Sell
Bad photos will kill your sales faster than bad products. For baking soda paint vase listings specifically:
- Shoot near a window during the “golden hour” (early morning or late afternoon) for warm, flattering light that highlights the texture.
- Include a close-up shot that shows the surface texture clearly—buyers want to see that ceramic-like grain.
- Style one photo with dried flowers or branches so buyers can visualize the vase in their own home.
- Show the vase next to a common object (like a book or a mug) so the scale is immediately understood.
- Use a neutral background—white, beige, or light wood—to keep the focus on the vase itself.
Textured items are notoriously hard to photograph well, but when you nail it, the photos do a lot of the selling for you. The key is side lighting rather than front lighting—light coming from the side creates shadows in the texture that make it visible in photos.
Frequently Asked Questions
What is the best paint to use for a baking soda paint vase?
Matte acrylic paint is the best all-around choice for this technique. It dries with a natural flat finish that closely mimics unglazed ceramic. Chalk paint is an excellent alternative—it’s naturally matte and adheres well to most surfaces without primer. Avoid glossy or satin-finish paints unless you plan to sand and distress heavily afterward, as the shine undermines the pottery illusion. For the most authentic results, stick with matte formulations from brands like FolkArt, Apple Barrel, or even matte wall paint samples from the hardware store.
How long does baking soda paint take to dry completely?
Each coat of baking soda paint dries to the touch in about 45-60 minutes under normal room conditions (68-72°F, moderate humidity). However, the paint continues to cure for up to 24 hours. It’s safe to handle gently after 2 hours, but avoid any stress on the surface—stacking, wrapping, or packing—until a full day has passed. If you’re sealing the vase, wait the full 24 hours before applying any topcoat to prevent clouding or adherence issues.
Can you use baking soda paint on plastic vases?
Yes, but with an important caveat: plastic vases need a bonding primer first. Plastic is even less porous than glass, and regular paint doesn’t adhere well to it. Use a spray primer specifically formulated for plastic (Krylon Fusion or Rust-Oleum Plastic Primer are both reliable options), let it cure fully, and then proceed with the baking soda paint mixture as usual. Without primer, the paint will peel off in sheets within days or weeks.
Do I need to seal my baking soda paint vase?
Yes—emphatically, yes. Unsealed baking soda paint has a dusty, chalky feel and will absorb oils from your hands every time you touch it, eventually developing dark, grimy-looking spots. More importantly, the texture is somewhat fragile without protection. A matte spray sealer (polycrylic) applied in 2-3 light coats provides excellent protection without changing the appearance. If you want the most natural matte finish possible, clear furniture wax buffed into the surface is the least visible option.
How do I clean a baking soda paint vase?
Dust gently with a soft, dry microfiber cloth. For more thorough cleaning, use a barely damp cloth (water only—no cleaning sprays or chemicals) and wipe very lightly. Never scrub, and never submerge the vase in water. The sealed exterior can handle a light wipe-down, but aggressive cleaning will eventually wear through the sealer and damage the texture. Treat these vases as you would a delicate decor item, not a dishwasher-safe dish.
Can I use this technique on terracotta pots or other surfaces?
Absolutely. The baking soda paint technique works beautifully on terracotta pots, ceramic planters, candle holders, bookends, and even furniture legs or drawer fronts. The key is adjusting your approach based on the surface: porous surfaces like terracotta don’t usually need primer (they absorb paint well), while non-porous surfaces like glass and metal do. The technique is fundamentally the same regardless of what you’re painting—the baking soda creates texture, and the sealer locks it in place.
Why did my baking soda paint turn out lumpy instead of textured?
Lumpy texture (distinct, hard bumps rather than even graininess) almost always comes from one of two causes: the baking soda wasn’t stirred thoroughly enough, or the baking soda was old and had absorbed moisture, causing it to clump. To prevent lumps, sift your baking soda through a fine-mesh strainer before adding it to the paint, and stir for a full 1-2 minutes—longer than you think you need to. If your mixture has visible clumps, keep stirring. If they won’t break up, the baking soda may be too old and should be replaced.
How many vases can I make with one box of baking soda?
A standard 16-ounce box of baking soda will make approximately 8 to 12 medium-sized vases, depending on the texture ratio you use and the size of your vases. Since baking soda costs around $1 per box, the per-vase cost for this ingredient is roughly 8 to 12 cents. This is one of the reasons the profit margin on these vases is so attractive if you decide to sell them—the most expensive component is the paint, not the texture agent.
Now that you’ve got the complete picture—from mixing ratios to selling strategies—the only thing left is to actually make one. Grab a vase from the dollar store, raid your pantry for baking soda, and give yourself an afternoon to play. The first one might take some trial and error, but by your third vase, you’ll have a process that feels almost meditative. And when guests ask where you got that beautiful textured vase on your shelf? You get to smile and say, “I made it.”
If you’re looking for more ways to turn creative skills into income, don’t miss our roundup of the 10 Most Profitable Art and Craft Niches to Start in 2026. The home decor category—which includes techniques like this one—consistently ranks among the top three most profitable craft niches year after year.
And if you enjoyed the hands-on nature of this project, you might also love our tutorial on DIY macrame wall hangings—another boho home decor project that’s surprisingly beginner-friendly and looks far more complicated than it actually is.