how to make a tufted rug: 9 Essential Steps to Craft Your Masterpiece in 2026
- how to make a tufted rug: 9 Essential Steps to Craft Your Masterpiece in 2026
- 📋 Key Takeaways
- Table of Contents
- 1. Understanding the Basics of Modern Rug Making
- Cut Pile vs. Loop Pile: Which is Better?
- 2. Gathering Your Essential Tufting Supplies
- The Core Equipment You Cannot Skip
- Choosing the Right Yarn
- 3. Setting Up Your Workspace and Frame
- Building and Securing the Frame
- Stretching the Primary Cloth (The Coin Toss Test)
- 4. how to make a tufted rug: The Step-by-Step Tufting Process
- Tracing Your Design
- Threading and Holding the Gun Correctly
- Punching Your First Lines
- 5. Gluing, Backing, and Curing Your Project
- Applying the Right Carpet Adhesive
- The Curing Process and Attaching Secondary Backing
- 6. Trimming, Carving, and Shaving for a Professional Finish
- Leveling the Surface
- Carving the Details
- 7. Troubleshooting Common Beginner Mistakes
- Why is My Cloth Ripping?
- Why Won't the Yarn Stay in the Canvas?
- 8. Turning Your New Hobby Into a Profitable Business
- Packaging and Shipping
- 9. Long-Term Care and Maintenance of Your Custom Rug
- Frequently Asked Questions
- Is rug tufting an expensive hobby to start?
- Can I use regular knitting yarn for tufting?
- How long does it take to make a medium-sized rug?
- Why is my tufted rug curling at the edges?
- Can you wash a hand-tufted rug in the washing machine?
- What is the difference between monks cloth and primary tufting cloth?
Imagine scrolling through your social media feed late at night, completely mesmerized by the rhythmic, satisfying thump-thump-thump of a machine shooting yarn into a canvas, slowly revealing a vibrant, fluffy masterpiece. You are definitely not the only one captivated by this process. If you have been wondering exactly how to make a tufted rug, you have landed in the absolute best place to start your journey.
I remember my very first attempt at rug making. I ordered a tufting gun online, bought the cheapest yarn I could find, and ended up with a canvas full of holes and a floor covered in loose threads. The learning curve can feel steep, but the good news is that it doesn’t have to be. Once you understand the mechanics of the tools and the specific sequence of steps, creating custom floor art becomes incredibly intuitive and deeply relaxing.
📋 Key Takeaways
- Understanding the difference between cut-pile and loop-pile machines is crucial before buying equipment.
- The foundation of a good rug relies entirely on stretching your primary cloth drum-tight on a sturdy frame.
- Using the right carpet adhesive ensures your yarn stays locked in place for years to come.
- Carving and shaving your rug at the end is the secret step that transforms an amateur piece into a professional product.
- Learning how to make a tufted rug opens up a highly profitable avenue for a creative side hustle.
1. Understanding the Basics of Modern Rug Making
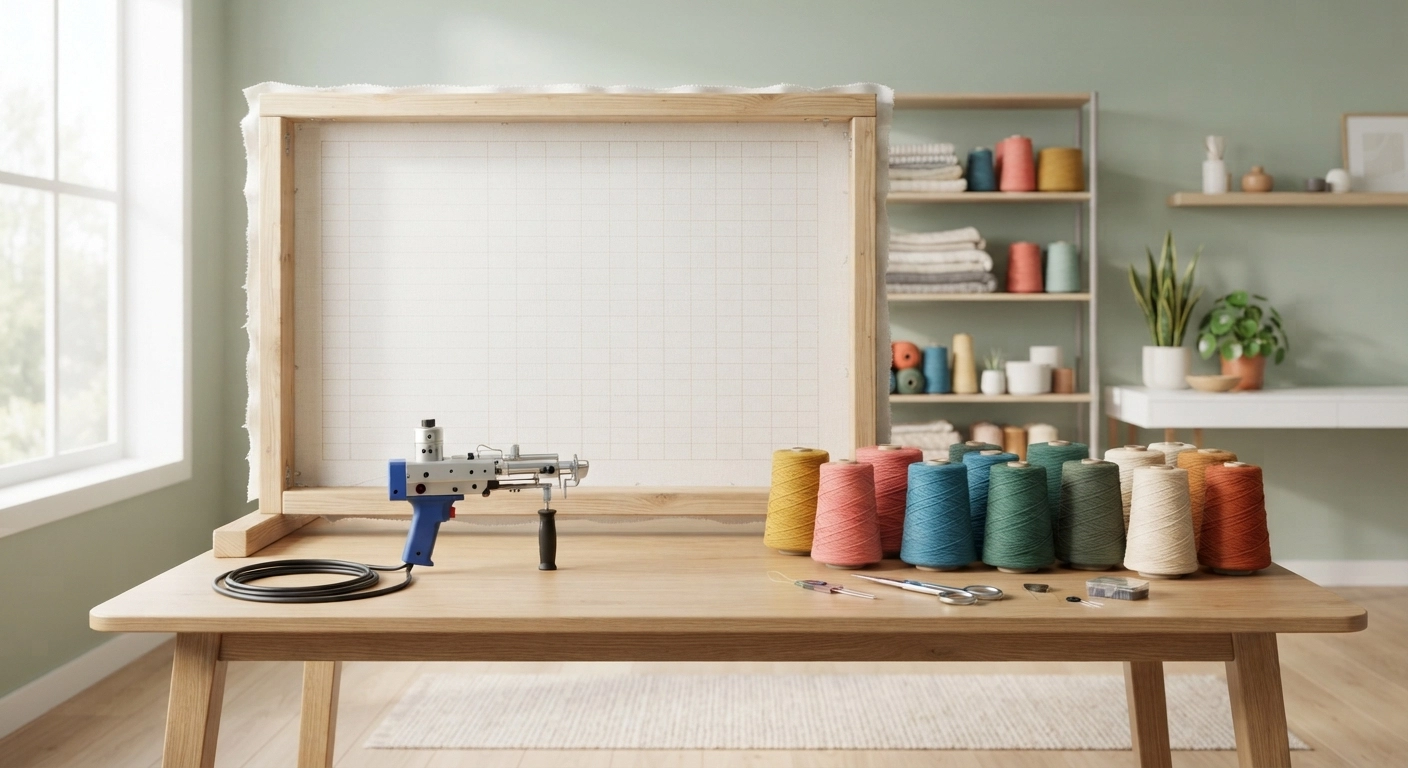
Before we dive into the physical labor, let’s talk about what this craft actually entails. Historically, rug making was a painstaking process done entirely by hand, knot by knot. Today, we use a mechanized handheld tool called a tufting gun. This tool rapidly punches yarn through a fabric backing, allowing you to “paint” with textiles at an incredible speed.
When you look up resources on how to make a tufted rug, you will immediately encounter a major decision: choosing between a cut-pile and a loop-pile machine.
Cut Pile vs. Loop Pile: Which is Better?
The type of gun you choose dictates the final texture of your piece.
- Cut Pile (e.g., AK-I model): This machine has a tiny pair of scissors built into the needle. Every time it punches the yarn through the cloth, it snips it. This results in a fluffy, shaggy texture that is incredibly soft to the touch. It is the most popular choice for beginners because it is forgiving and easy to carve.
- Loop Pile (e.g., AK-II model): Instead of cutting the yarn, this machine pushes a continuous loop through the fabric. The result is a bumpy, knobby texture—similar to commercial berber carpets. It requires a bit more manual cutting when you want to change colors, but it creates a very durable surface.
If this is your first foray into the craft, I highly recommend starting with a cut-pile machine. It provides that classic, plush look most people associate with modern indie rugs.
2. Gathering Your Essential Tufting Supplies
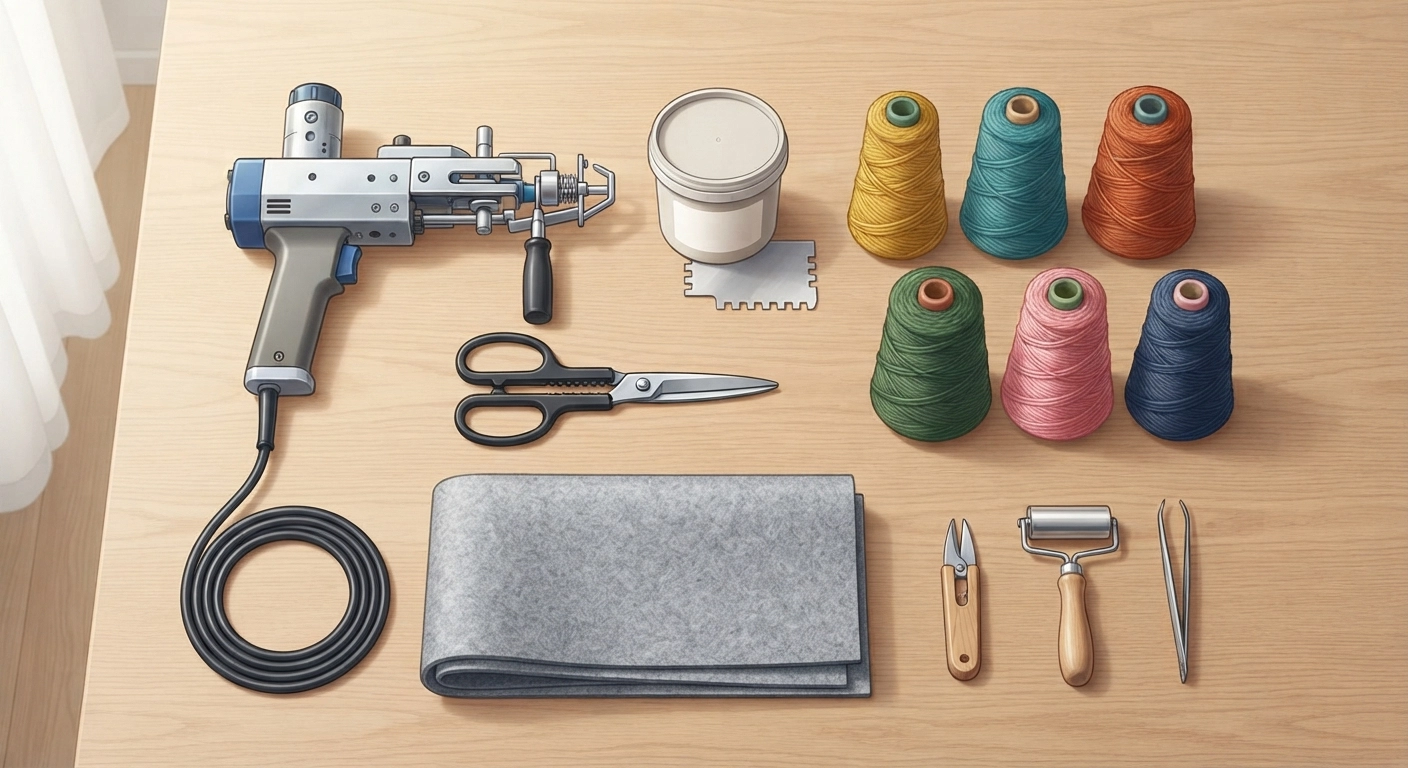
The upfront investment can be a bit daunting, but having the correct materials is non-negotiable. Using the wrong fabric or yarn is the number one reason beginners fail and get frustrated.
The Core Equipment You Cannot Skip
To successfully figure out how to make a tufted rug, your shopping list needs to be precise. Here is exactly what you need:
- A Tufting Gun: As discussed, an AK-I cut pile is ideal.
- Primary Tufting Cloth: Do not use regular canvas or burlap from a local craft store. You need a specific 100% polyester or cotton-poly blend tufting cloth with woven grid lines. It is designed to stretch tightly and withstand the aggressive punching of the gun without tearing.
- A Tufting Frame: You can build this yourself using 2×4 wood and carpet tack strips, or buy a pre-made one.
- Yarn: We will discuss this in detail below.
- Carpet Adhesive: A synthetic latex glue (like Roberts 3095) to lock the yarn into the cloth.
- Secondary Backing: Felt or non-slip rug backing to cover the ugly glued side.
- Sheep Shears or Carpet Clippers: Essential for leveling the yarn and carving details.
Choosing the Right Yarn
Yarn choice dictates both the price of your project and its longevity. According to textile experts at authoritative organizations like Wikipedia’s rug making database, traditional rugs are made of wool for a reason. Wool is naturally resilient, water-resistant, and springs back when stepped on.
However, wool is expensive. For your first few practice pieces, 100% acrylic yarn is perfectly fine. It is cheap, comes in thousands of vibrant colors, and is readily available. Just keep in mind that acrylic rugs are better suited as decorative wall hangings or low-traffic floor pieces, as they tend to pill and flatten over time. If you want a more traditional textile feel but prefer hand-crafting without machines, you might also enjoy exploring how to make a chunky knit blanket as an alternative cozy project.
3. Setting Up Your Workspace and Frame
Your workspace setup will make or break your physical comfort. Tufting requires applying constant, firm pressure against the canvas. If your frame wobbles, you will end up with uneven lines and severe shoulder pain.
Building and Securing the Frame
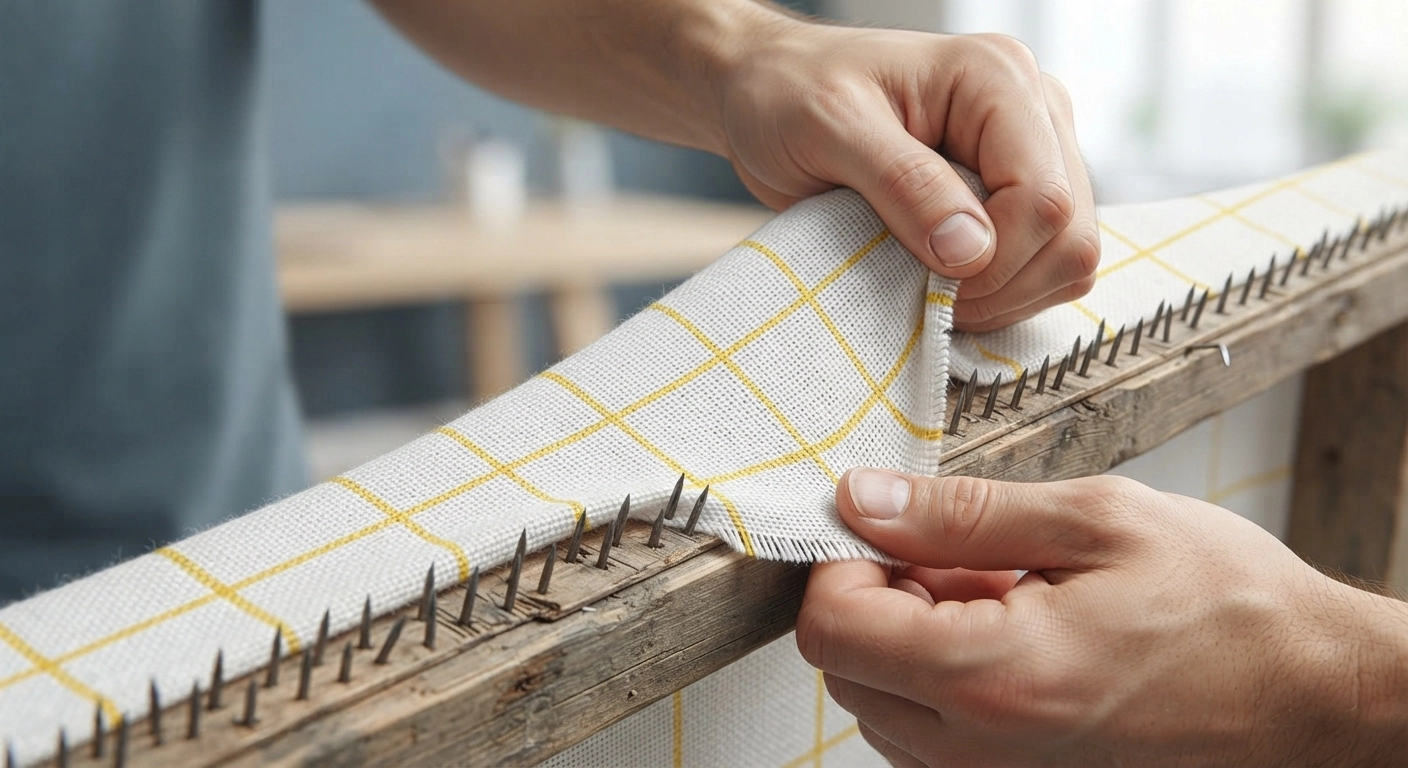
If you are building your own frame, you need sturdy wood (at least 2×2 inches thick). The most critical component is the carpet tack strips. Nail these strips around the entire inner perimeter of your frame, ensuring the sharp metal teeth are pointing OUTWARD (away from the center). This is what grips the fabric.
Clamp your frame securely to a heavy desk or table using C-clamps. It should not move an inch when you push against it.
Stretching the Primary Cloth (The Coin Toss Test)
This is where many beginners stumble when learning how to make a tufted rug. You must stretch your primary cloth over the tack strips so tightly that it feels like a drum.
Start by hooking the top edge, then pull the bottom edge down as hard as you can. Repeat for the left and right sides. The grid lines on the cloth should remain perfectly straight and square. If the lines are wavy, your tension is uneven, and your final rug will warp when you cut it off the frame. A good rule of thumb: if you flick a coin at the canvas, it should bounce right off.
4. how to make a tufted rug: The Step-by-Step Tufting Process
Now we get to the fun part. The canvas is tight, the frame is secure, and you are ready to start shooting yarn.
Tracing Your Design
Unless you are doing freehand abstract art, you will want to trace a design. The easiest method is to use a cheap LED projector connected to your phone or laptop. Project the image onto the canvas and trace it with a thick permanent marker.
Crucial tip: Because you are working on the BACK of the rug, you must flip or mirror your image horizontally before projecting it. If you forget this step, any text or directional designs will be backwards on the final product!
Threading and Holding the Gun Correctly
Thread your yarn through the guide loop at the top of the gun, and then use a wire threader to pull it through the needle hole. You should always use two strands of yarn at the same time; a single strand is usually too thin and will result in a sparse, patchy rug.
When holding the gun, your dominant hand should be on the trigger handle, and your non-dominant hand should support the front handle. The foot of the gun (the metal plate around the needle) MUST remain in flat, firm contact with the cloth at all times. If you lift the gun even slightly while tufting, the scissors won’t cut properly, and the fabric will tear.
Punching Your First Lines
The tufting gun has a motorized wheel that naturally wants to walk upwards. Therefore, you should always tuft from the bottom of your design moving UP. If you need to move horizontally or diagonally, you must physically rotate the entire gun so the needle is always leading the way.
Let’s look at a practical breakdown of the tufting order:
- Outline first: Trace the outer borders of your color blocks.
- Fill in the center: Run vertical lines right next to each other to fill the space.
- Check the front: Periodically walk to the other side of your frame to ensure the yarn is dense enough and there are no bald spots.
If you love creating customized aesthetics for your home, mastering this skill is a game-changer. It fits perfectly into the broader trend of crafting your own space, much like the ideas found in our guide on easy DIY room decor aesthetics.
5. Gluing, Backing, and Curing Your Project
You have filled every inch of your design. The back looks like a chaotic mess of yarn loops, but the front looks like a beautiful, fluffy rug. Now, we need to make it permanent.
Applying the Right Carpet Adhesive
Do not remove the rug from the frame yet! While it is still stretched tight, you need to apply glue. If you cut it down before gluing, the tension will release, and the rug will curl up like a potato chip.
Using a plastic putty knife or trowel, smear a generous, even layer of synthetic latex carpet adhesive (Roberts 3095 is the industry standard) over the entire back of the tufted area. Ensure you cover every single yarn thread. The glue will seep into the fibers and lock them to the primary cloth.
The Curing Process and Attaching Secondary Backing
Leave the rug on the frame in a well-ventilated room for at least 24 hours. The glue needs to dry completely until it feels tacky but no longer wet to the touch.
Once dry, you can cut the rug off the frame, leaving about a 2-inch border of blank cloth around your design. Cut slits into this border, fold the edges over the glued back, and secure them with hot glue. This creates a clean “waterfall” edge.
Finally, use a strong spray adhesive (like Super 77) to attach a piece of felt or non-slip backing to the glued side. Finish the raw outer edges by hot-gluing a strip of cotton twill tape around the perimeter for a professional, clean look.
6. Trimming, Carving, and Shaving for a Professional Finish
If you want to know the absolute best secret regarding how to make a tufted rug look professional, it all comes down to the finishing process. Straight off the frame, your rug will look a bit shaggy and the color lines might bleed into one another.
Leveling the Surface
Place your rug flat on a table. Using sheep shears (or specialized carpet clippers with a shearing guide), slowly shave the top layer of the entire rug. This evens out all the yarn strands, making the surface incredibly smooth and uniform. It also reveals the crispness of your design.
Carving the Details
Carving is the process of using smaller clippers (like dog grooming clippers) or angled scissors to cut V-shaped trenches between different colors. By snipping away the overlapping yarn where two colors meet, you create a 3D, embossed effect. This step takes time and patience, but it elevates a basic DIY project into a premium piece of art.
7. Troubleshooting Common Beginner Mistakes
Every single person who learns how to make a tufted rug runs into the exact same issues. Let’s solve them right now so you don’t panic when they happen.
Why is My Cloth Ripping?
This is the most common nightmare. If your gun is chewing holes in the canvas, it is usually due to one of three things:
- Lack of pressure: You aren’t pushing the gun hard enough against the cloth. The machine is bouncing, causing the scissors to snip the fabric instead of the yarn.
- Loose fabric: Your primary cloth isn’t stretched tight enough. It is flagging back and forth with the needle.
- Moving sideways without rotating: Remember, the needle must always lead. If you drag the gun sideways, the scissors will slice the canvas wide open.
Why Won’t the Yarn Stay in the Canvas?
If you pull the trigger and the yarn just falls out onto the floor, check your yarn feed. The yarn must flow from the cone to the gun with zero resistance. If the yarn gets caught on a table edge or is tangled, the gun will pull it out of the cloth. Consider building a simple yarn feeder using eye-hooks on the ceiling to keep the tension perfectly loose.
8. Turning Your New Hobby Into a Profitable Business
Once you master the mechanics of how to make a tufted rug, you will quickly realize that you can only keep so many rugs in your own house. This craft has exploded in popularity, and custom, handmade rugs can sell for anywhere from $150 to $800+ depending on the size and complexity.
If you are thinking about monetizing this skill, you need a solid strategy. Selling physical crafts requires calculating material costs, labor time, and shipping materials. For a deep dive into the financial side of running a craft business, I highly recommend reading our comprehensive guide on how to price your DIY crafts for Etsy.
Packaging and Shipping
Rugs are bulky but thankfully not fragile. The best way to ship a tufted rug is to roll it up tightly (always roll with the yarn facing OUTWARD so it doesn’t wrinkle the backing) and slide it into a heavy-duty poly mailer or a long cardboard tube. Don’t forget to include a care card for your customers!
Expanding your creative repertoire is always a good idea for a side hustle. If you want to explore other lucrative avenues, check out our list of 10 profitable DIY crafts to make and sell this year.
9. Long-Term Care and Maintenance of Your Custom Rug
You have spent hours learning how to make a tufted rug, tracing, shooting, gluing, and carving. The last thing you want is for it to fall apart after a few months of use.
Hand-tufted rugs, especially those made with acrylic yarn, require gentle care. They cannot be thrown into a washing machine. The latex glue backing will degrade if submerged in water, and the agitation will destroy the yarn structure.
Here are the golden rules for tufted rug care:
- Vacuuming: Use a low-suction vacuum without a beater bar. The spinning brushes of a heavy-duty vacuum will pull the fibers out.
- Spot Cleaning: If you spill something, immediately blot it with a clean, damp cloth and a drop of mild dish soap. Do not aggressively rub the stain, or you will felt the yarn together.
- Shedding: It is completely normal for a new rug to shed loose fibers for the first few weeks. Just lightly vacuum or use a lint roller to pick up the fuzz.
Creating your own textiles from scratch is an incredibly rewarding experience. It merges mechanical skill with artistic vision, resulting in a tangible, functional piece of art. Whether you are making a vibrant logo for your gaming room, a cute character for a nursery, or a sophisticated abstract piece for your living room, the possibilities are genuinely endless.
Now that you know exactly how to make a tufted rug, it is time to gather your supplies, stretch that canvas, and pull the trigger. If you are looking for more ways to turn your creative passions into tangible products, be sure to explore our other detailed guides on How To Make Easy.
Frequently Asked Questions
Is rug tufting an expensive hobby to start?
Yes, the initial setup can be quite an investment. A quality tufting gun, frame, primary cloth, and adhesive will generally cost between $250 and $400 upfront. However, once you have the reusable equipment, the ongoing cost per rug (just yarn and cloth) is relatively low, making it a sustainable hobby or business.
Can I use regular knitting yarn for tufting?
You can use standard acrylic or wool knitting yarn, but you must ensure it is thick enough. Typically, medium weight (size 4) yarn works best. If the yarn is too thin, you will need to thread three or four strands through the gun at once to achieve a dense, full look.
How long does it take to make a medium-sized rug?
For a beginner, a 2×2 foot rug might take 4 to 6 hours of active tufting, plus 24 hours for the glue to dry, and another 2 hours for backing and carving. As you gain experience, the tufting phase becomes significantly faster.
Why is my tufted rug curling at the edges?
Curling usually happens if you remove the rug from the frame before the latex adhesive is 100% dry and cured. It can also occur if your primary cloth wasn’t stretched evenly, causing the tension to warp the fabric once it is cut loose.
Can you wash a hand-tufted rug in the washing machine?
No, you should never put a hand-tufted rug in a washing machine. The water and aggressive spinning will break down the latex glue backing and ruin the yarn structure. Always spot clean with a damp cloth and mild detergent.
What is the difference between monks cloth and primary tufting cloth?
Monks cloth is a 100% cotton fabric traditionally used for punch needle crafts. While it can be used for tufting, it tears much easier under the speed of a tufting gun. Premium primary tufting cloth is a polyester blend that stretches tighter and easily withstands the aggressive mechanical punching.