12 Renter-Friendly Decor Hacks That Won’t Damage Walls
- 12 Renter-Friendly Decor Hacks That Won’t Damage Walls
- 📋 Key Takeaways
- Table of Contents
- What Are Renter Friendly Decor Hacks and Why Do They Matter?
- Who Needs These Hacks?
- The Real Cost of Skipping These Hacks
- Wall-Safe Hanging Solutions That Hold Strong and Remove Clean
- 1. Command Hooks and Strips: The Gold Standard for a Reason
- 2. Washi Tape Gallery Walls: Colorful, Creative, and Completely Removable
- 3. Removable Wall Decals: Instant Mural, Zero Commitment
- 4. Fabric Wall Hangings and Tapestries: Texture Without Tape
- Peel-and-Stick Makeovers for Walls, Floors, and Furniture
- 5. Peel-and-Stick Wallpaper: The Accent Wall That Peels Away
- 6. Peel-and-Stick Backsplash Tiles: Kitchen Upgrade in an Hour
- 7. Vinyl Floor Decals: Temporary Flooring That Looks Permanent
- 8. Contact Paper Furniture Makeovers
- No-Drill Window Treatments and Smart Storage
- 9. Tension Rod Curtains: The Zero-Hole Window Solution
- 10. Adhesive Shelving and Over-the-Door Storage
- Freestanding Decor and Lighting That Changes Everything
- 11. Lean-To Floor Mirrors: Statement Piece, Zero Installation
12 Renter Friendly Decor Hacks That Won’t Damage Walls (Landlord-Approved for 2026)
You just moved into your new apartment. The walls are bare, the lighting is harsh, and every surface screams “temporary.”
You want to make it feel like *yours* — but your lease agreement has a full page dedicated to what you can’t do. No painting. No drilling. No nails. The security deposit hangs over your head like a dark cloud.
I’ve been there. Six apartments in eight years, and I’ve probably tested every renter friendly decor hacks trick on the internet. Some were disasters (don’t ask about the “removable” wallpaper that ripped off half the drywall in 2019). Others were pure genius.
The good news? After years of trial and error, I’ve narrowed down exactly what works — and more importantly, what *actually* comes off clean when move-out day arrives.
This guide covers 12 landlord-friendly, damage-free decorating solutions that’ll transform your rental into a space you genuinely love coming home to. No forfeited deposits required.
📋 Key Takeaways
- All 12 hacks require zero drilling, nailing, or permanent changes to walls or surfaces.
- Command strips, tension rods, and peel-and-stick materials are the backbone of damage-free decorating.
- Proper removal technique matters just as much as proper application — we cover both.
- You can achieve a fully customized, designer look on any budget without risking your security deposit.
- Most of these solutions take under an hour to implement and cost less than $50 per project.
What Are Renter Friendly Decor Hacks and Why Do They Matter?
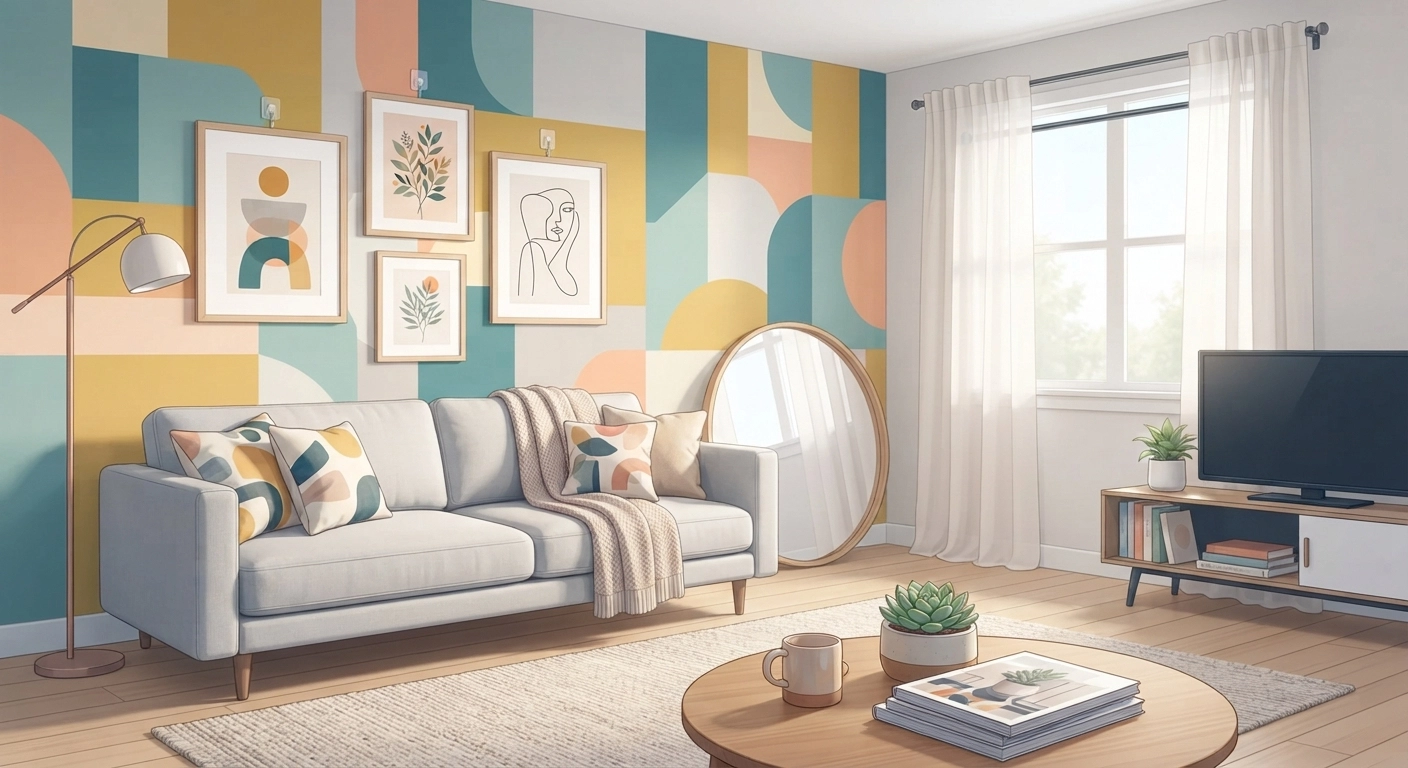
Renter friendly decor hacks are temporary, non-invasive decorating solutions that transform a rental space without causing permanent changes to walls, floors, or fixtures. Think peel-and-stick wallpaper instead of paint, tension rods instead of drilled curtain brackets, and adhesive hooks that remove cleanly without pulling off paint or drywall. These methods let you personalize your home while fully complying with lease restrictions — and they’re completely reversible when your lease ends.
For the 44 million renting households in the United States, decorating presents a unique challenge. You want a space that reflects your personality, but you’re working within strict boundaries set by landlords and property management companies.
The frustration is real. According to a 2023 survey by RentCafe, 68% of renters said they’d personalize their space more if they weren’t worried about losing their security deposit. The average deposit in the U.S. ranges from $500 to $1,500 — that’s real money.
But here’s what most renters don’t realize.
The market for temporary home solutions has exploded in the last three years. Brands like Command by 3M, RoomMates, and Art3d have developed genuinely impressive products that hold strong during your lease and peel away without a trace when it’s time to go.
Who Needs These Hacks?
The short answer: anyone who rents.
College students in dorms, young professionals in high-rise apartments, families in rented houses, and even homeowners who just want to avoid commitment before choosing a permanent design direction. The versatility of these approaches means they work across every living situation.
What surprised me most during my own rental journey was how *permanent* temporary decor could look. Friends visiting my last apartment genuinely couldn’t tell the difference between my peel-and-stick backsplash and a professionally tiled one. That’s the level of quality available now.
The Real Cost of Skipping These Hacks
If you’re thinking “I’ll just patch the holes later” — reconsider.
Professional drywall repair for multiple nail holes can run $150-$300. Repainting a single accent wall averages $200-$400. And if you’ve used improper adhesives that rip off the top layer of drywall? You could be looking at $500+ in repairs.
Renter friendly decor hacks aren’t just about following rules. They’re about protecting your finances while still creating a home you love.
If you enjoy hands-on DIY projects, you’ll find these approaches just as satisfying as permanent renovations. And for more permanent DIY inspiration that could actually earn you money, check out our guide on woodworking projects that sell — perfect for when you eventually have your own garage workshop.
Wall-Safe Hanging Solutions That Hold Strong and Remove Clean
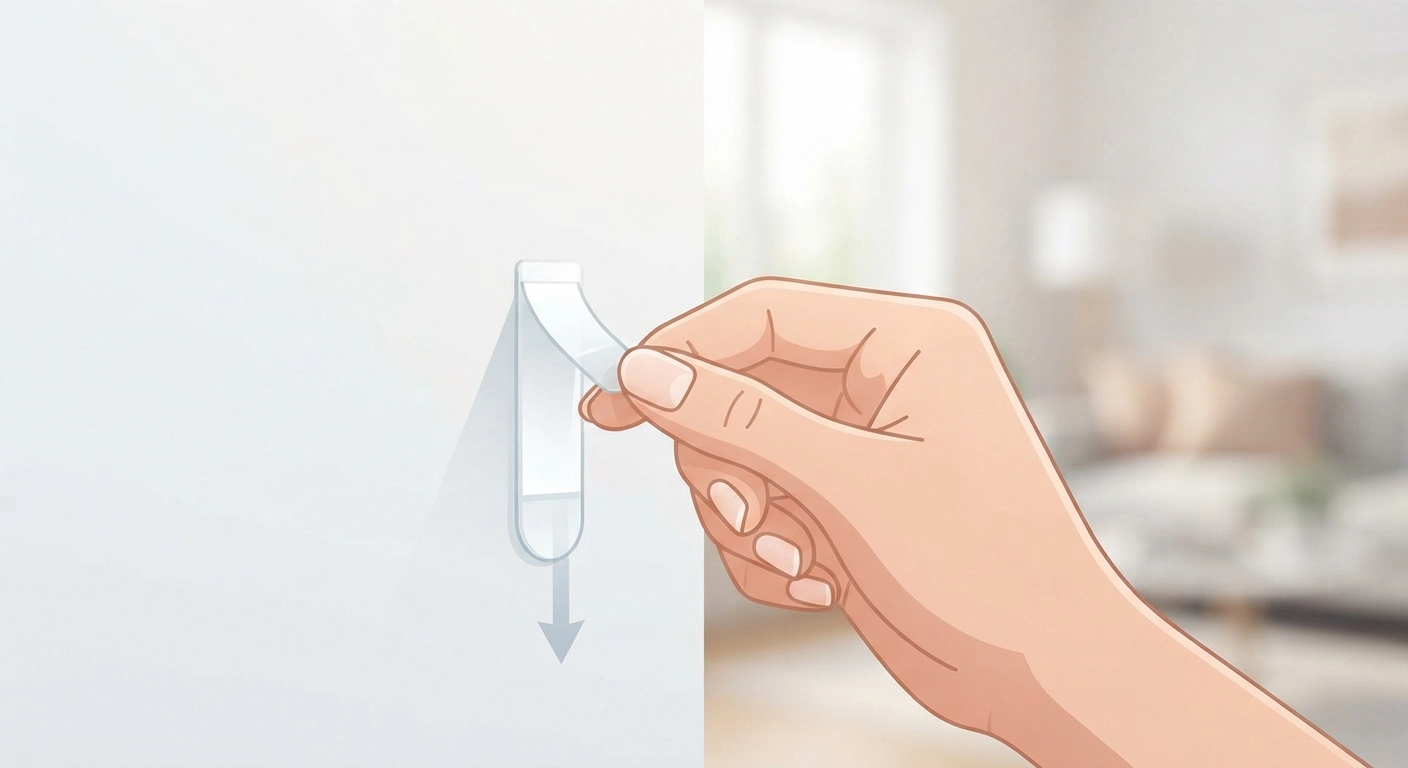
Nothing transforms blank walls faster than art, photos, and decorative objects. The problem? Traditional picture hanging requires nails, screws, or anchors — all of which leave holes that need patching come move-out day.
These four renter friendly decor hacks solve the hanging dilemma completely. Each method supports significant weight while promising clean removal.
1. Command Hooks and Strips: The Gold Standard for a Reason
If you only invest in one product from this entire guide, make it Command strips.
I’ve hung everything from lightweight photo frames to heavy 16×20-inch canvases using these adhesive marvels. The weight ratings are genuinely accurate — the large picture hanging strips hold up to 16 pounds per pair. For heavier mirrors or framed art, you can use multiple pairs distributed across the frame.
The key to success with Command products isn’t the product itself — it’s the application technique.
Clean the wall with rubbing alcohol first. Press firmly for 30 seconds per strip. And critically, wait at least one hour before hanging anything on them. Rushing this process accounts for probably 90% of Command strip failures I hear about.
When removal time comes, never pull the strip *outward* from the wall. Pull the tab straight *downward* along the wall surface. The adhesive stretches, releases, and leaves zero residue. I’ve removed literally hundreds of strips across multiple apartments and have never damaged a wall using this method.
2. Washi Tape Gallery Walls: Colorful, Creative, and Completely Removable
Washi tape is the unsung hero of temporary decorating.
This Japanese rice paper tape comes in hundreds of colors, patterns, and widths. It sticks securely but peels off effortlessly — even from delicate surfaces. And it costs about $3-$5 per roll.
Here’s the creative part: you can use washi tape to create “frames” directly on the wall. Outline rectangular shapes, geometric patterns, or even a full gallery wall layout. Then use tiny adhesive squares (or more washi tape) to mount lightweight prints and photos inside your taped frames.
The effect reads as intentional and artistic rather than makeshift. I created an entire geometric accent wall in my bedroom using gold washi tape and black-and-white photos. Total cost: under $20. Removal time: 15 minutes with zero residue.
3. Removable Wall Decals: Instant Mural, Zero Commitment
Today’s removable wall decals are light-years ahead of the cheesy vinyl stickers from a decade ago.
Companies like Urban Walls, RoomMates, and Etsy sellers produce stunning, large-format decals that look like hand-painted murals. Botanical prints, abstract watercolors, mountain landscapes — the options are genuinely impressive. For adding an aesthetic touch throughout your space, our guide on making printables using Canva pairs perfectly with removable wall solutions.
Application takes patience. Use a credit card or squeegee to smooth out air bubbles as you go. Work slowly from one edge to the other. And keep the backing paper — you’ll need it for storage if you want to reuse the decal in your next apartment.
4. Fabric Wall Hangings and Tapestries: Texture Without Tape
A large textile piece can cover significant blank wall space without a single adhesive touching the paint.
The trick is using a lightweight wooden dowel or brass rod threaded through the top hem of the fabric. Hang that rod from — you guessed it — Command hooks or existing picture rails if your rental has them.
I’ve used vintage scarves, woven tapestries, and even a beautiful Turkish towel as wall art. The texture adds warmth that flat prints can’t match. And when you move, the whole thing rolls up and packs in seconds.
For a cozy, textured element that complements fabric wall hangings beautifully, try making your own arm-knitted chunky blanket — it doubles as decor draped over a chair or folded on a shelf.
Peel-and-Stick Makeovers for Walls, Floors, and Furniture
The peel-and-stick revolution changed the rental decorating game permanently. What started with basic contact paper has evolved into high-end wallpaper, realistic tile decals, and even temporary flooring solutions.
These four hacks use peel-and-stick technology to create dramatic transformations.
5. Peel-and-Stick Wallpaper: The Accent Wall That Peels Away
Want a bold botanical accent wall in your bedroom? A geometric pattern behind your desk? Peel-and-stick wallpaper delivers.
I was skeptical until I tried it. The pattern alignment was tricky on my first attempt — definitely buy an extra roll for mistakes. But the final result genuinely looked like professionally installed wallpaper. Visitors asked who I hired.
Key tips from my experience: Start with a small wall first to build confidence. Use a level to draw vertical guide lines. And order samples before committing to a full roll — colors look different on screen than in your actual lighting.
The best brands for clean removal are RoomMates, Tempaper, and Chasing Paper. Expect to pay $30-$60 per roll, with one roll covering roughly 28-30 square feet.
One caution: avoid peel-and-stick wallpaper on textured “orange peel” walls. The adhesive can’t form a proper bond on rough surfaces, and you’ll end up with peeling edges within weeks. Smooth or lightly textured walls only.
6. Peel-and-Stick Backsplash Tiles: Kitchen Upgrade in an Hour
Rental kitchen backsplashes tend to be… uninspiring. Beige tiles. Off-white laminate. Nothing that sparks joy.
Peel-and-stick backsplash tiles change that in under an hour. Brands like Art3d and Smart Tiles offer realistic subway tile, Moroccan patterns, and even faux marble. Each tile is lightweight vinyl with a strong adhesive backing.
I installed a white subway tile backsplash in my current rental kitchen. It took about 45 minutes, required only a utility knife and a ruler, and has stayed perfectly in place for 14 months and counting. The tiles resist steam from cooking and wipe clean easily.
When you move out, use a hairdryer on low heat to gently warm each tile. The adhesive softens, and they peel away cleanly. Any tiny residue comes off with a dab of rubbing alcohol.
7. Vinyl Floor Decals: Temporary Flooring That Looks Permanent
Ugly rental flooring is one of the hardest things to disguise. Rugs help, but large rooms need multiple rugs — and quality area rugs get expensive fast.
Enter vinyl floor decals and temporary flooring tiles.
Companies like FloorPops and Achim Home Furnishings make peel-and-stick floor tiles specifically designed for temporary installation. They’re thinner than permanent vinyl tile, which actually helps with clean removal. The patterns range from classic checkerboard to wood-look planks to encaustic cement tile designs.
I used black-and-white checkerboard tiles in my tiny rental bathroom. The transformation was absurdly satisfying. Total cost: about $40 for a 6×8-foot space.
8. Contact Paper Furniture Makeovers
This hack extends beyond walls and floors to the furniture itself.
Removable vinyl contact paper can resurface laminate countertops, cover dated cabinet fronts, and even transform IKEA furniture. The marble-look and wood-grain options are particularly convincing from even a few feet away.
The most impressive application I’ve seen? A friend covered her entire rental kitchen countertop in white marble contact paper. Two years later, it still looked pristine, and when she moved out, it peeled off in large sheets with no residue. The landlord never knew it was there.
For more clever furniture transformation ideas that don’t require permanent changes, browse our collection of easy IKEA hacks to make your furniture look expensive.
No-Drill Window Treatments and Smart Storage
Bare windows make a space feel unfinished. But curtain rods typically require drilling brackets into wall studs or using drywall anchors — both non-starters for most renters.
These two hacks solve the window dilemma and add storage without a single hole.
9. Tension Rod Curtains: The Zero-Hole Window Solution
Tension rods are spring-loaded and expand to press firmly against the inside of a window frame. No screws, no brackets, no holes. Modern tension rods can support surprisingly heavy curtains — some rated up to 20 pounds.
The aesthetic trick is choosing the right rod diameter and finish. Thin telescoping rods with white plastic ends scream “college dorm.” Instead, look for 1-inch diameter rods with decorative finials in matte black, brass, or oil-rubbed bronze. Brands like Umbra and Amazon Basics offer stylish options under $30.
For wider windows, consider a double tension rod setup. The front rod holds decorative curtains, while the back rod supports sheer panels for privacy. Layering window treatments this way looks intentional and high-end.
One thing I learned the hard way: measure the window width *exactly* before ordering. Tension rods have a minimum and maximum extension range, and being off by even an inch can mean the rod won’t fit securely.
10. Adhesive Shelving and Over-the-Door Storage
Storage in rentals is often limited. Closets are small, bathroom cabinets are nonexistent, and kitchen counter space disappears fast.
Adhesive wall shelves using heavy-duty Command strips or similar products can add display and storage space without drilling. Small ledge shelves (the kind meant for displaying framed photos) work particularly well because their shallow depth puts less leverage on the adhesive.
For heavier storage needs, over-the-door solutions are unbeatable. Over-the-door organizers for pantry items, bathroom toiletries, and even shoes eliminate the need for wall-mounted shelving entirely. The hooks simply sit over the top of the door — no adhesive required at all.
In my current apartment, I use an over-the-door rack for spices and a tension-mounted shelf above the toilet for extra towels. Combined, they added roughly six square feet of storage to spaces that had zero before.
Freestanding Decor and Lighting That Changes Everything
Sometimes the best way to avoid damaging walls is to avoid touching them entirely. Freestanding decor elements and creative lighting solutions can transform a room without a single adhesive strip or tension rod.
11. Lean-To Floor Mirrors: Statement Piece, Zero Installation
A large floor mirror leaned against the wall serves multiple purposes at once. It’s a functional full-length mirror. It reflects light and makes small rooms feel larger. And it acts as a major decor statement — especially if you choose a mirror with an interesting frame.
The lean-to approach has been popular in interior design for years, so it reads as intentional rather than temporary. Look for mirrors at least 5 feet tall for proper impact. Vintage and antique stores often have affordable options with character that new big-box mirrors lack.
Placement matters. Leaning a mirror opposite a window doubles the natural light in a room. Positioning one at the end of a hallway creates depth. And leaning a smaller mirror on a dresser or console table adds vertical interest without any wall contact.