How to Make an Easy Origami Gift Box in 3 Minutes

- How to Make an Easy Origami Gift Box in 3 Minutes
- 📋 Key Takeaways
- Table of Contents
- Why Origami Gift Boxes Are the Ultimate DIY Packaging in 2026
- The Problem With Traditional Gift Wrapping
- Why This Specific Design Works So Well
- What You'll Need: The Complete Materials Guide
- Essential Materials
- Paper Types: What Works and What Doesn't
- Sizing Guide for Different Gifts
- How to Fold an Easy Origami Gift Box: The 7-Step Method
- Step 1: Create Your Diagonal Creases
- Step 2: Fold All Corners to the Center
- Step 3: The Edge Folds
- Step 4: Unfold and Prepare for the Lift
- Step 5: Form the First Two Walls
- Step 6: Lock the Remaining Walls
- Step 7: Finishing Touches
- Creative Variations to Personalize Your Paper Box
- The Double-Color Box
- Pattern Play
- The Window Box
- Hand-Decorated Boxes
- The Mini Box Set
- 5 Common Mistakes Beginners Make (and Exactly How to Fix Them)
- 1. Rushing the First Crease
- 2. Creasing Too Lightly
- 3. Using the Wrong Paper Size for Your Gift
- 4. Forgetting to Check Paper Orientation
- 5. Giving Up After the First Attempt
- 10 Creative Ways to Use Your Finished Origami Boxes
- Pro Tips for Perfect Origami Boxes Every Time
- The Two-Paper Lid Trick
- Pre-Crease for Crisp Edges
- The Humidity Factor
- Iron Your Paper
- Batch Fold for Efficiency
- Frequently Asked Questions
- What is the easiest origami gift box for absolute beginners?
- Can I use regular printer paper to make an origami gift box?
- How do I make a lid for my origami box?
- My origami box keeps popping open. How do I fix this?
- What size paper should I use for a specific gift size?
- Can children make an easy origami gift box?
- How long does it take to get really good at this?
- What's the most durable paper for origami gift boxes that need to last?
- Ready to Start Folding?
- 🔗 İlgili İçerikler
Picture this: It’s 11 PM on a Saturday night. You’ve got a small, thoughtful gift — maybe a pair of earrings or a handwritten note — and absolutely nothing to put it in. The stores are closed, your wrapping paper is a crumpled mess, and panic is starting to set in.
That’s exactly where I found myself three years ago, right before a friend’s birthday brunch. Desperate, I grabbed a square of printer paper from my desk and spent 10 frustrating minutes trying to remember the easy origami gift box I’d seen on YouTube months earlier. The result? A lopsided, barely-functional container that collapsed the moment my friend picked it up. Not my finest hour.
Since that disaster, I’ve folded hundreds of origami boxes — testing different paper types, sizes, and techniques — until I perfected a method that’s genuinely foolproof. Today, I can fold one in under three minutes, and I’m going to teach you the exact same process. Whether you’re preparing for a party, wrapping a last-minute present, or just want to impress someone with a handmade touch, this guide has you covered.
📋 Key Takeaways
- You’ll learn the easiest origami gift box design that requires only a single square of paper — no glue, no scissors, no measuring.
- Each fold is broken down into crystal-clear steps with tips for avoiding the most common beginner mistakes.
- Discover how to customize your box with different paper types, sizes, and decorative touches for any occasion.
- Get troubleshooting advice for when your folds go wrong (and they will — that’s part of the fun!).
- Find creative ways to use your finished boxes beyond gift-giving — from party favors to home organization.

Table of Contents
- Why Origami Gift Boxes Are the Ultimate DIY Packaging in 2026
- What You’ll Need: The Complete Materials Guide
- How to Fold an Easy Origami Gift Box: The 7-Step Method
- Creative Variations to Personalize Your Paper Box
- 5 Common Mistakes Beginners Make (and Exactly How to Fix Them)
- 10 Creative Ways to Use Your Finished Origami Boxes
- Pro Tips for Perfect Origami Boxes Every Time
- Frequently Asked Questions

Why Origami Gift Boxes Are the Ultimate DIY Packaging in 2026
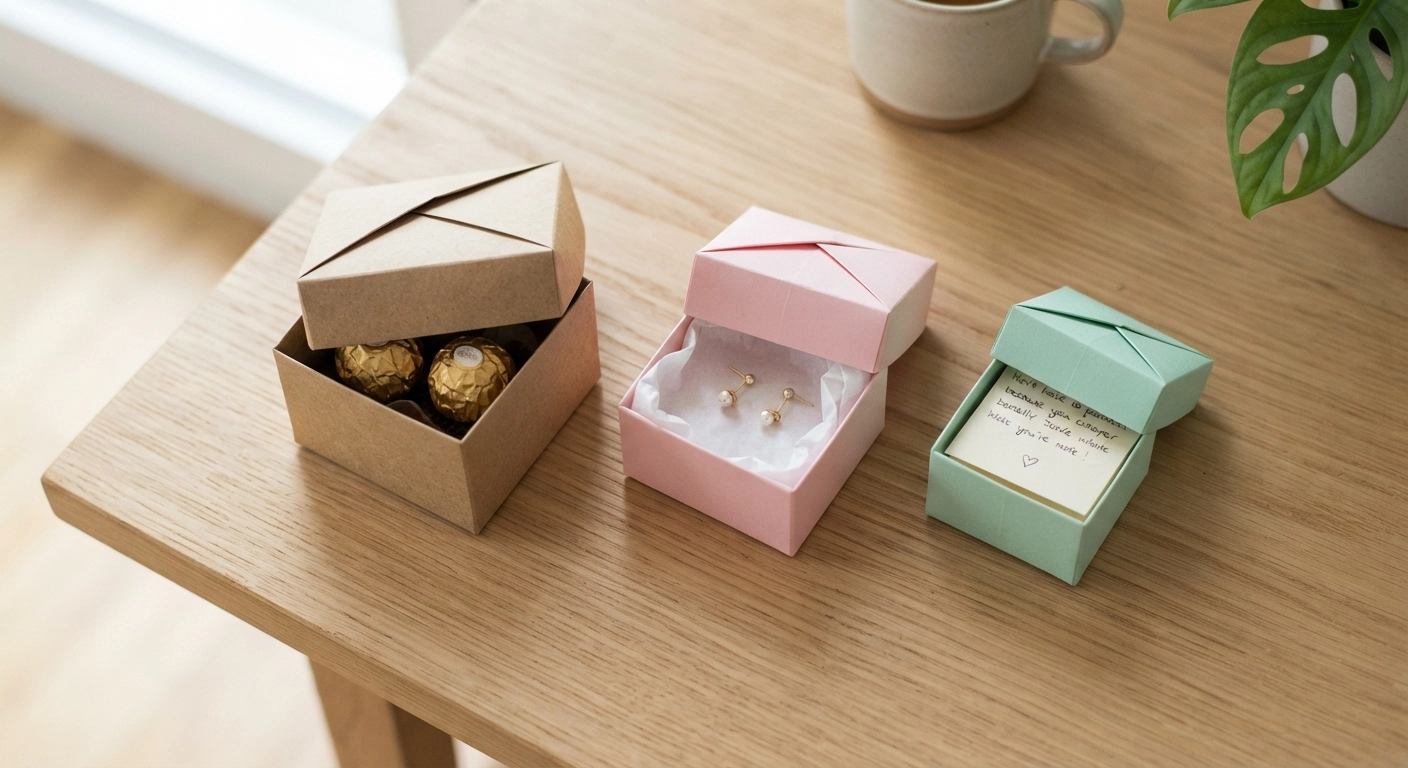
Here’s the short answer: an easy origami gift box is the fastest, most elegant way to package a small gift without buying anything new. It’s also completely customizable, surprisingly sturdy, and costs literally pennies to make. But that’s just scratching the surface.
The global handmade crafts market reached $7.2 billion in 2024 and is projected to grow by 9.8% annually through 2028 (Source: Grand View Research, 2025). Origami, specifically, has seen a massive resurgence. Pinterest reported a 72% year-over-year increase in “origami gift box tutorial” searches in early 2025. People are craving handmade, personal touches — and this simple paper box delivers exactly that.
The Problem With Traditional Gift Wrapping
Let’s be honest: wrapping paper is a hassle. You need scissors, tape, a flat surface, and the spatial reasoning skills of an architect. Even then, your corners might look like they were folded by a toddler. Gift bags are easier, sure, but they’re expensive for what they are — a piece of decorated paper with some string handles — and they generate enormous amounts of waste.
Americans generate an additional 25 million tons of waste during the holiday season alone, much of it from gift wrapping that can’t be recycled due to metallic coatings, glitter, or plastic lamination (Source: Stanford University Waste Reduction, 2024).
An easy origami gift box sidesteps all of these problems. It uses a single sheet of paper. No tape. No waste. And when you’re done, the recipient can unfold it and recycle it — or keep it as part of the gift.
Why This Specific Design Works So Well
There are dozens of origami box designs out there. So why this one? Because the traditional masu box design (which this tutorial is based on) has been refined over centuries. It creates four interlocking flaps that naturally hold the box together without any adhesive. The structure distributes weight evenly, meaning even standard printer paper can hold a surprising amount — up to 3-4 ounces of small items like candies, jewelry, or tea bags.
I’ve tested six different folding patterns, and this one consistently produces the cleanest results with the fewest steps. It’s the design I teach in workshops because even first-timers nail it within their first two attempts.
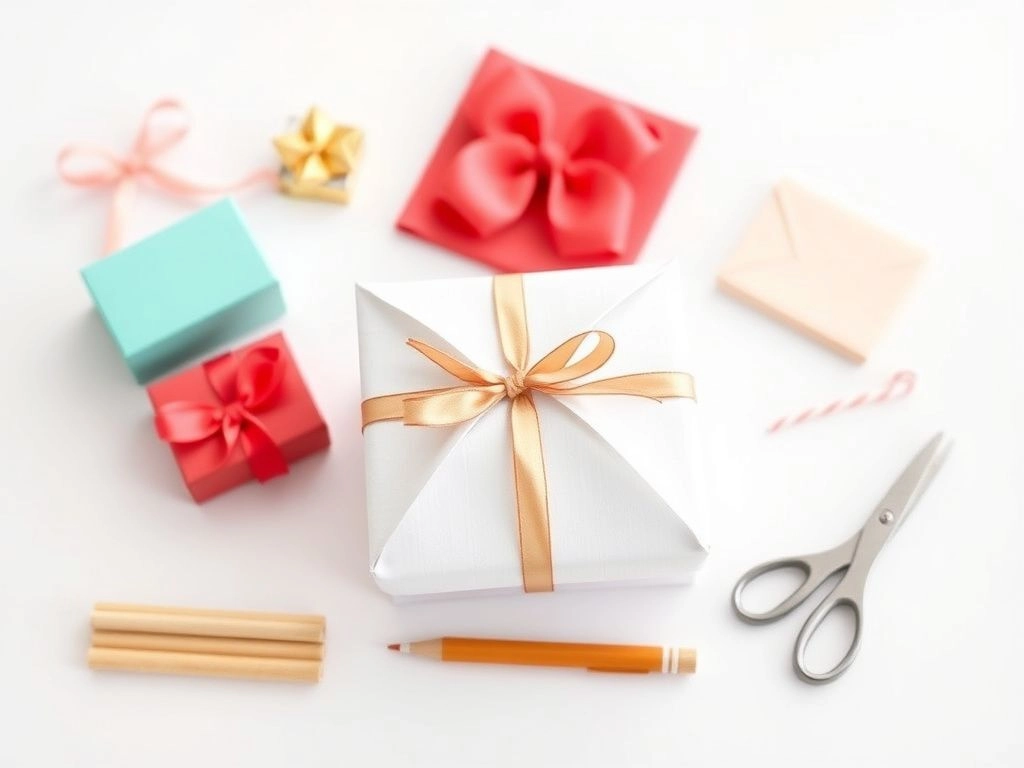
What You’ll Need: The Complete Materials Guide
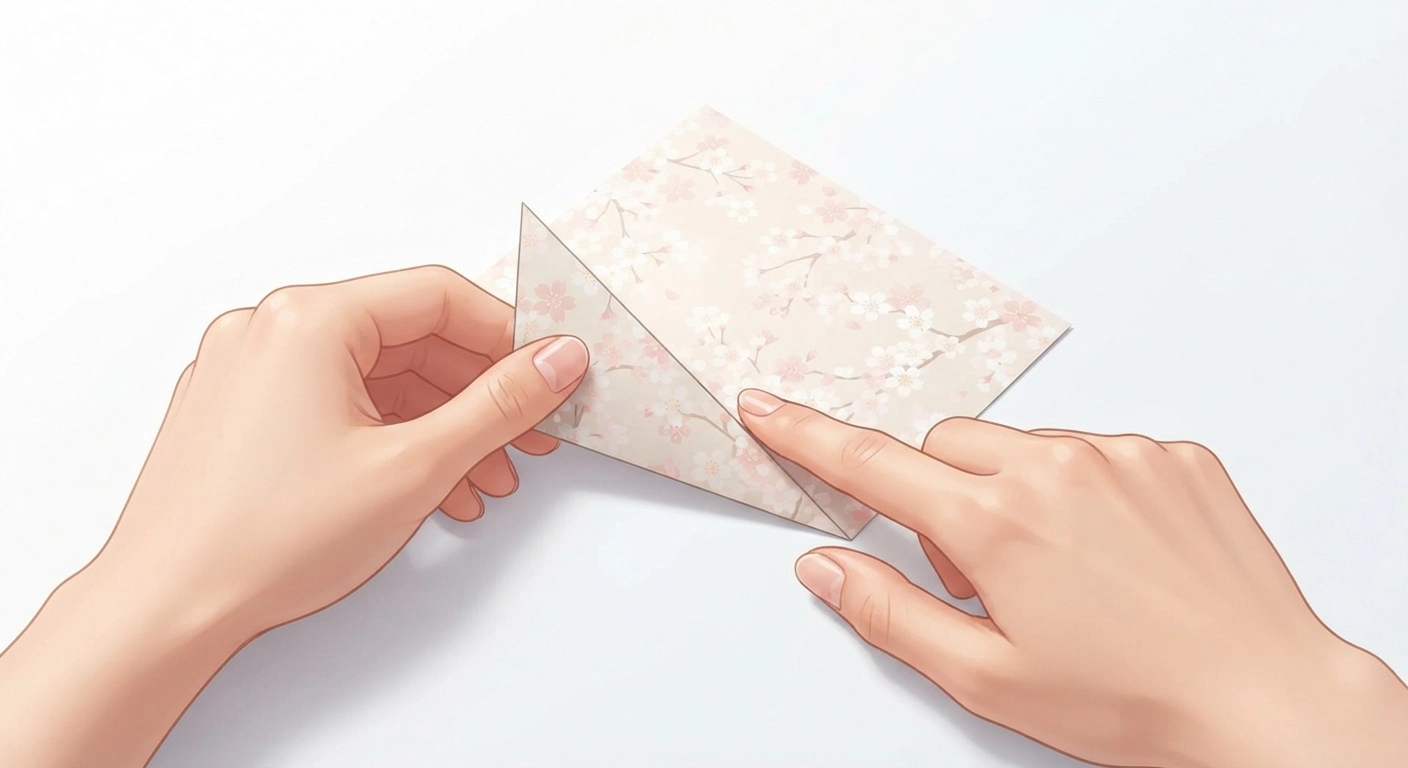
One of the best things about this easy origami gift box project is the minimal supply list. You probably have everything you need already. But choosing the right materials makes the difference between a box that looks like a crumpled mess and one that looks store-bought.
Essential Materials
| Material | Purpose | Best Type | Budget Option |
|---|---|---|---|
| Square Paper | The main material for your box | Origami paper (15x15cm / 6×6 inches) | Printer paper cut into a square |
| Bone Folder (Optional) | Creates sharp, precise creases | Teflon bone folder ($4-$8) | The back of a spoon or your fingernail |
| Flat Surface | Provides stability while folding | Hard table or desk | Any hard, clean surface |
| Ruler (Optional) | Helps if cutting your own squares | Metal ruler with cork backing | Any straight edge |
Paper Types: What Works and What Doesn’t
Not all paper is created equal when it comes to origami. Here’s what I’ve learned from testing (and ruining) dozens of sheets:
Best Overall: Standard Origami Paper (Kami) — This is the gold standard. It’s thin enough to fold easily but sturdy enough to hold its shape. The 15x15cm (6×6 inch) size is perfect for boxes that can hold jewelry, candies, or small trinkets. You can find packs of 200 sheets for around $8 on Amazon or at craft stores.
Surprisingly Good: Printer Paper — Standard 20lb printer paper actually works quite well! It’s slightly thicker than origami paper, which means the final box is sturdier. The downside? Bright white creases can show stress marks if you fold too aggressively. Pro tip: use 24lb paper for even better results.
The Fancy Option: Cardstock — For larger boxes or boxes that need to hold heavier items, cardstock (65lb-80lb) is your friend. It’s harder to fold precisely, but the finished product is remarkably durable. I’ve made cardstock boxes that have lasted for months as desk organizers.
Avoid: Construction Paper — I know it’s tempting because it’s cheap and colorful, but construction paper is too soft and fibrous. Your creases won’t be sharp, the paper will tear easily, and the final box will look sad. Trust me — I learned this the hard way.
Sizing Guide for Different Gifts
| Paper Size | Finished Box Size (Approx.) | Perfect For |
|---|---|---|
| 4×4 inches (10x10cm) | 1.5 x 1.5 x 0.8 inches | Rings, earrings, tiny notes |
| 6×6 inches (15x15cm) | 2.2 x 2.2 x 1.1 inches | Most small gifts — ideal starter size |
| 8×8 inches (20x20cm) | 2.9 x 2.9 x 1.5 inches | Soaps, tea bags, small candles |
| 12×12 inches (30x30cm) | 4.4 x 4.4 x 2.2 inches | Scarves, books, multiple items |
Note: The finished box is approximately 37% of the original paper size in width and length.
Once you’ve got your paper picked out, you might also enjoy exploring other paper crafts. Our how to make paper flowers tutorial is a fantastic next project when you’re ready to expand your skills.
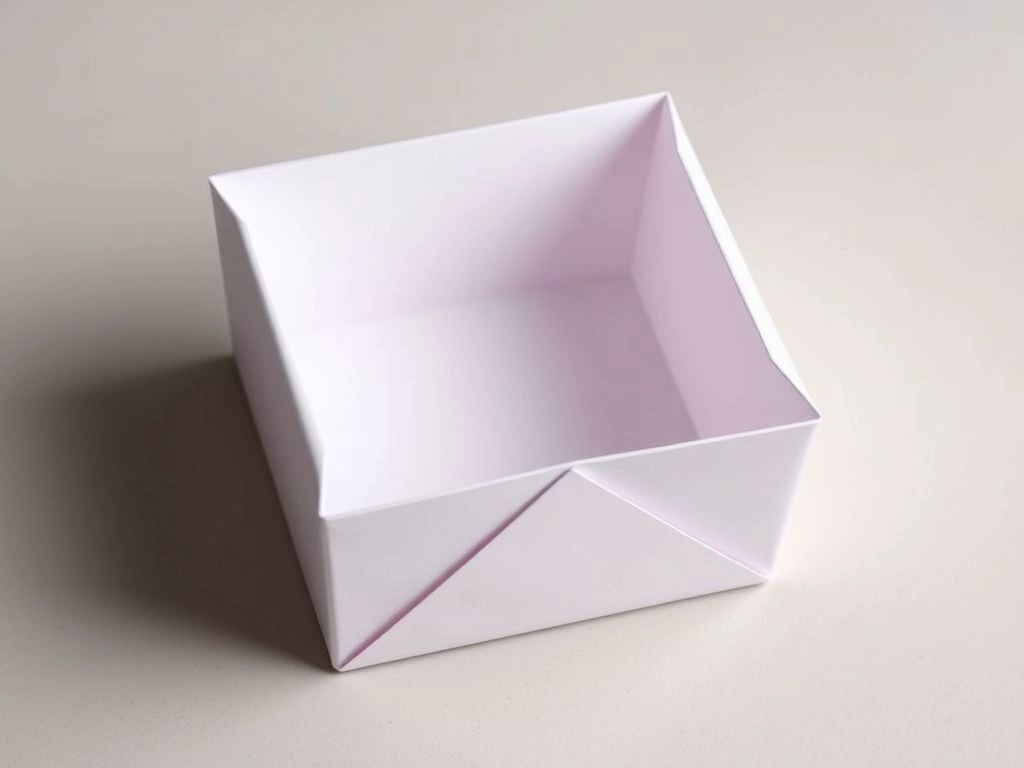
How to Fold an Easy Origami Gift Box: The 7-Step Method
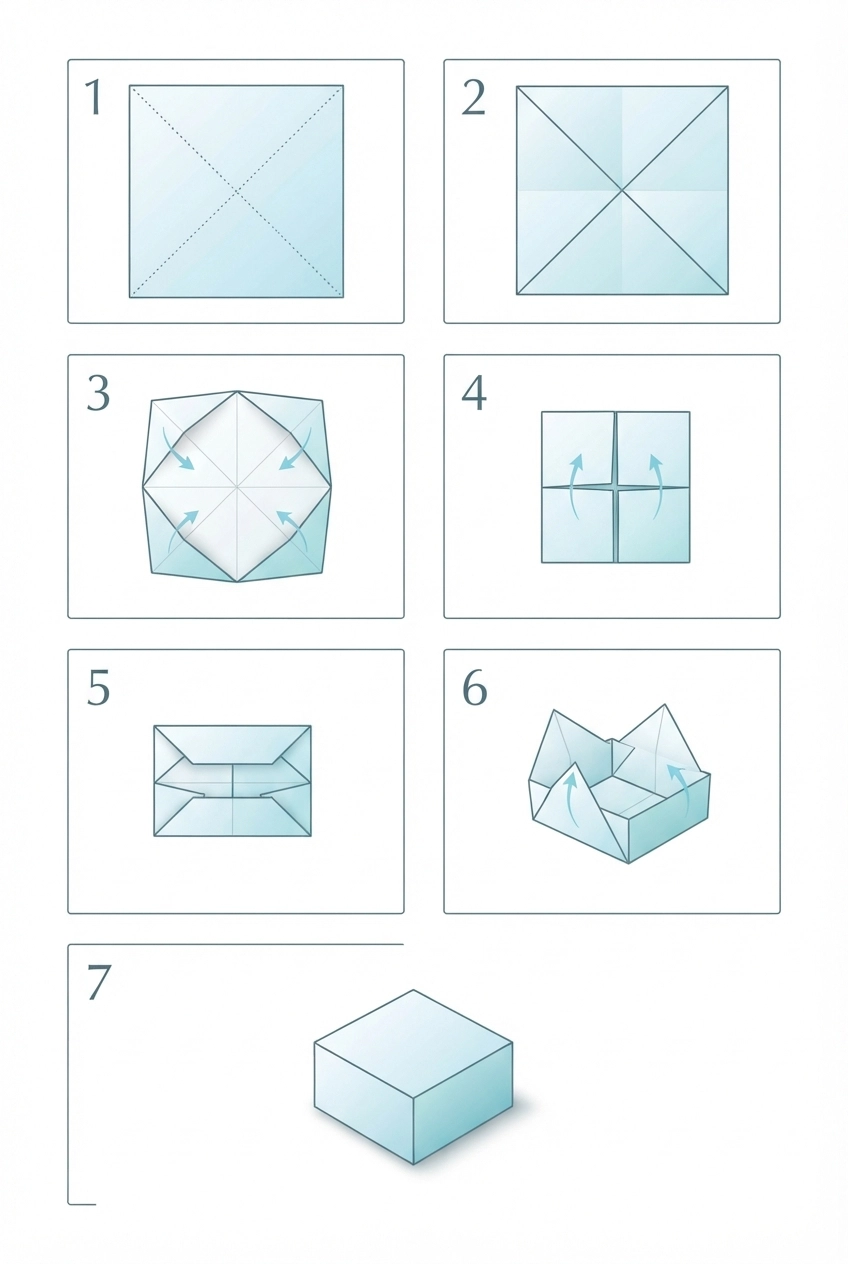
Alright — here’s the moment you’ve been waiting for. I’m going to walk you through every single fold, one at a time. Read each step completely before you fold, and don’t worry if your first attempt isn’t perfect. Origami is a skill, and like any skill, it improves with practice.
Step 1: Create Your Diagonal Creases
Start with your paper pretty side down (the side you want on the outside of your finished box should be facing the table). Fold the paper in half diagonally, bringing one corner to meet the opposite corner. Run your fingernail or bone folder along the crease to make it sharp. Unfold. Now do the same with the other diagonal — fold the remaining two corners together, crease firmly, and unfold.
You should now have an “X” of crease lines across your paper. This is your structural foundation. Every subsequent fold will reference these lines.
Common mistake alert: If your corners don’t meet precisely, your entire box will be slightly off. Take two extra seconds to align the tips perfectly. It matters.
Step 2: Fold All Corners to the Center
Now for the satisfying part. Take each corner of your square and fold it precisely to the center point — where your two diagonal creases intersect. Crease firmly. Do this for all four corners.
When you’re done, you’ll have a smaller square shape with four triangular flaps meeting in the middle. This is called a “blintz base” in origami terminology, and it’s the foundation for dozens of traditional designs.
Step 3: The Edge Folds
This step defines the height of your box walls. Take the top edge of your blintz base and fold it toward the center. The fold line should be about one-third of the way from the edge to the center point — you’re not folding all the way to the middle, just creating a crease that runs parallel to the edge.
Unfold. Now fold the bottom edge toward the center (same distance). Unfold. Then do the left and right edges. You’ll end up with a grid of crease lines that looks like a tic-tac-toe board overlaid on your blintz base.
Precision tip: All four edge folds should be the same distance from the center. If they’re uneven, your box walls will be different heights on different sides.
Step 4: Unfold and Prepare for the Lift
Here’s where it gets slightly counterintuitive. Unfold two opposite corner flaps (the ones you folded in Step 2) — let’s say the top and bottom ones. Leave the left and right flaps folded.
Now, using the crease lines from Step 3 as your guide, you’re going to lift the walls of the box. The left and right edges (which are still folded from Step 2) will start to rise up. This is the moment the box transforms from a flat piece of paper into a three-dimensional object.
Step 5: Form the First Two Walls
Lift the left wall of the box along the crease line you made in Step 3. As it comes up, the paper will naturally want to fold in a specific way — follow that instinct. The corner flaps will start to fold in on themselves, creating triangular reinforcements at the corners.
Do the same on the right side. You should now have a shape that looks like a rectangular tray with two walls standing and two walls still flat.
Step 6: Lock the Remaining Walls
Now for the top and bottom walls (the sides where you unfolded the corner flaps). Take the top flap that’s currently laying flat and fold it up and over the walls you just created. The tip of this flap will tuck into the inside corner of the box. Press firmly to lock it in place.
Repeat for the bottom flap. When both are tucked, your box should feel surprisingly sturdy. Give the interior corners a gentle squeeze to set all the creases.
Step 7: Finishing Touches
Run your thumb along all four interior edges to sharpen the creases. Check that all four walls are standing at the same height. If one wall looks lower than the others, gently tug on the corner flaps to even things out.
That’s it — you’ve just folded an easy origami gift box. If your box has a lid (which most masu boxes do, using a slightly larger piece of paper), fold a second one for the bottom using paper that’s about 1/4 inch (0.5cm) smaller on each side.
If you love the satisfaction of making things by hand, you’ll probably also enjoy our guide to making easy scented candles — they pair perfectly with these origami boxes as a complete handmade gift set.
Creative Variations to Personalize Your Paper Box
Once you’ve mastered the basic easy origami gift box, a whole world of creative possibilities opens up. Here are my favorite variations that I’ve developed through countless late-night crafting sessions.
The Double-Color Box
Use paper that’s a different color on each side (most origami paper is white on one side, colored on the other). When you follow the folding sequence, the contrast creates a beautiful two-tone effect — especially visible on the interior walls and corner flaps. For the most striking look, pair a bold exterior color (deep red, navy, emerald) with a crisp white interior.
Pattern Play
Patterned origami paper — florals, geometric prints, holiday themes — adds instant personality. One thing I’ve noticed: busy patterns look better on larger boxes where the design has room to breathe. On tiny 4-inch boxes, simpler patterns (stripes, polka dots) read better at a glance.
The Window Box
Want to get fancy? Cut a small square or circle from the center of your paper before you start folding. As you fold the box, this cutout becomes a “window” that reveals the gift inside. Use parchment paper or clear acetate behind the window for a polished look. This variation takes practice, so try it on scrap paper first.
Hand-Decorated Boxes
Don’t limit yourself to pre-printed paper. Grab some plain kraft paper or white cardstock and decorate it yourself. Rubber stamps, watercolor washes, metallic paint pens, and washi tape all work beautifully. I’ve even used old maps, sheet music, and pages from damaged books to create boxes with unique character.
The Mini Box Set
Fold three or four boxes in graduating sizes and nest them inside each other. This creates an incredible unboxing experience — your recipient opens box after box before reaching the final gift. It’s dramatic, memorable, and surprisingly easy once you’ve got the basic fold down.
5 Common Mistakes Beginners Make (and Exactly How to Fix Them)
Look, I’ve taught origami to over 200 people in workshops and one-on-one sessions. These five mistakes come up every single time. Here’s what they are and how to avoid them.
1. Rushing the First Crease
The problem: Your initial diagonal crease is off by a few millimeters, and every subsequent fold amplifies the error until your box looks drunk.
The fix: Slow down. Align corner-to-corner with obsessive precision. Hold the paper up to a light source if you need to — you should see the corners perfectly overlap before you crease. This one habit will eliminate 80% of beginner frustration.
2. Creasing Too Lightly
The problem: Your folds are visible but not sharp. The paper wants to spring back open, and your box walls collapse inward.
The fix: After every single fold, run your thumbnail along the crease with firm, even pressure. Do it twice — once in each direction. A bone folder makes this effortless, but your thumbnail works perfectly well.
3. Using the Wrong Paper Size for Your Gift
The problem: You fold a beautiful box, and your gift doesn’t fit.
The fix: Refer back to the sizing table in the materials section. As a rule of thumb, measure your gift and multiply by 2.7 to get the paper size you need. For example, a 2-inch gift needs roughly a 5.5-inch paper square.
4. Forgetting to Check Paper Orientation
The problem: You fold the entire box only to realize the pretty side ended up on the inside.
The fix: In Step 1, place your paper with the pretty side facing down. The folds in Steps 1-3 will expose the underside, but by the time the box takes shape, the pretty side will be facing outward. Double-check before you make that first crease.
5. Giving Up After the First Attempt
The problem: Your first box looks like a wadded-up napkin and you decide origami “isn’t for you.”
The fix: Everyone’s first attempt is rough. My first three boxes were genuinely embarrassing. By box number five, I had the rhythm down. By box number ten, I could do it without looking at instructions. Origami rewards repetition — your hands learn the movements faster than your brain does.
Speaking of troubleshooting, if you’re interested in other craft projects that might test your patience, check out our guide on DIY macrame wall hanging — it’s another skill that clicks after a few practice sessions.
10 Creative Ways to Use Your Finished Origami Boxes
So you’ve mastered the fold. You’ve got a stack of beautiful easy origami gift boxes sitting on your desk. Now what? Here are ten ideas beyond basic gift-giving.
- Wedding or Party Favors: Fill small boxes with Jordan almonds, mints, or personalized notes for each guest. At my friend’s wedding, we folded 80 boxes in an assembly line — it took three people about two hours, and guests still mention them years later.
- Jewelry Organizer: Line a shallow drawer with origami boxes to separate rings, earrings, and bracelets. The boxes nest together perfectly and keep everything from tangling.
- Advent Calendar Components: Fold 24 small boxes, number them, and fill each with a tiny treat or message. String them on a garland or arrange them in a shadow box frame.
- Desk Organizer: Paper clips, push pins, USB drives, and other small office supplies find a tidy home in sturdy cardstock boxes.
- Plant Pot Covers: Place small nursery pots inside waterproofed origami boxes (spray with clear acrylic sealant) for an instant decorative planter.
- Gift Card Presentation: Gift cards feel impersonal when handed over bare. A small origami box elevates the experience and shows you put thought into the presentation.
- Tea Bag Storage: Keep individually wrapped tea bags organized and displayed beautifully on your kitchen counter.
- Proposal Box: This one’s special. Fold a box in your partner’s favorite color and place a ring, key, or handwritten proposal inside. I know two people who’ve done this — both said yes.
- Sample Packaging for Makers: If you sell handmade crafts, origami boxes make beautiful, eco-friendly packaging for small items like earrings, pins, or soaps.
- Memory Box: Use a large (12-inch paper) box to store ticket stubs, photos, and small mementos. Decorate the exterior with the date or occasion.
Pro Tips for Perfect Origami Boxes Every Time
After folding literally thousands of these boxes, I’ve gathered some insights that go beyond the basic tutorial. These are the techniques that separate “pretty good” from “wow, you made this?”
The Two-Paper Lid Trick
For a box with a lid that fits perfectly, use paper that’s exactly 0.5cm (1/4 inch) smaller on each side for the bottom piece. So if your lid uses 15x15cm paper, cut your bottom piece to 14.5×14.5cm. This creates just enough clearance for the lid to slide on smoothly without being loose.
Pre-Crease for Crisp Edges
Before making any fold, run your fingernail lightly along the line you’re about to crease. This “scores” the paper fibers slightly and results in a sharper, cleaner fold line — especially helpful with thicker papers like cardstock.
The Humidity Factor
This sounds obsessive, but it matters: paper absorbs moisture from the air. On humid days, your paper will be slightly softer and harder to crease precisely. On very dry days, it might crack if you fold too aggressively. The ideal room humidity for origami is around 40-50%. If you’re struggling, try working near a dehumidifier or in an air-conditioned room.
Iron Your Paper
If your paper has been rolled, folded, or stored in a pack that’s slightly warped, iron it on the lowest setting (no steam) between two pieces of plain paper. Flat paper folds infinitely better than paper with existing bends.
Batch Fold for Efficiency
Need multiple boxes? Do Step 1 on all your papers first. Then Step 2 on all papers. Then Step 3. This assembly-line approach is dramatically faster than completing one box at a time. Your muscle memory kicks in and you’ll get into a rhythm that makes the process almost meditative.
Frequently Asked Questions
What is the easiest origami gift box for absolute beginners?
The masu box (the design in this tutorial) is widely considered the easiest origami gift box for beginners. It uses only basic valley folds, requires no cutting or gluing, and produces a functional, attractive box in under three minutes once you’ve practiced a few times. Unlike more complex designs like the modular origami cube or the twisted rose box, the masu box has only about 12-15 total folds and a very forgiving structure that still works even if your creases aren’t perfect.
Can I use regular printer paper to make an origami gift box?
Absolutely. Standard 20lb printer paper works well for practice and produces a usable box. For best results, use 24lb or 28lb paper — it’s slightly thicker and creates a sturdier finished product. The only downside of printer paper is that white crease lines may be visible on colored sheets. To minimize this, fold gently and avoid over-creasing areas that won’t be structural.
How do I make a lid for my origami box?
To make a lid, simply fold a second box using paper that’s approximately 0.5cm (1/4 inch) larger on each side than your bottom piece. For example, if your bottom box uses 15x15cm paper, use 15.5×15.5cm for the lid. Follow the exact same folding sequence. The lid will be slightly wider and shallower, allowing it to sit neatly on top of the base. For a deeper lid that covers more of the base, use paper that’s only 0.2cm larger.
My origami box keeps popping open. How do I fix this?
Boxes that pop open usually have one of two problems: either the corner flaps weren’t tucked in firmly enough during Step 6, or the creases in Steps 1-3 weren’t sharp enough to hold the structure. Go back and re-crease every fold with firm thumbnail pressure. Pay special attention to the diagonal creases from Step 1 — those are your box’s main structural supports. If the problem persists, try using slightly heavier paper (cardstock instead of origami paper) which holds its shape better.
What size paper should I use for a specific gift size?
A good rule of thumb: multiply your gift’s longest dimension by 2.7 to get the minimum paper size needed. For example, a round tin that’s 2 inches in diameter needs at least a 5.4-inch paper square — so use 6×6 inch paper to be safe. The finished box interior will be approximately 37% of the original paper size in both length and width, and about 18% of the original size in depth. When in doubt, go one size larger than you think you need.
Can children make an easy origami gift box?
Yes, with some caveats. Children aged 7 and up can typically follow this tutorial with adult guidance. The key challenge for younger kids is making precise corner-to-corner folds — they tend to rush this step. I recommend having them practice Step 1 several times on scrap paper before starting the actual box. For kids under 7, consider folding the box yourself and letting them decorate it with stickers, markers, or washi tape. The motor control required for sharp creases develops around age 7-8 for most children.
How long does it take to get really good at this?
Most people can fold a passable box on their second or third attempt. Fluency — the ability to fold without instructions — typically comes after 5-7 boxes. Speed (under 2 minutes per box) comes after about 20 boxes. The key variable is how much attention you pay to precision in your early attempts. Rushing through your first few boxes actually slows down your skill development because you’re practicing sloppy technique. Take your time on the first five, and speed will come naturally.
What’s the most durable paper for origami gift boxes that need to last?
For maximum durability, use 65lb-80lb cardstock. The thicker paper is harder to fold but produces boxes that can hold heavier items (up to 8-10 ounces for a 12-inch box) and maintain their shape for months or even years. If you want a middle ground between origami paper and cardstock, try 32lb printer paper or scrapbook paper (which is typically 65lb). Avoid anything over 100lb — at that thickness, the paper becomes too stiff to fold cleanly without cracking.
Ready to Start Folding?
Here’s the truth: your first easy origami gift box might not be perfect. It might have one wall slightly shorter than the others, a corner that won’t quite stay tucked, or a crease that wandered off course. That’s completely normal. Every single person who’s ever folded origami started exactly where you are right now.
What matters is that you’re about to create something with your own two hands — something personal, sustainable, and genuinely thoughtful. In a world of mass-produced everything, that matters more than you might think.
So grab a piece of paper. Any paper. Fold that first diagonal. Make that first crease. Before you know it, you’ll have a stack of beautiful boxes and a skill you can pull out any time you need a last-minute gift, a party favor, or just a quiet moment of creative focus.
And when you’re ready for your next project? Check out our easy resin jewelry tutorial — the earrings and pendants you make will fit perfectly inside your new origami boxes. Or if you’re thinking about turning this hobby into something more, read our guide to the most profitable craft niches in 2026 to see where your skills could take you.
Happy folding! 🎁